 Being a splitter of cedar by trade, Colin naturally decided to split all his own shakes for the roof of his new workshop by hand. Having many piles of cedar already collected and in need of being moved out of his old working location gave Colin a good start at the job of splitting approximately 600 square feet of coverage, or what he estimated to be 6 squares of shakes. A square is made up of 4 bundles of shakes covering 100 square feet (each bundle covers approx. 25sq.ft. depending on length of shake and row coverage). Using a froe and mallet, Colin split and shaped the shakes out of 18″ bolts of cedar, using the best of the shakes for the roof and saving the less than ideal (wavy, thin, less tapered, or too narrow) for a future wall project.
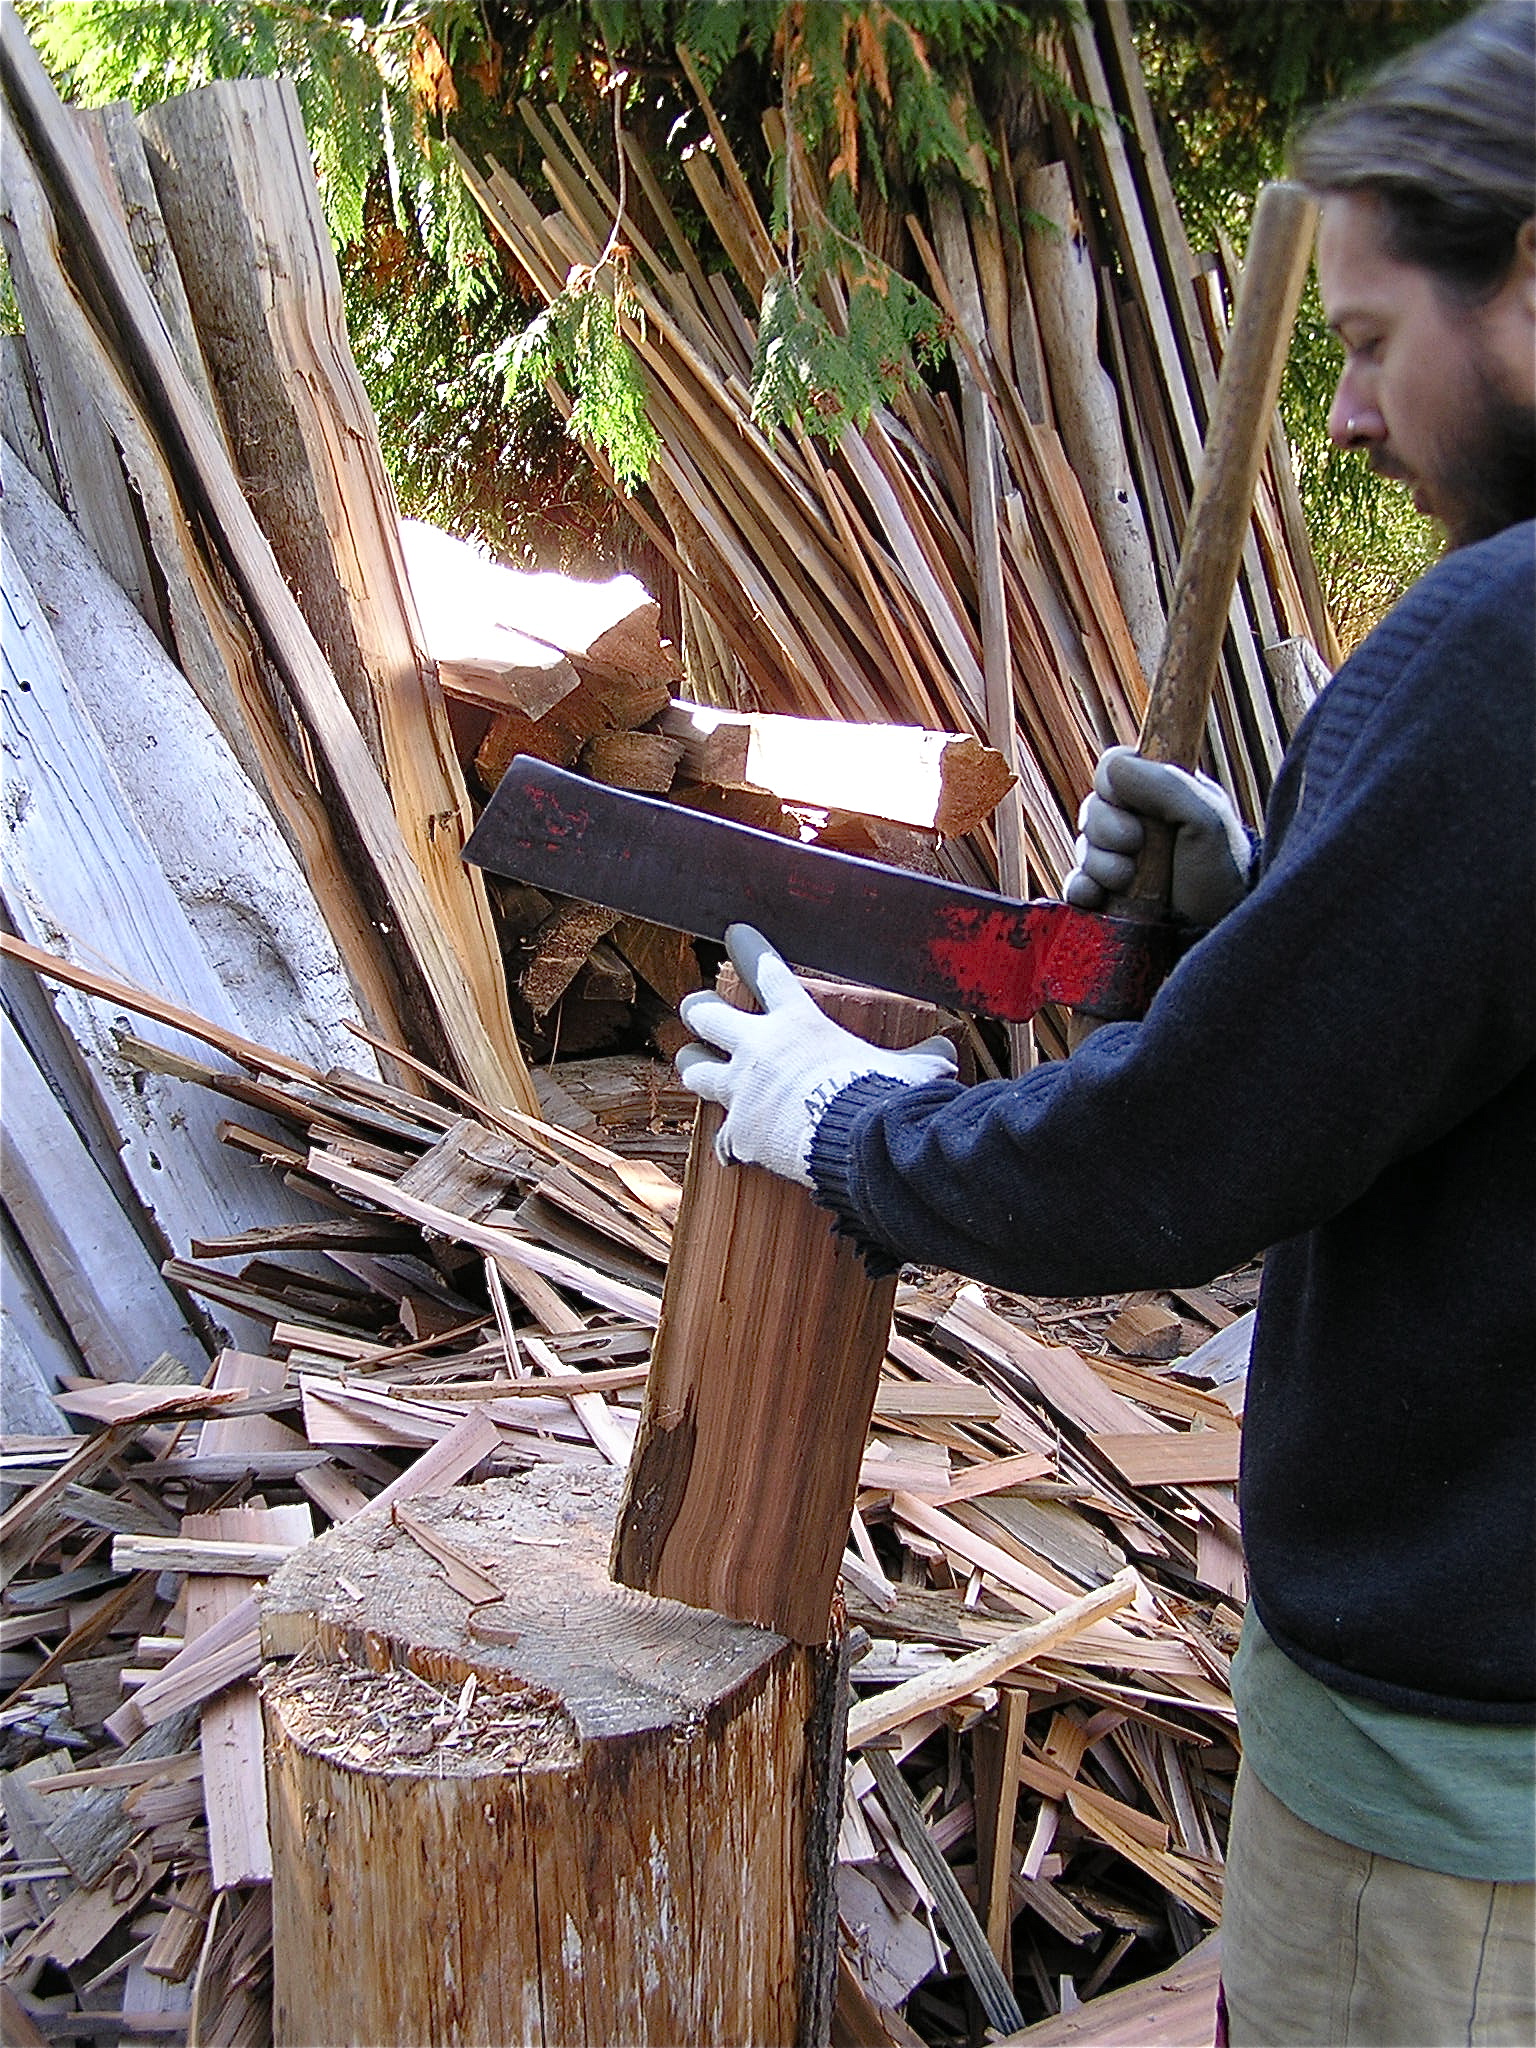
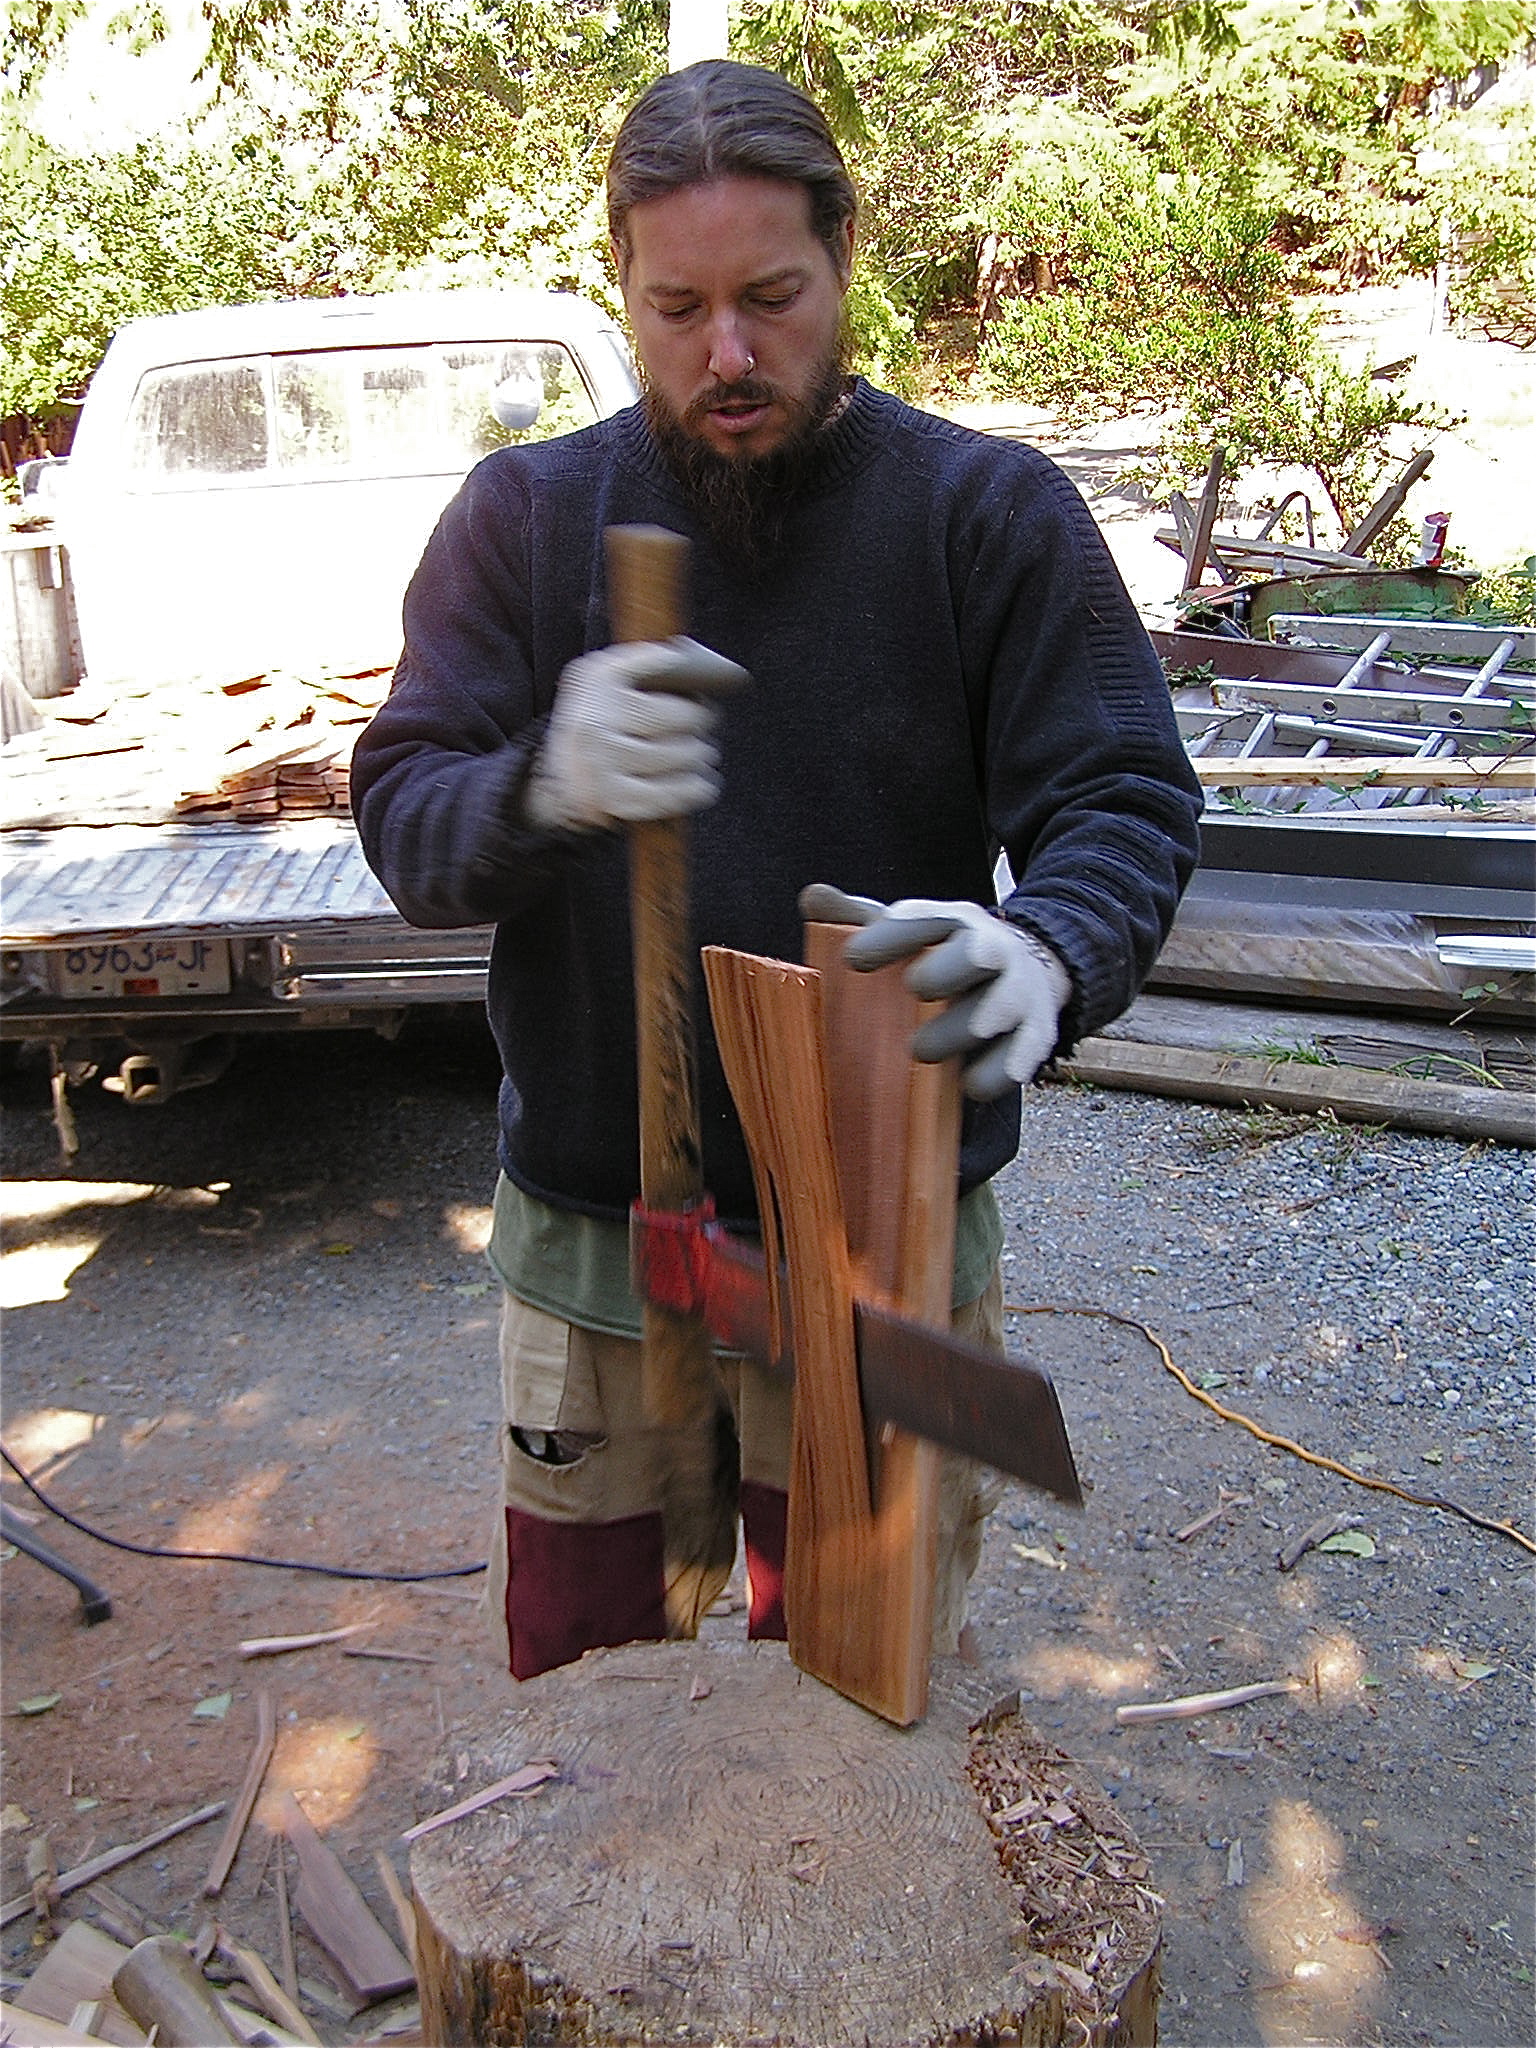
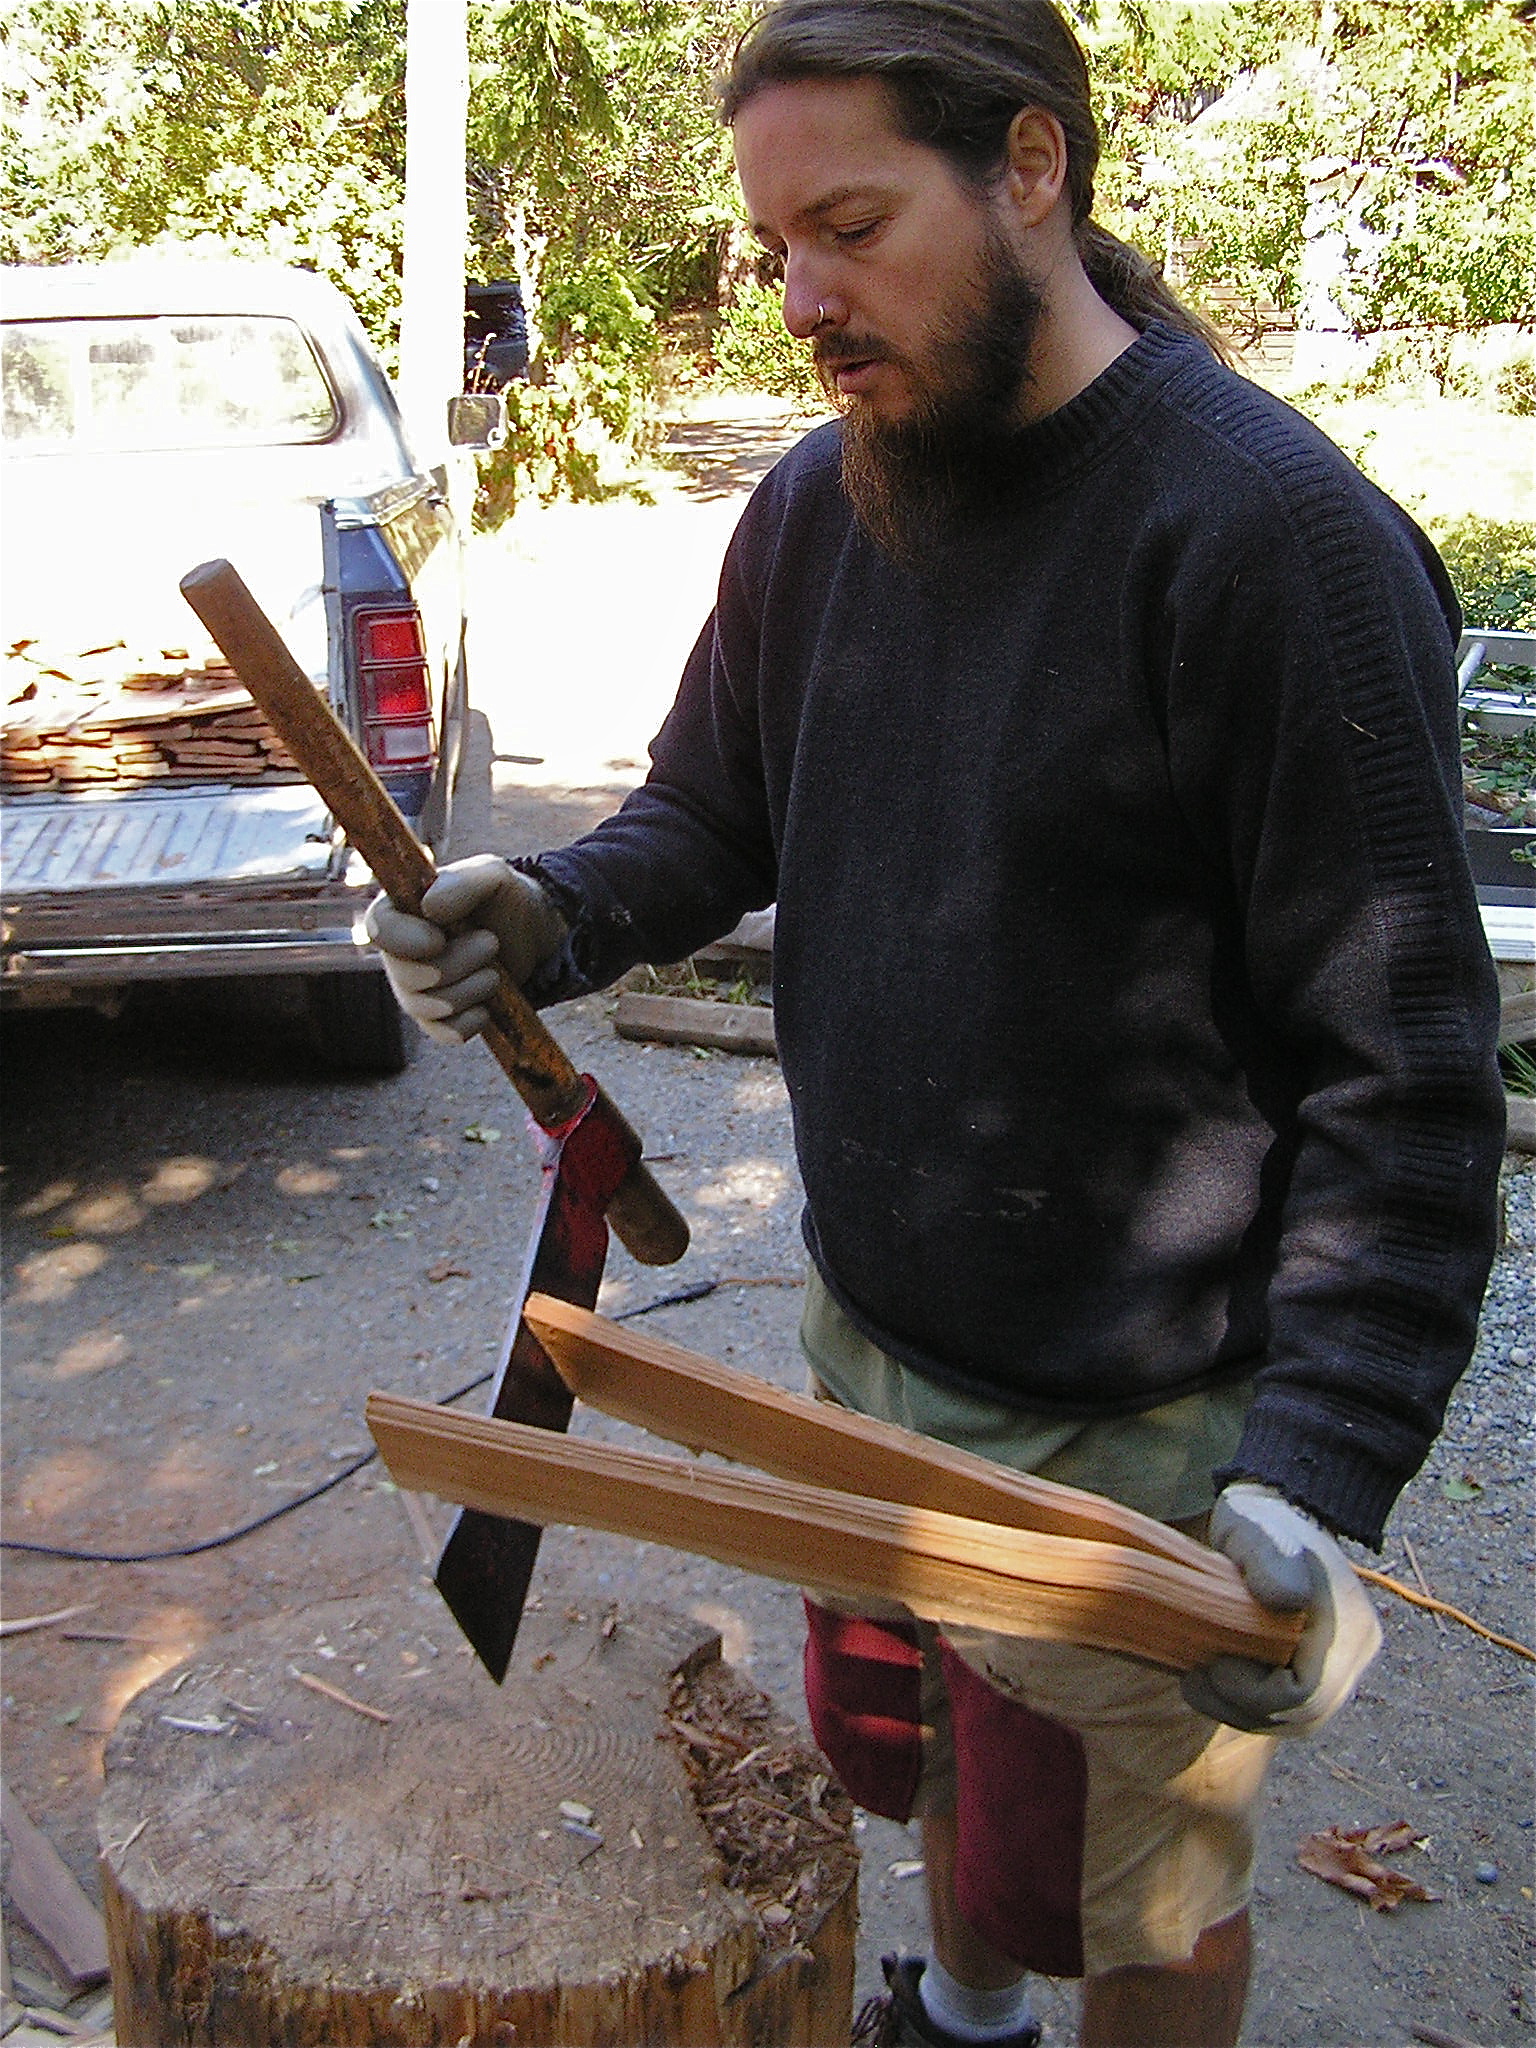 Shakes are split by placing the froe across the grain on one end of the bolt, about 3/4″ from the edge, then hitting the froe with the mallet and peeling off the shake. It should taper somewhat (shakes can be 24″ or 18″ long, usually the longer the better for coverage and tapering) and then you flip the bolt over and repeat the same action, flipping the bolt after splitting each shake.
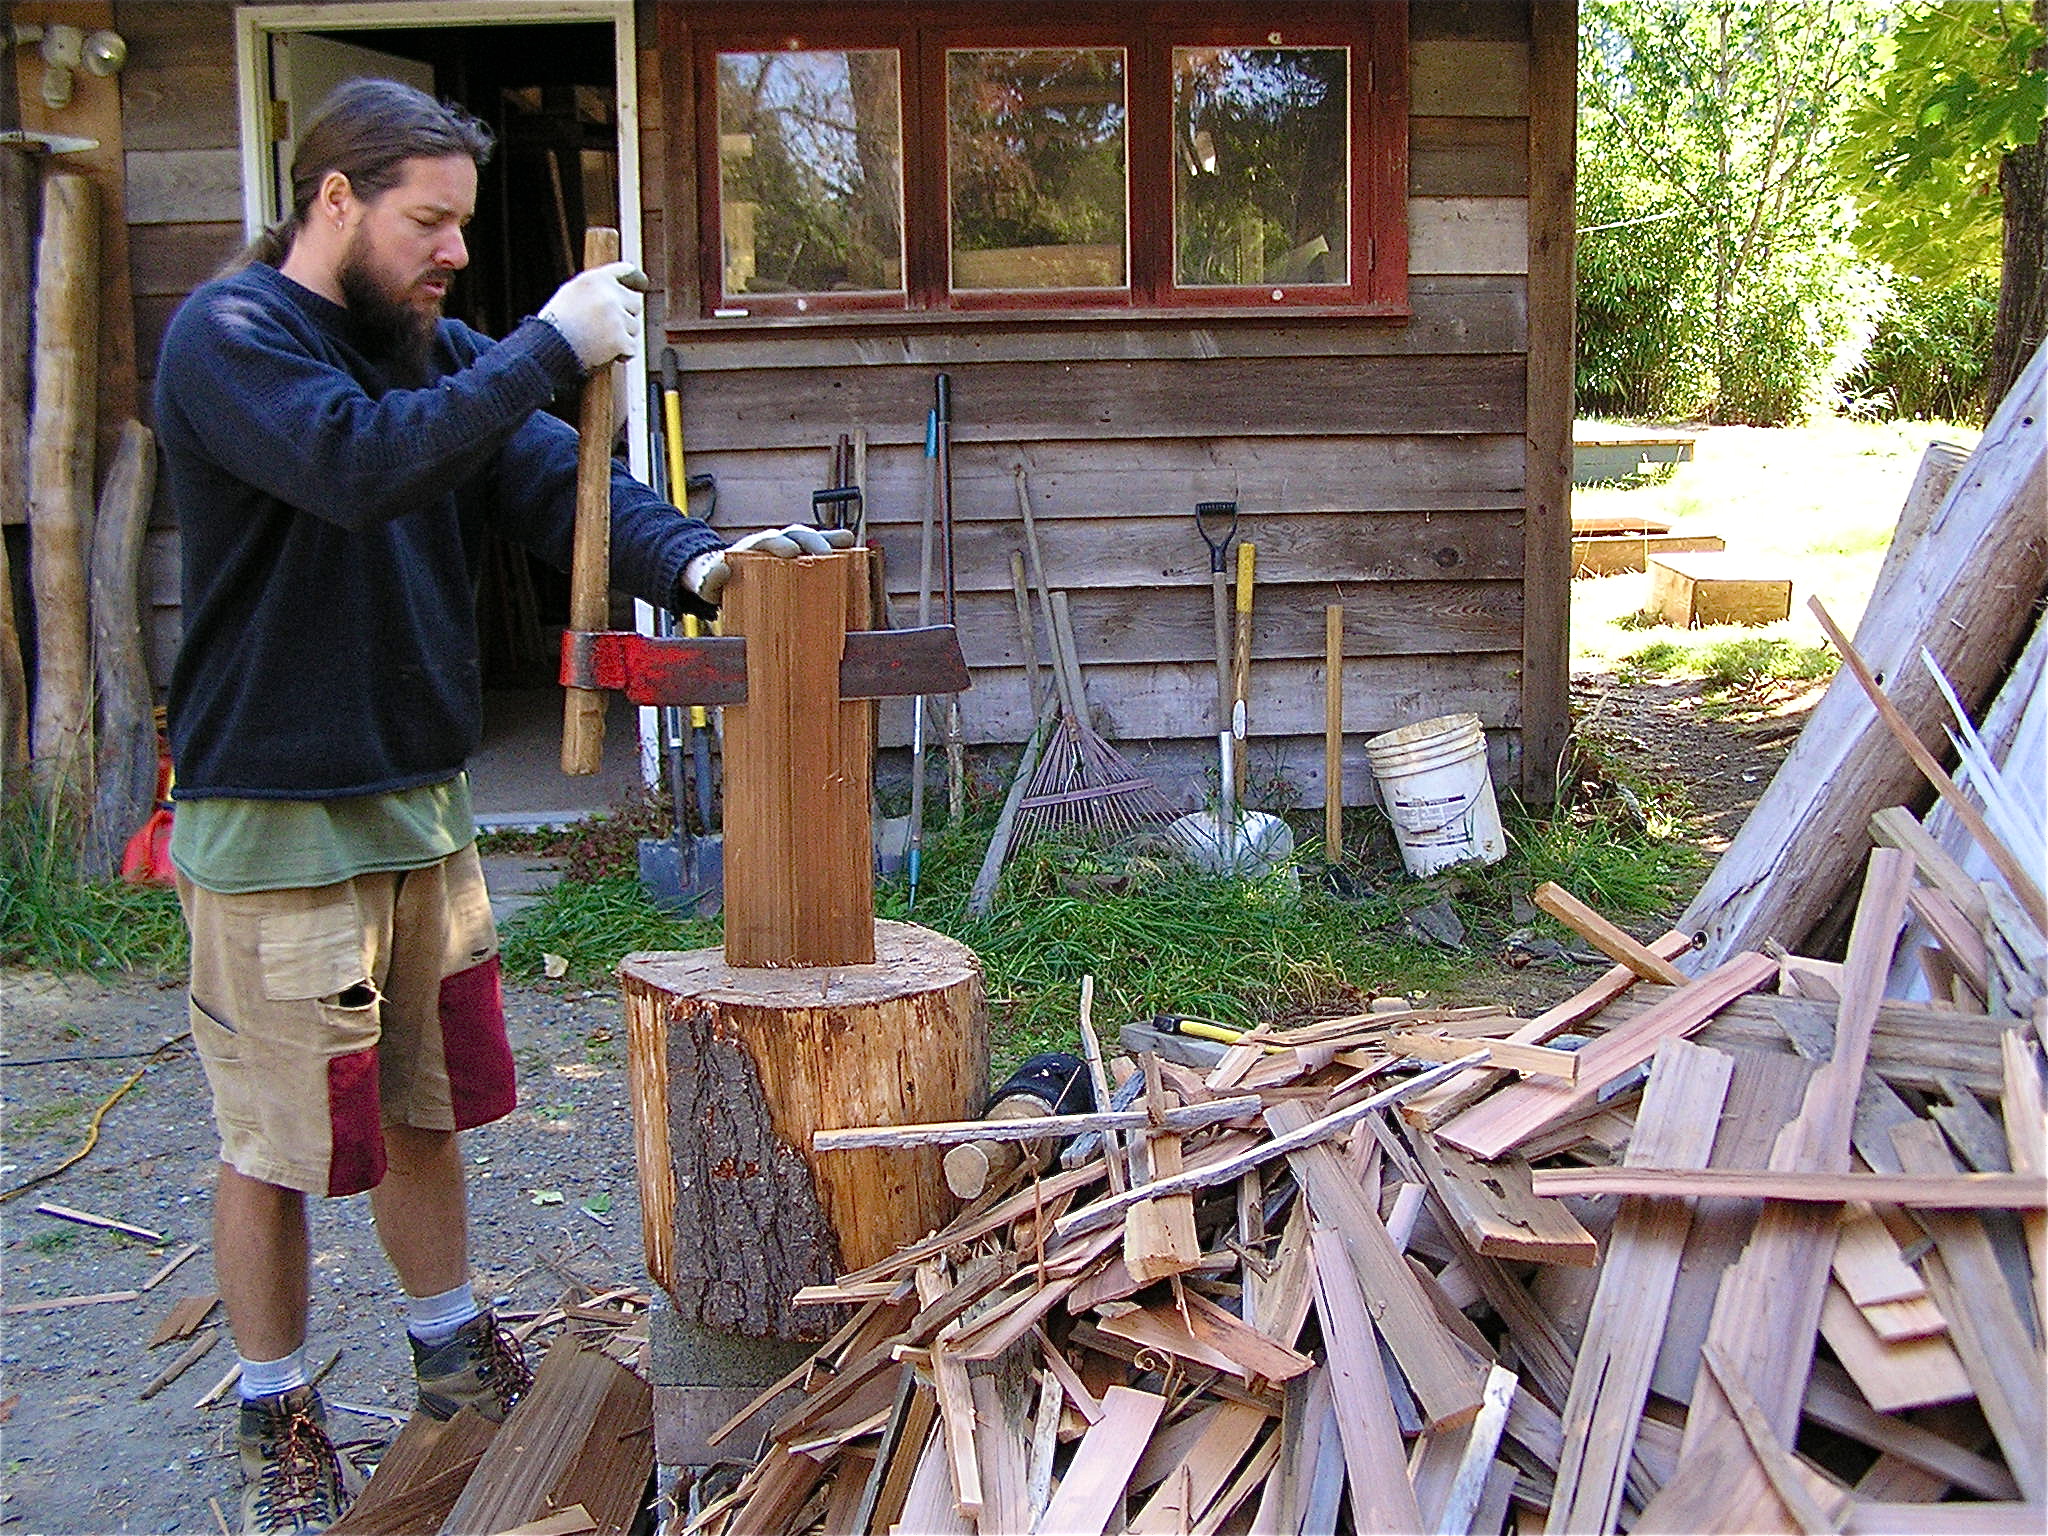
 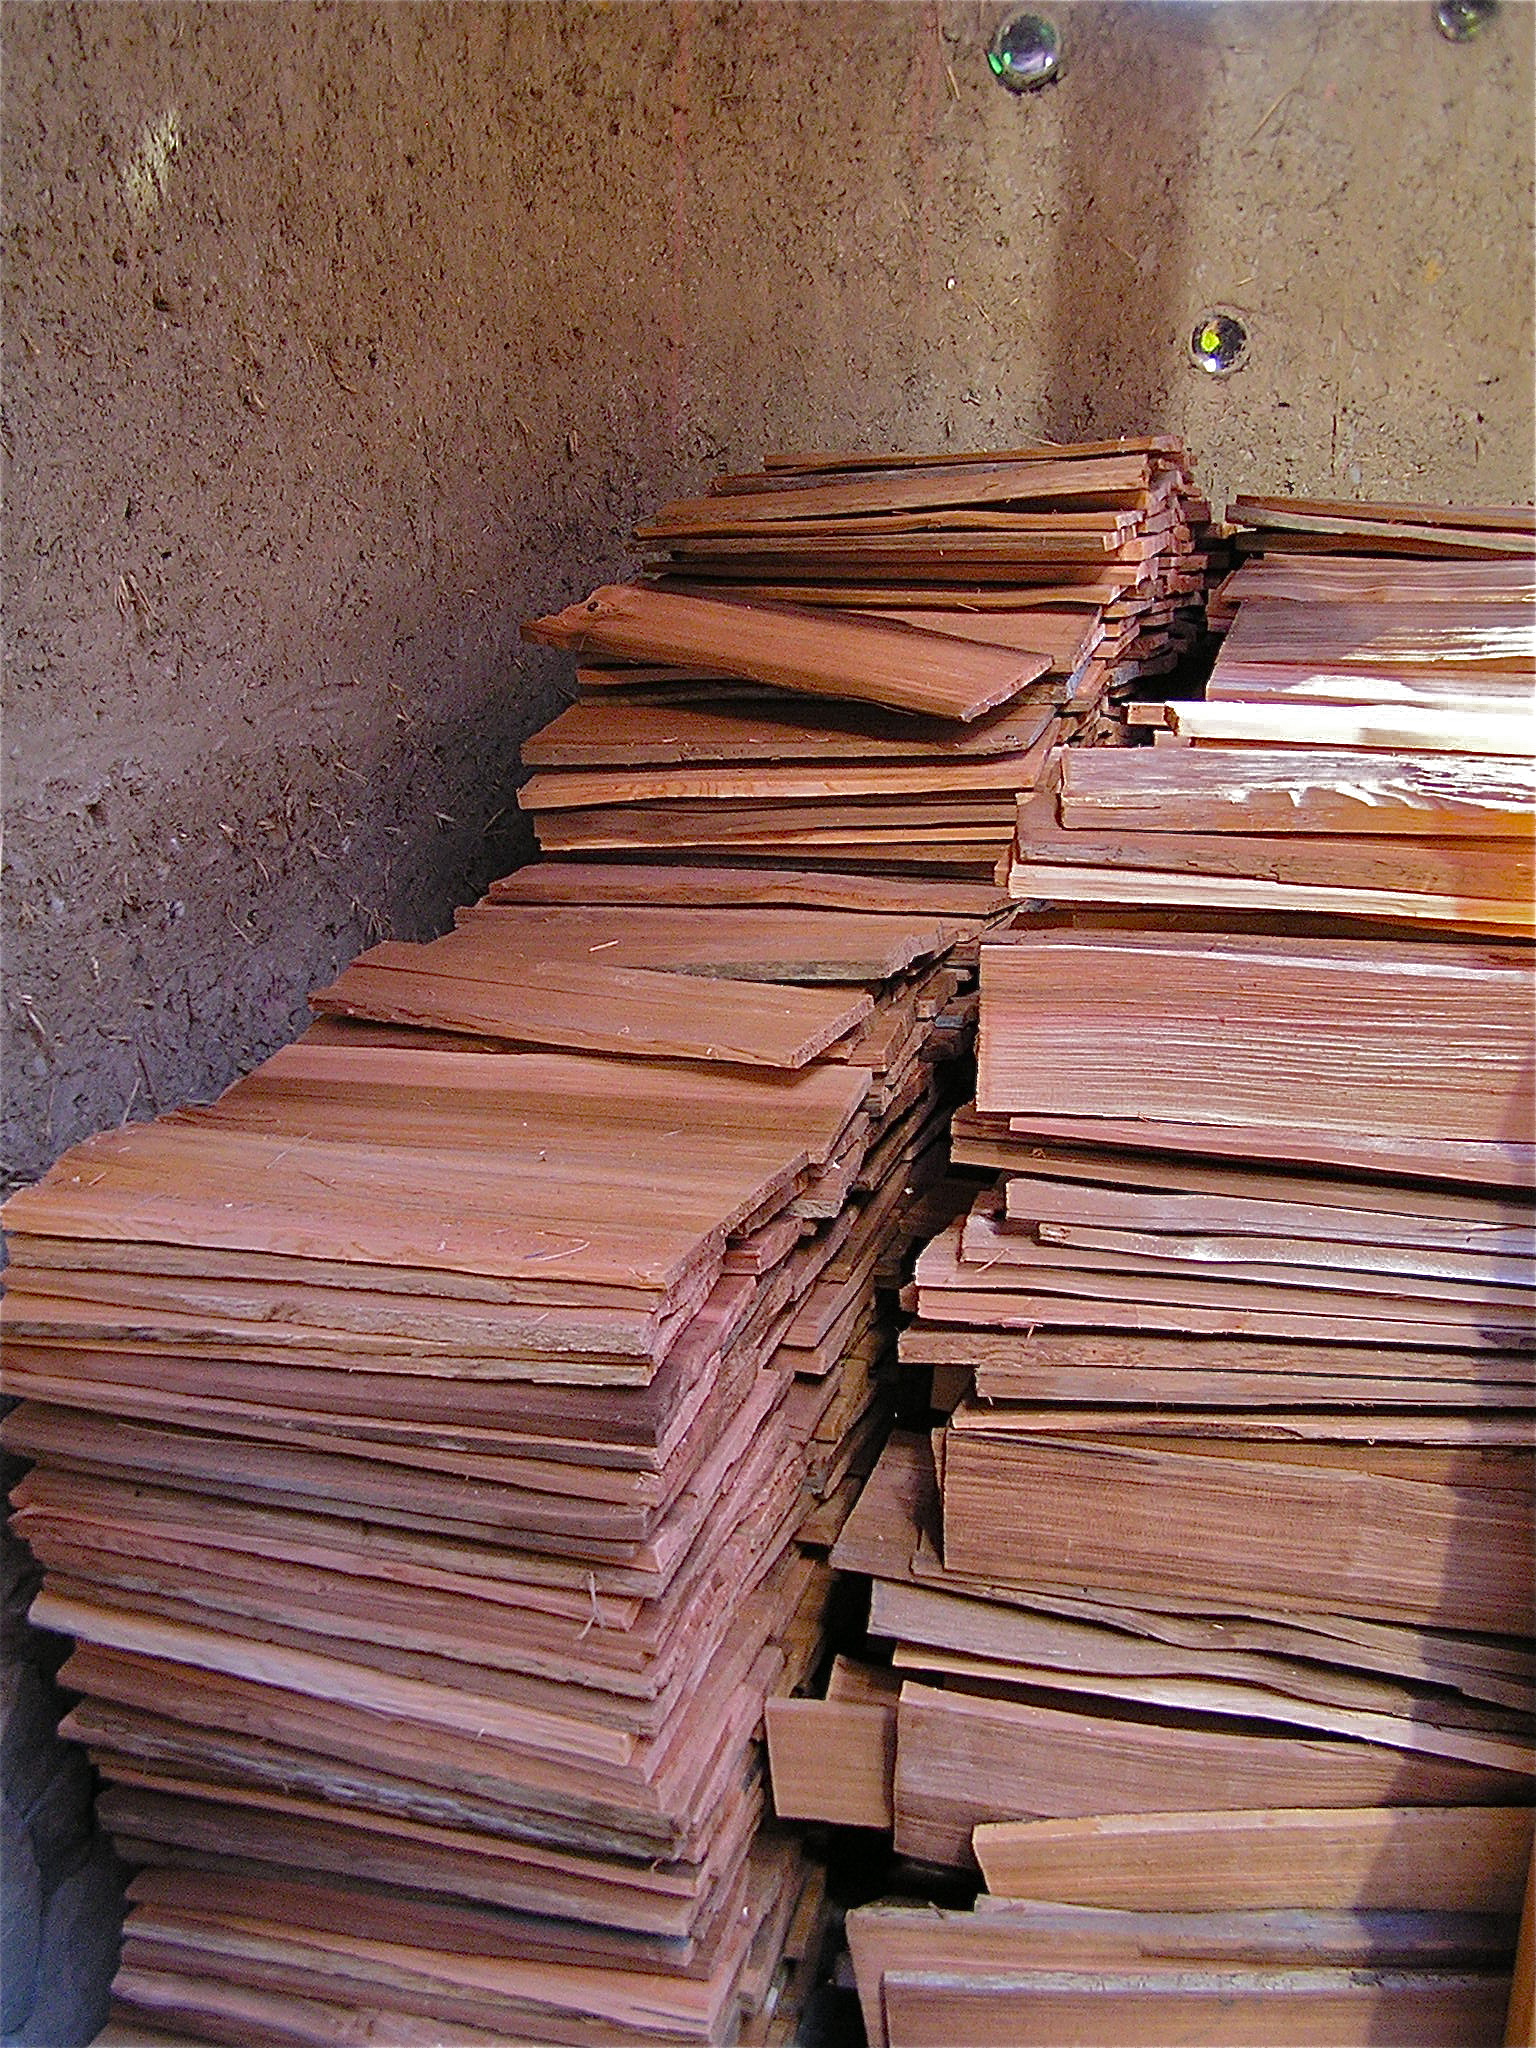 It took a surprisingly long time to split the estimated amount needed, mostly because of the amount of less than perfect shakes that he was getting from the bolts he was using (of which much was old grapestakes, and other pieces of cedar that were not as usable in longer lengths anymore, as the cedar he salvages is not collected for shakes, but in longer bolts usable for furniture, gates and fencing). Colin chose 18″ shakes partly because of the wood he had available and partly because of the curves and roundness of the roof on his shop.
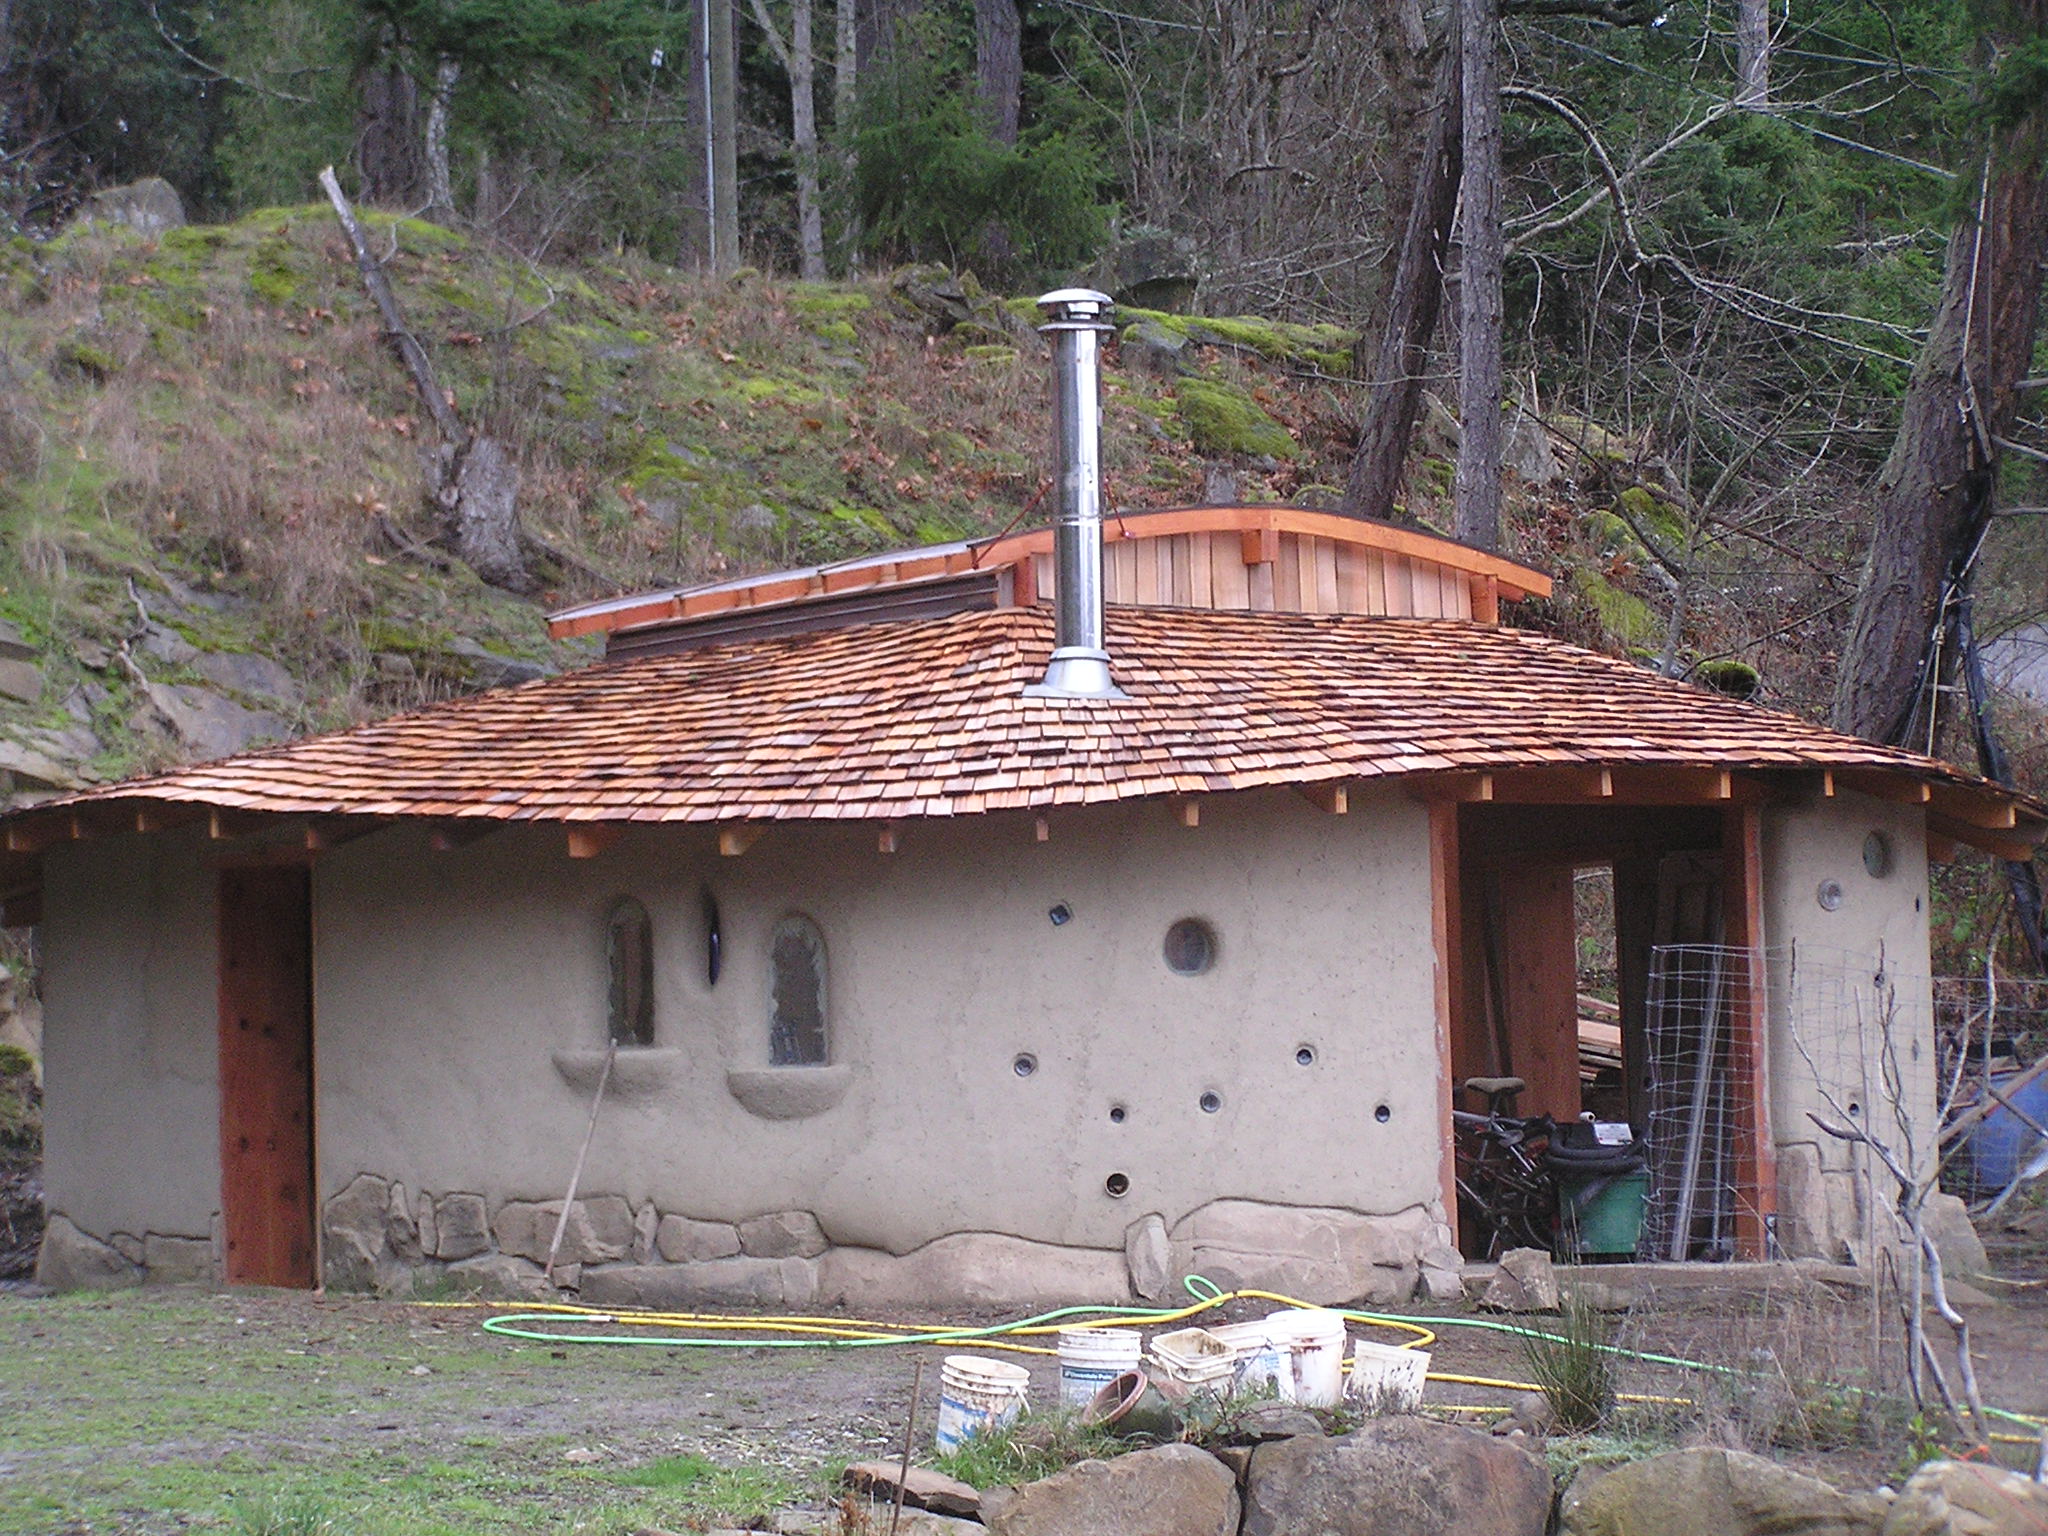
  He layered the shakes with an overlap of 7.5″ each row. As the rows are applied it is important to offset the gaps between shakes from row to row. What this means essentially is that the space between shakes never lines up directly with the gap in the row below, and better yet not for 3 rows. The straight grains of cedar and the overlapping shakes encourages efficient water run-off, while the gaps allow for evaporation and quick drying time. Cedar shake roofs have a life span of 50 years (though some have been known to last upwards of 80yrs).
  Cedar shingles differ from shakes in that they are taper sawn, thinner, and usually are rated only for 25yrs. Cedar has excellent natural oils present in it’s wood that makes it rot resistant in it’s naturally wet climate. Much of the northern pacific coastline, rimmed and abundant in fat old growth logs, offers ideal shake block opportunities with wide planks and tight grains. Most shakes are collected from downed red cedars near logging clear cuts or trees not long enough to be worth milling into lumber.
  Here we have salvaged what we can find on the beaches and then applied the best of our skills to producing by hand the beautiful and functional flow of cedar shakes.
At the very end of the project Colin ran out of suitable cedar to split for final part of the roof, and not wanting to waste anymore time as it was the middle of winter, we gave in and purchased the last few bundles of shakes needed to complete the roof. Although a bit of a disappointment for Colin, this is the reality of building yourself, sometimes you just need to compromise and get it done!


Feb 21, 2013 @ 21:13:53
My goodness, it’s looking so beautiful! We’ll have to get over there again this spring or summer and check it out in person!
Feb 22, 2013 @ 21:10:12
Thanks Gen! Colin is back to other work soon so we are trying to get done what we can…doors on and then more plastering in the spring. He has lots of work coming up, thank goodness. Hope things are coming together for you guys, and you aren’t having to deal with too many ridiculous code requirements…
Dec 09, 2013 @ 03:56:57
Awesome work Colin! I have done cedar roofing in my home too. But I didn’t do it myself. After all I am not an expert like you in this! I got it done from a professional roofing contractor in Oakville, Ontario. They have done it with Tapersawn cedar shakes and it looks so great.
Jul 28, 2014 @ 00:46:30
HI you guys. I am doing some research on the idea of re-roofing my house on Hudson Island (just outside the mouth of Telegraph Harbour on Thetis Island). My current roof is about 3o years old and the north side (away from the sun) is in pretty dire need of replacement. Your postings caught my eye. I was wondering how possible it might be to make contact with Colin to pick his brain about the procedure. My name is NIck, please feel free to contact me. Thanks!! Great pics and posts!
Sep 11, 2019 @ 23:56:01
man… i couldn’t agree more… ::tsk tsk::
Hi! This is my 1st visit to your blog! We’re a team of volunteers starting a new initiative in a community of the same niche.
Your blog provides some helpful info… cheers.
Sep 17, 2019 @ 02:50:46
Great to hear that what were posting is helpful, its all a big learning experience for sure! We are half way through the second half of the house now, havent been posting as much, as its a similar strawbale construction with living roofs. If you are ever on or near Pender Island give us a call… Colin and Wendi
Nov 07, 2019 @ 14:51:11
Quality articles is the secret to invite the
people to go to see the web site, that’s what this web
site is providing.