Building The Bathroom

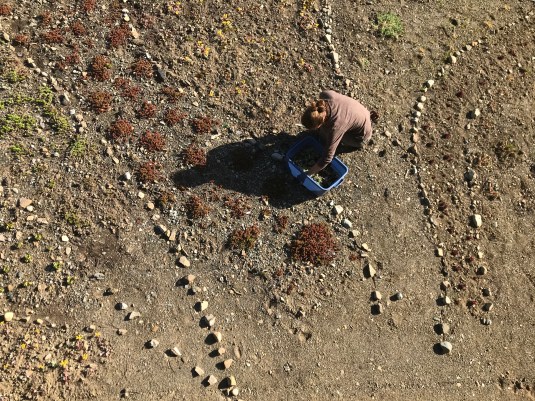
After finishing the bedrooms, we directed our attention next on the bathroom. We had a corner tub already, which we found for sale on the side of the road a few years previous for $200. The tub had been sitting in the forest and consequetly needed a good cleaning before we wrestled it up the stairs and into the space. Because of this affordable find, we had to redesign the bathroom somewhat since we had originally assumed we would have a regular rectangular tub. In fact, having this larger corner tub really simplified the arrangement of the space and probably saved us a bunch of time.

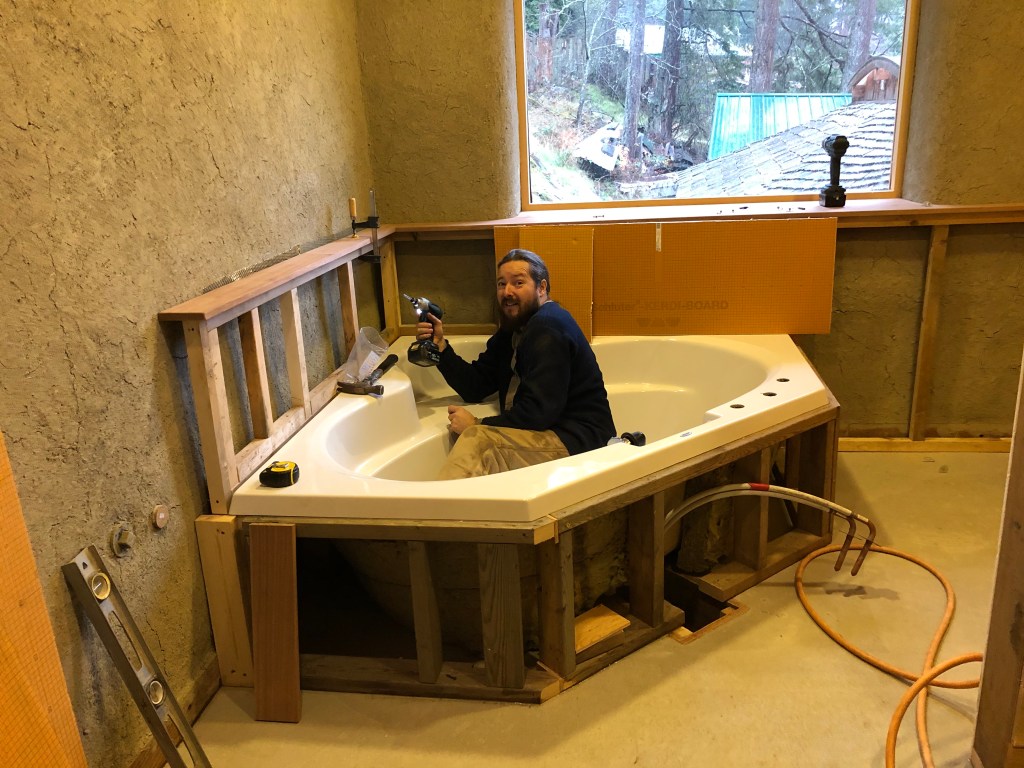
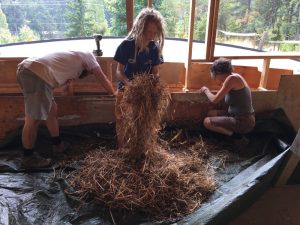
Building the frame for the corner tub. We also packed insulation around the underside so the water stays hot longer!

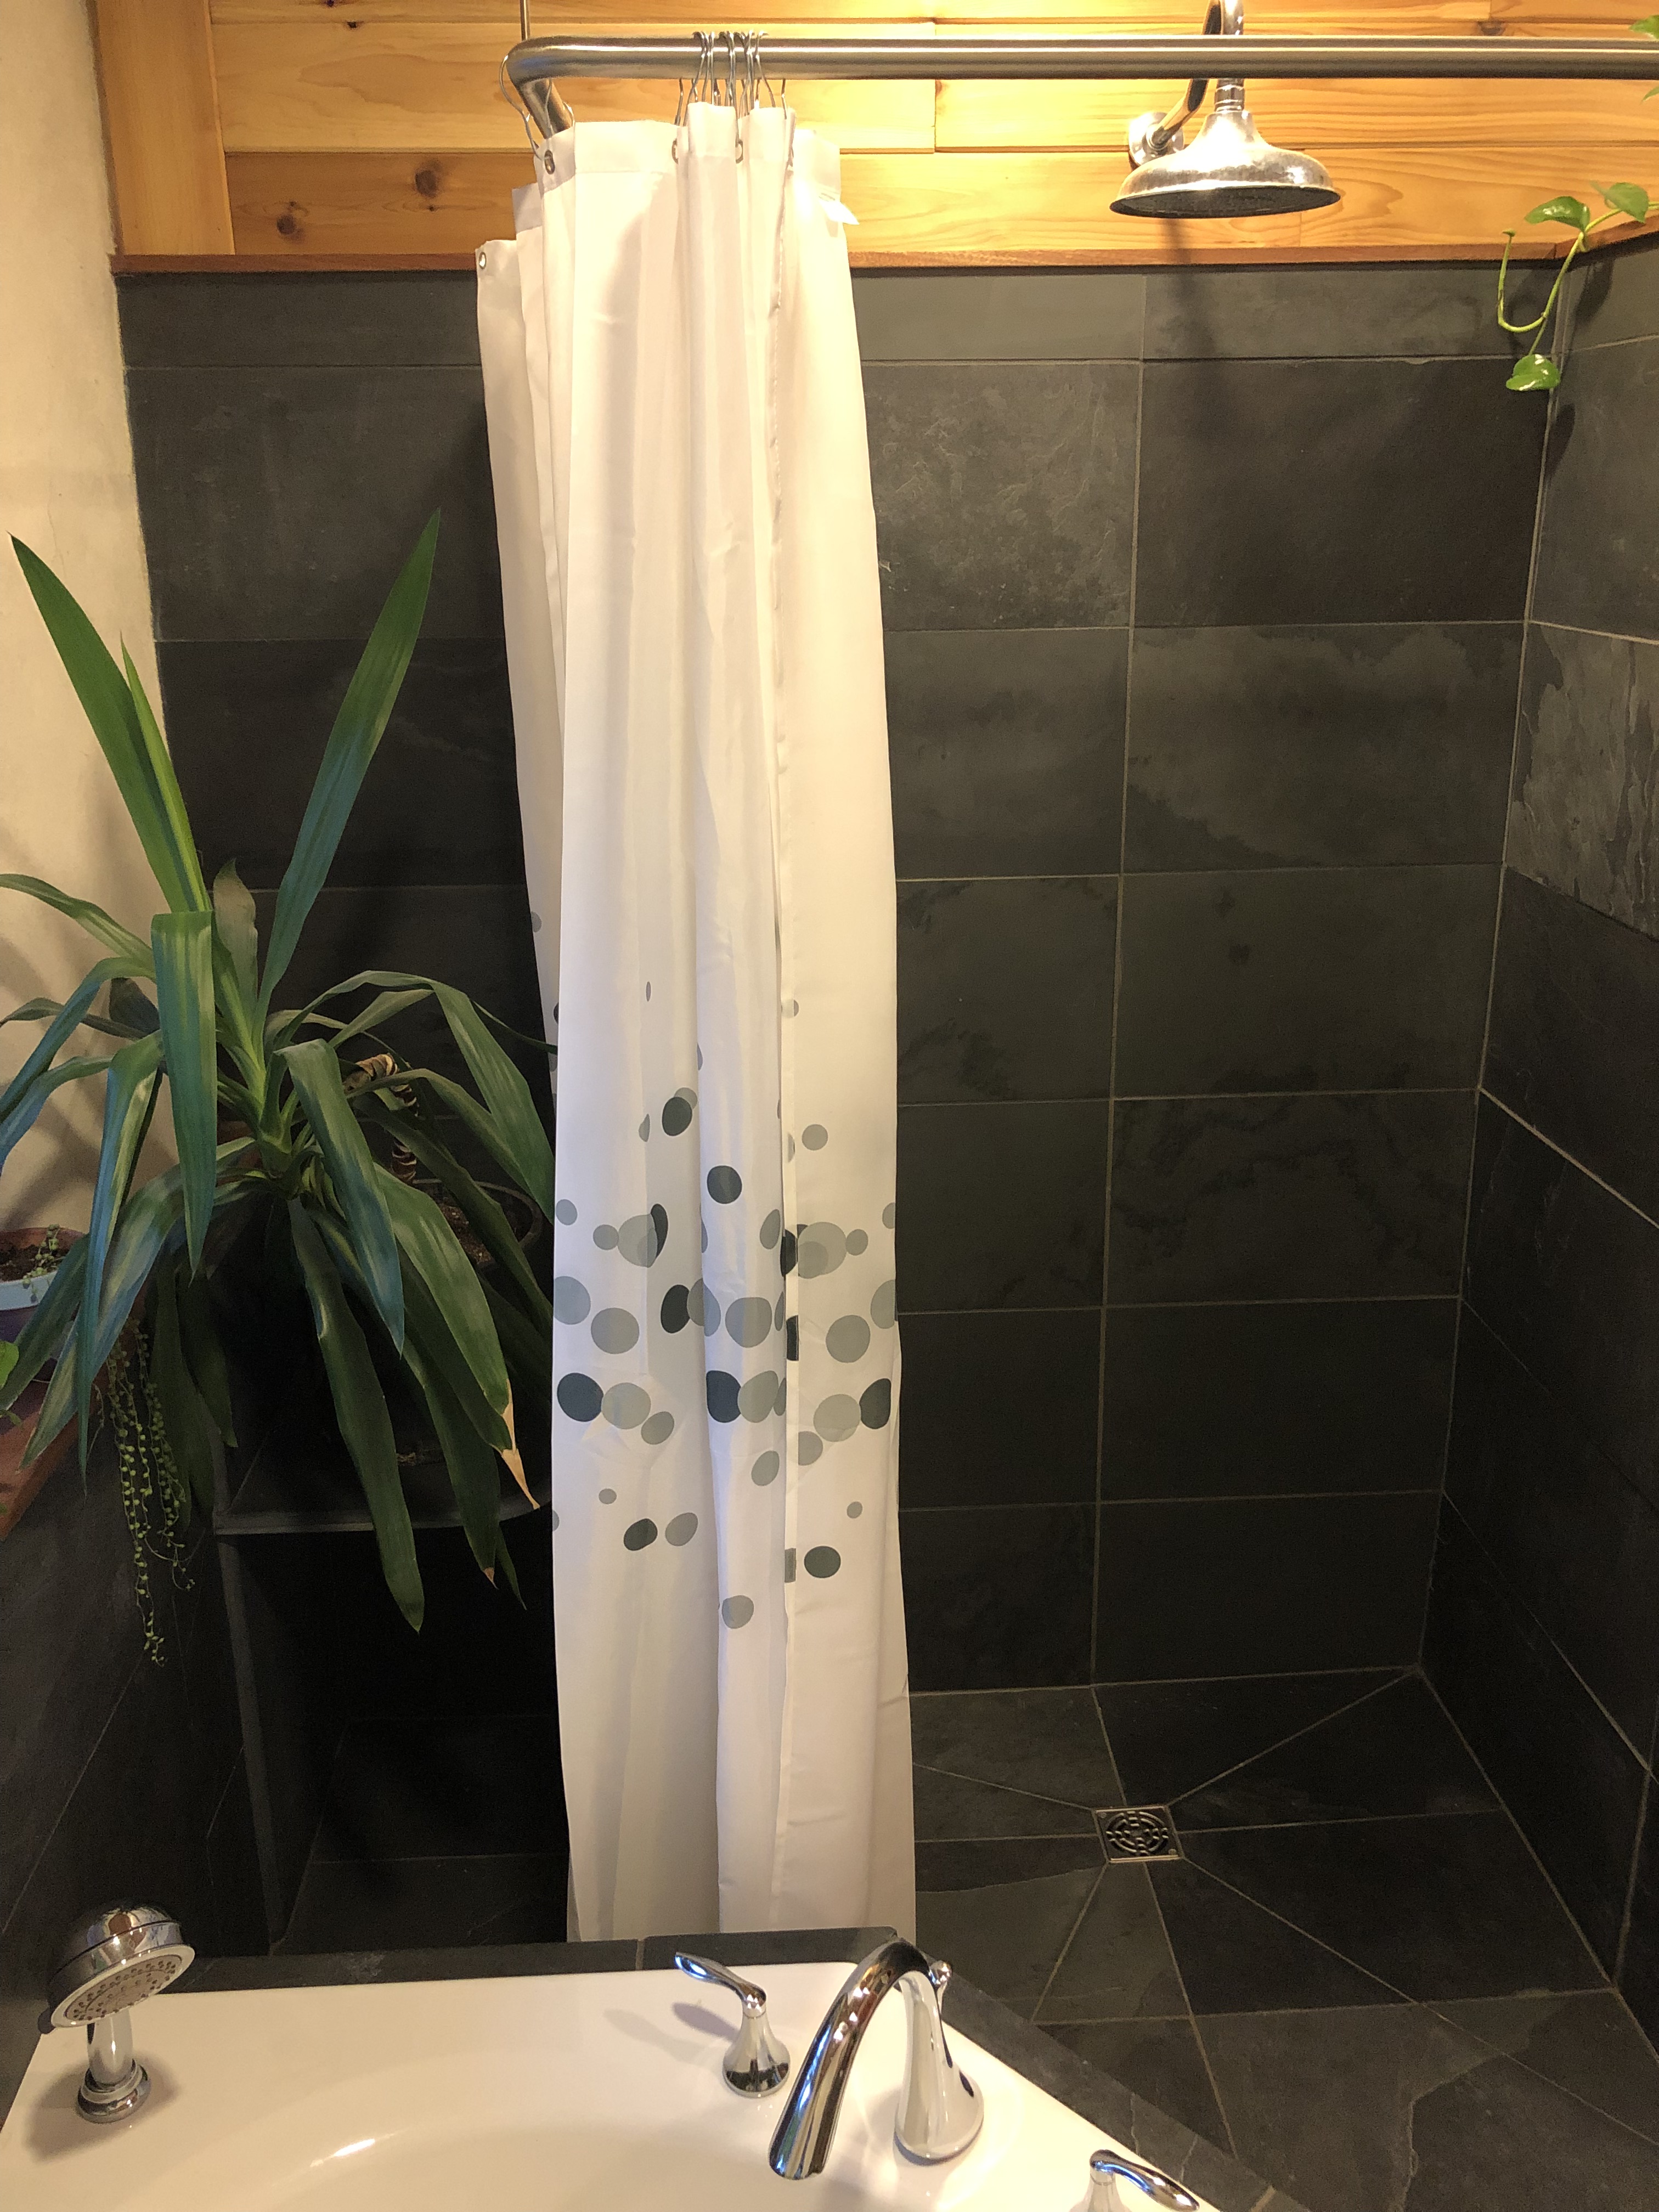
The main job involved in finishing the bathroom at this point was tiling. We obtained a certain amount of black slate tiles, mostly 1×2 foot tiles, and some scraps, from a friend’s leftover project. We weren’t sure if it would be enough tile, especially now that our corner tub redesign added more area that needed to be tiled, but another friend of ours who came visiting one day was excited to give us 100 square feet of almost exactly the same tile that he was no longer going to use at his place! It had a slightly different texture and colour, but was close enough to hardly tell at all. We hired Keith, a local tiler, because at this point, having speed, tools, and expertise sounded way better than our old ways of fumbling through these things ourselves. Since our job was relatively small, Keith even used up a bunch of scraps of backing board from other jobs.

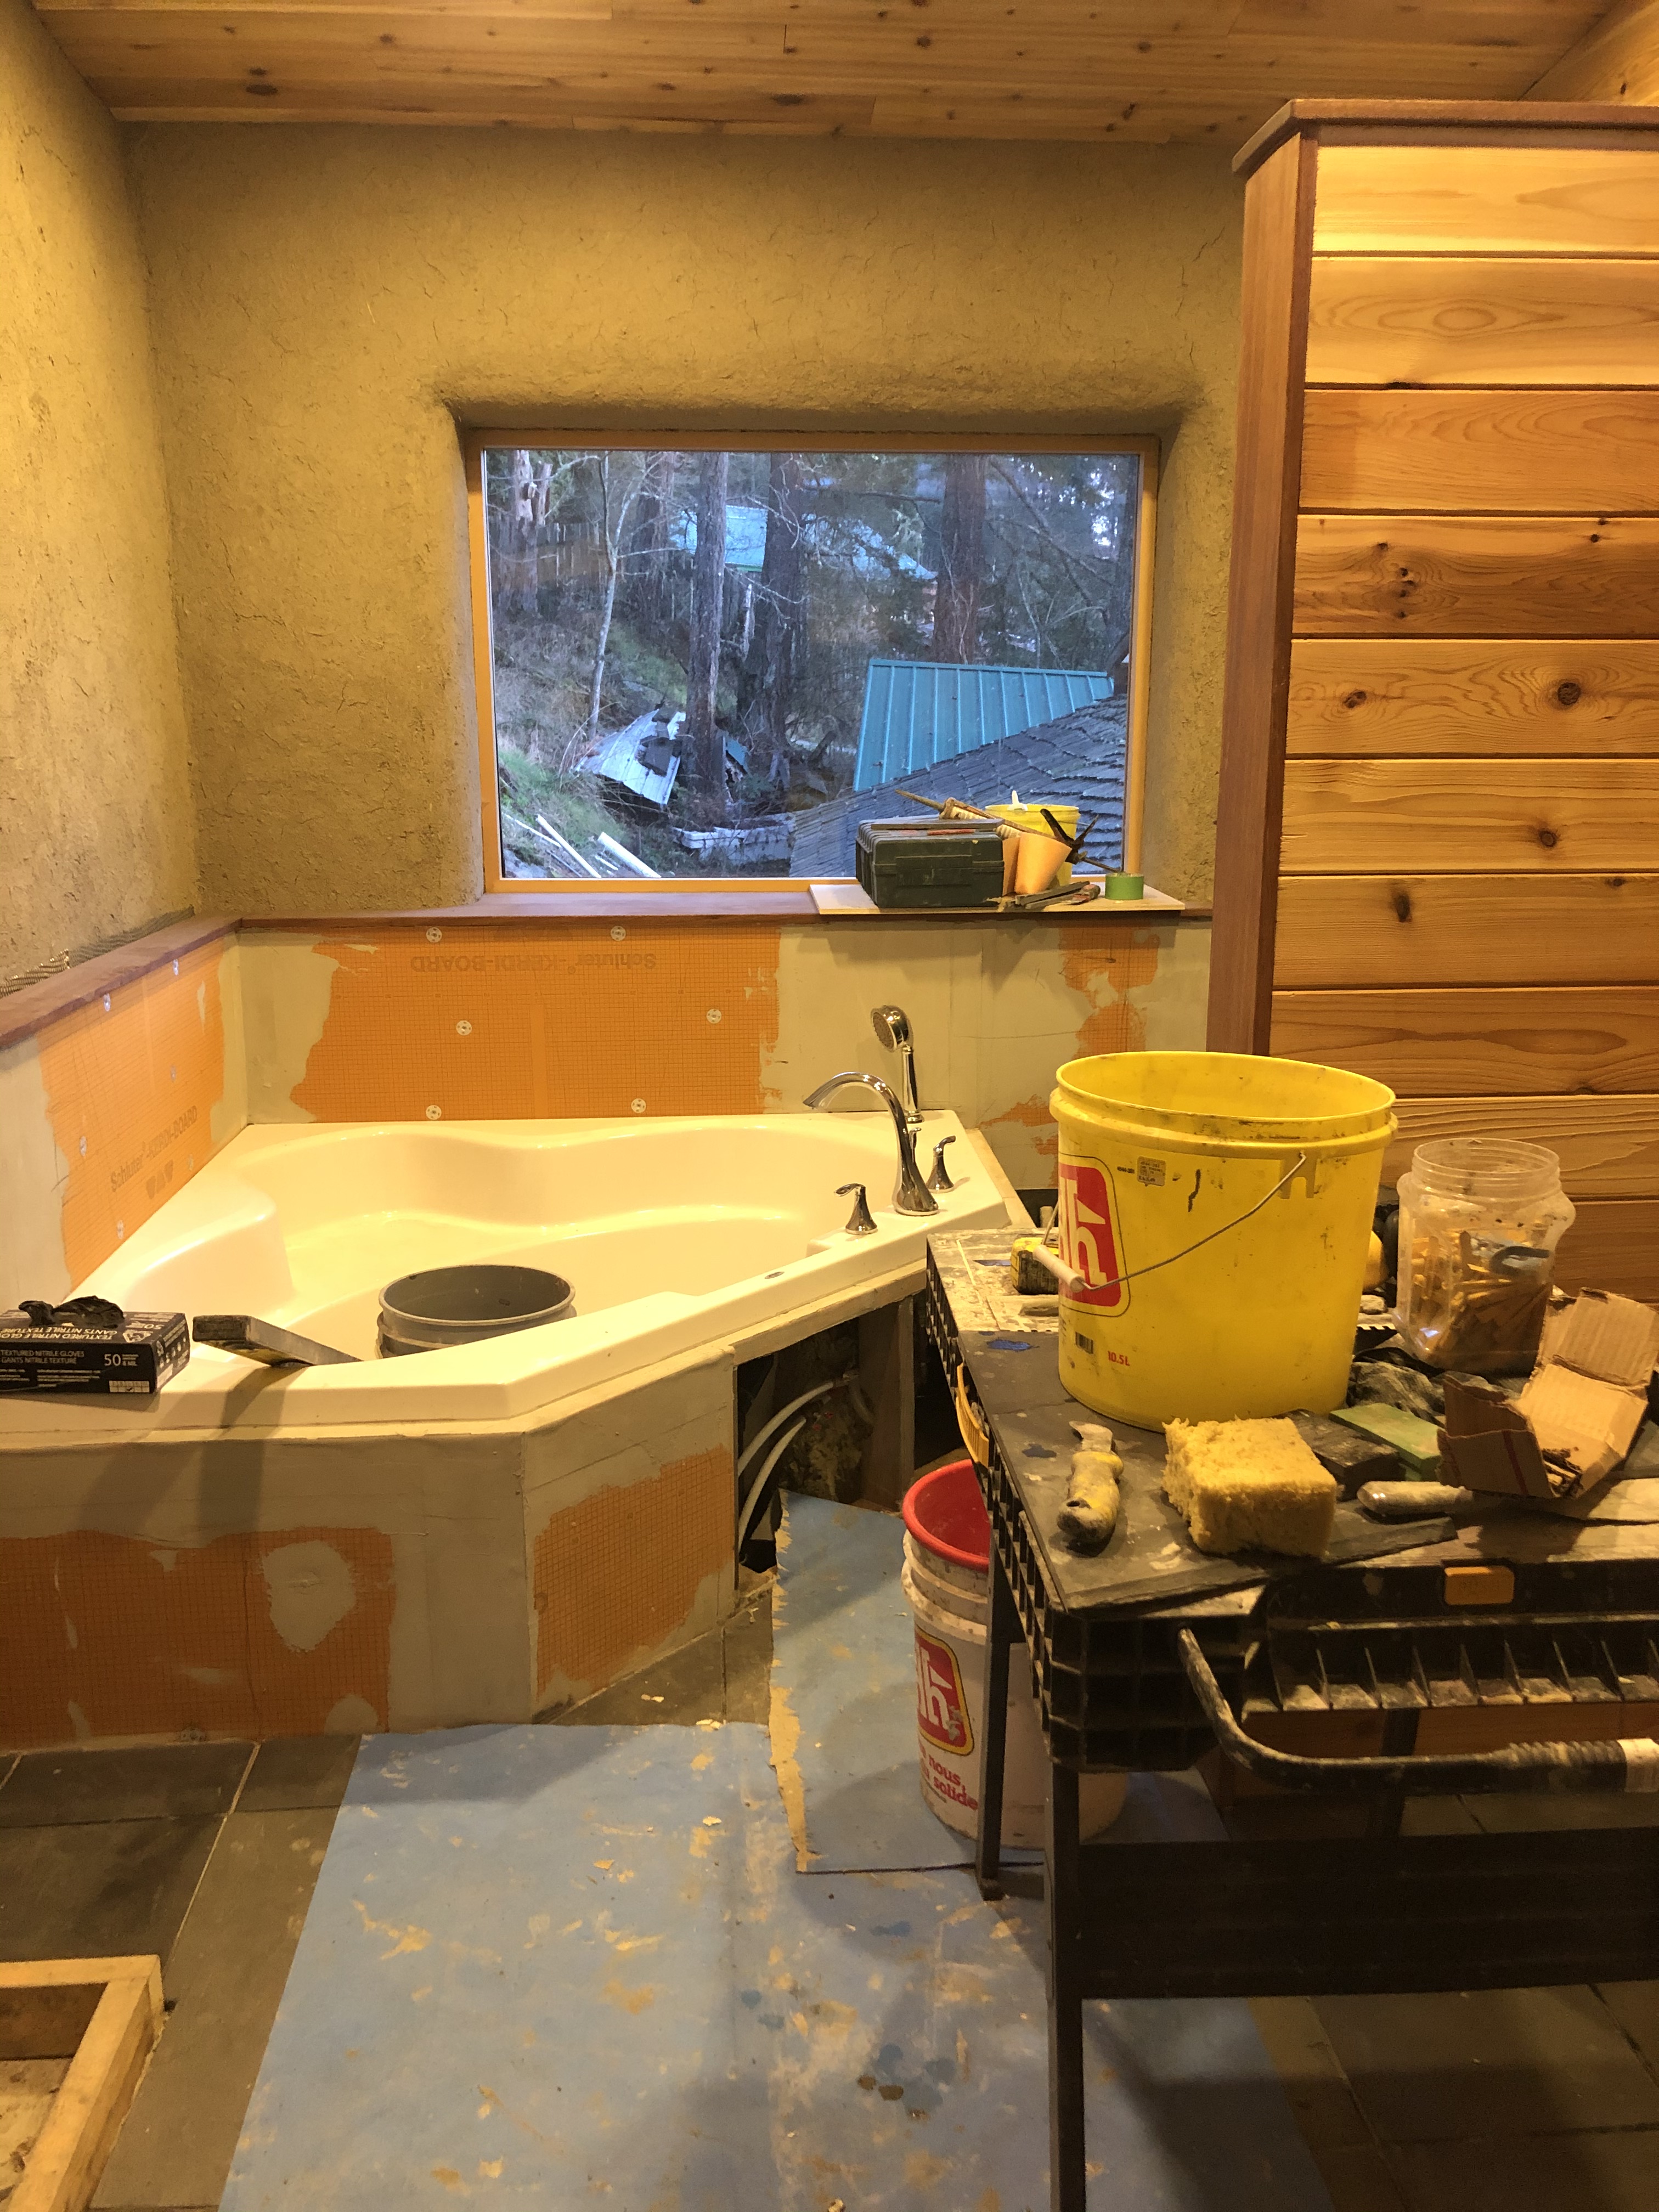
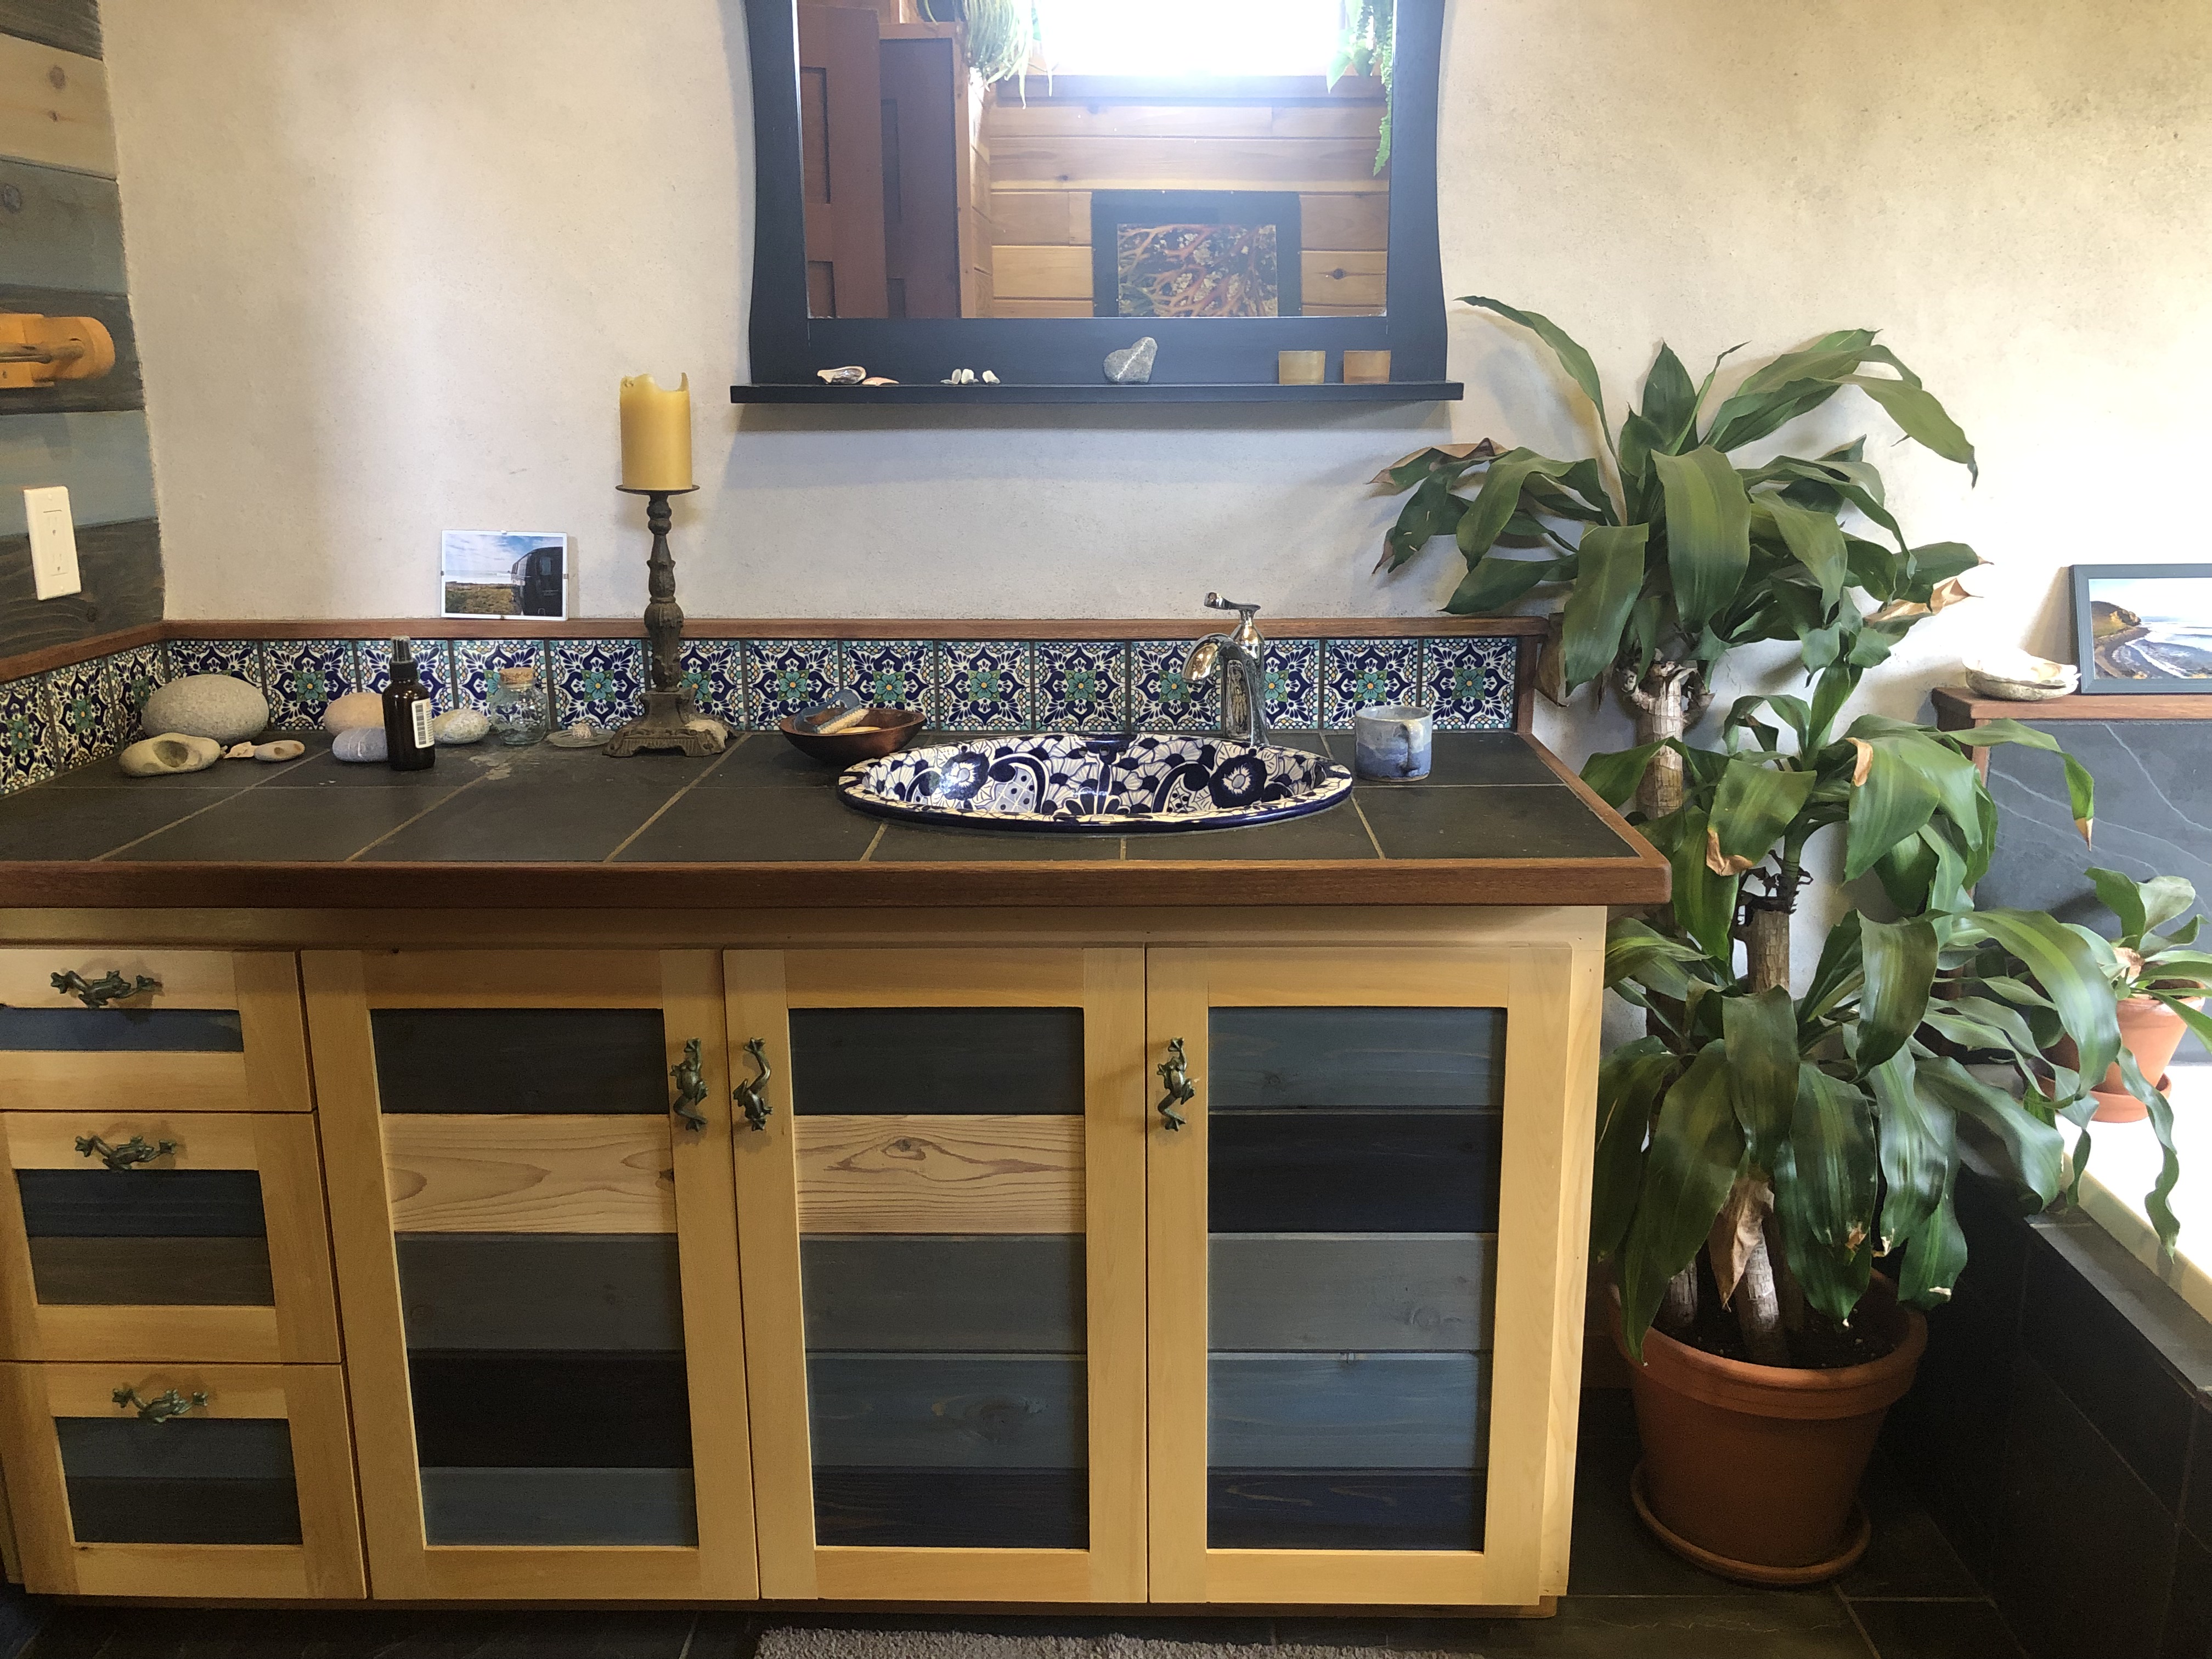
We already had a basic sink from the recycling depot here, but another old friend noticed that we had used Mexican Talavera tiles around the base of our woodstove, and offerred us a hand painted Mexican sink which she just had hanging around her place… it is such a beautiful and perfect addition! We were planning on using the same Talavera tiles as the backsplash in the bathroom, and now the artistry and colour of the sink and tiles really looks amazing and lively with the neautrality of the black slate and white walls.

Gifted hand painted Mexican sink and talavera tiles purchased online from Mexico, black slate counter top and mahogany trim

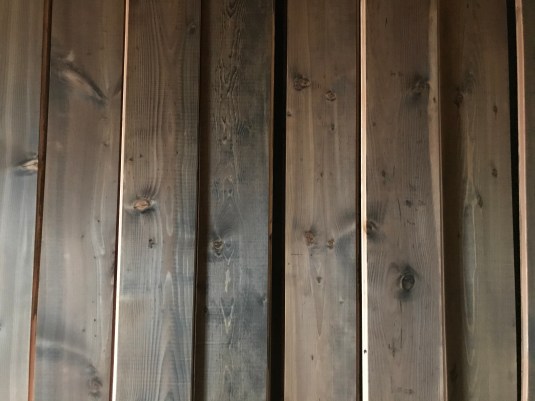
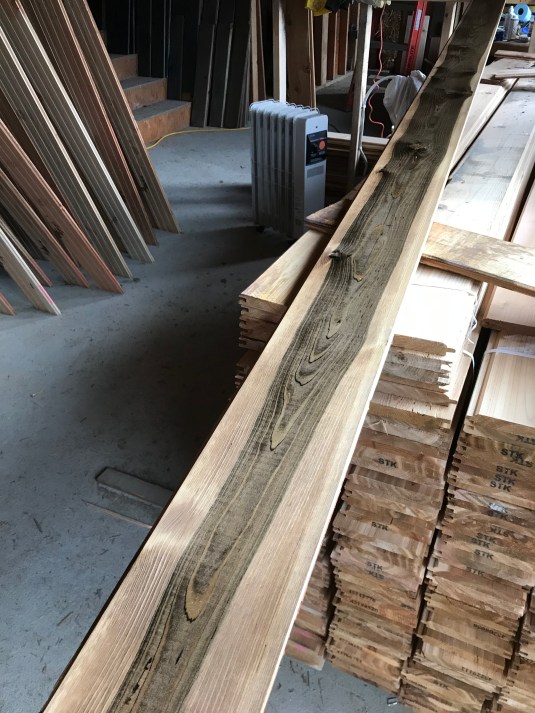
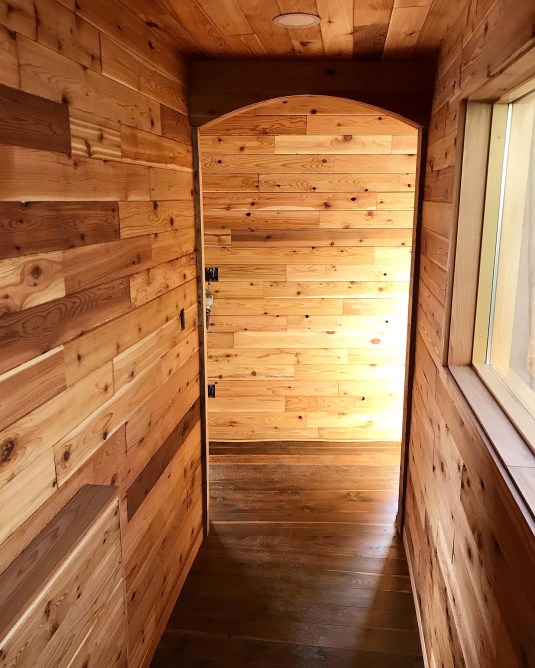
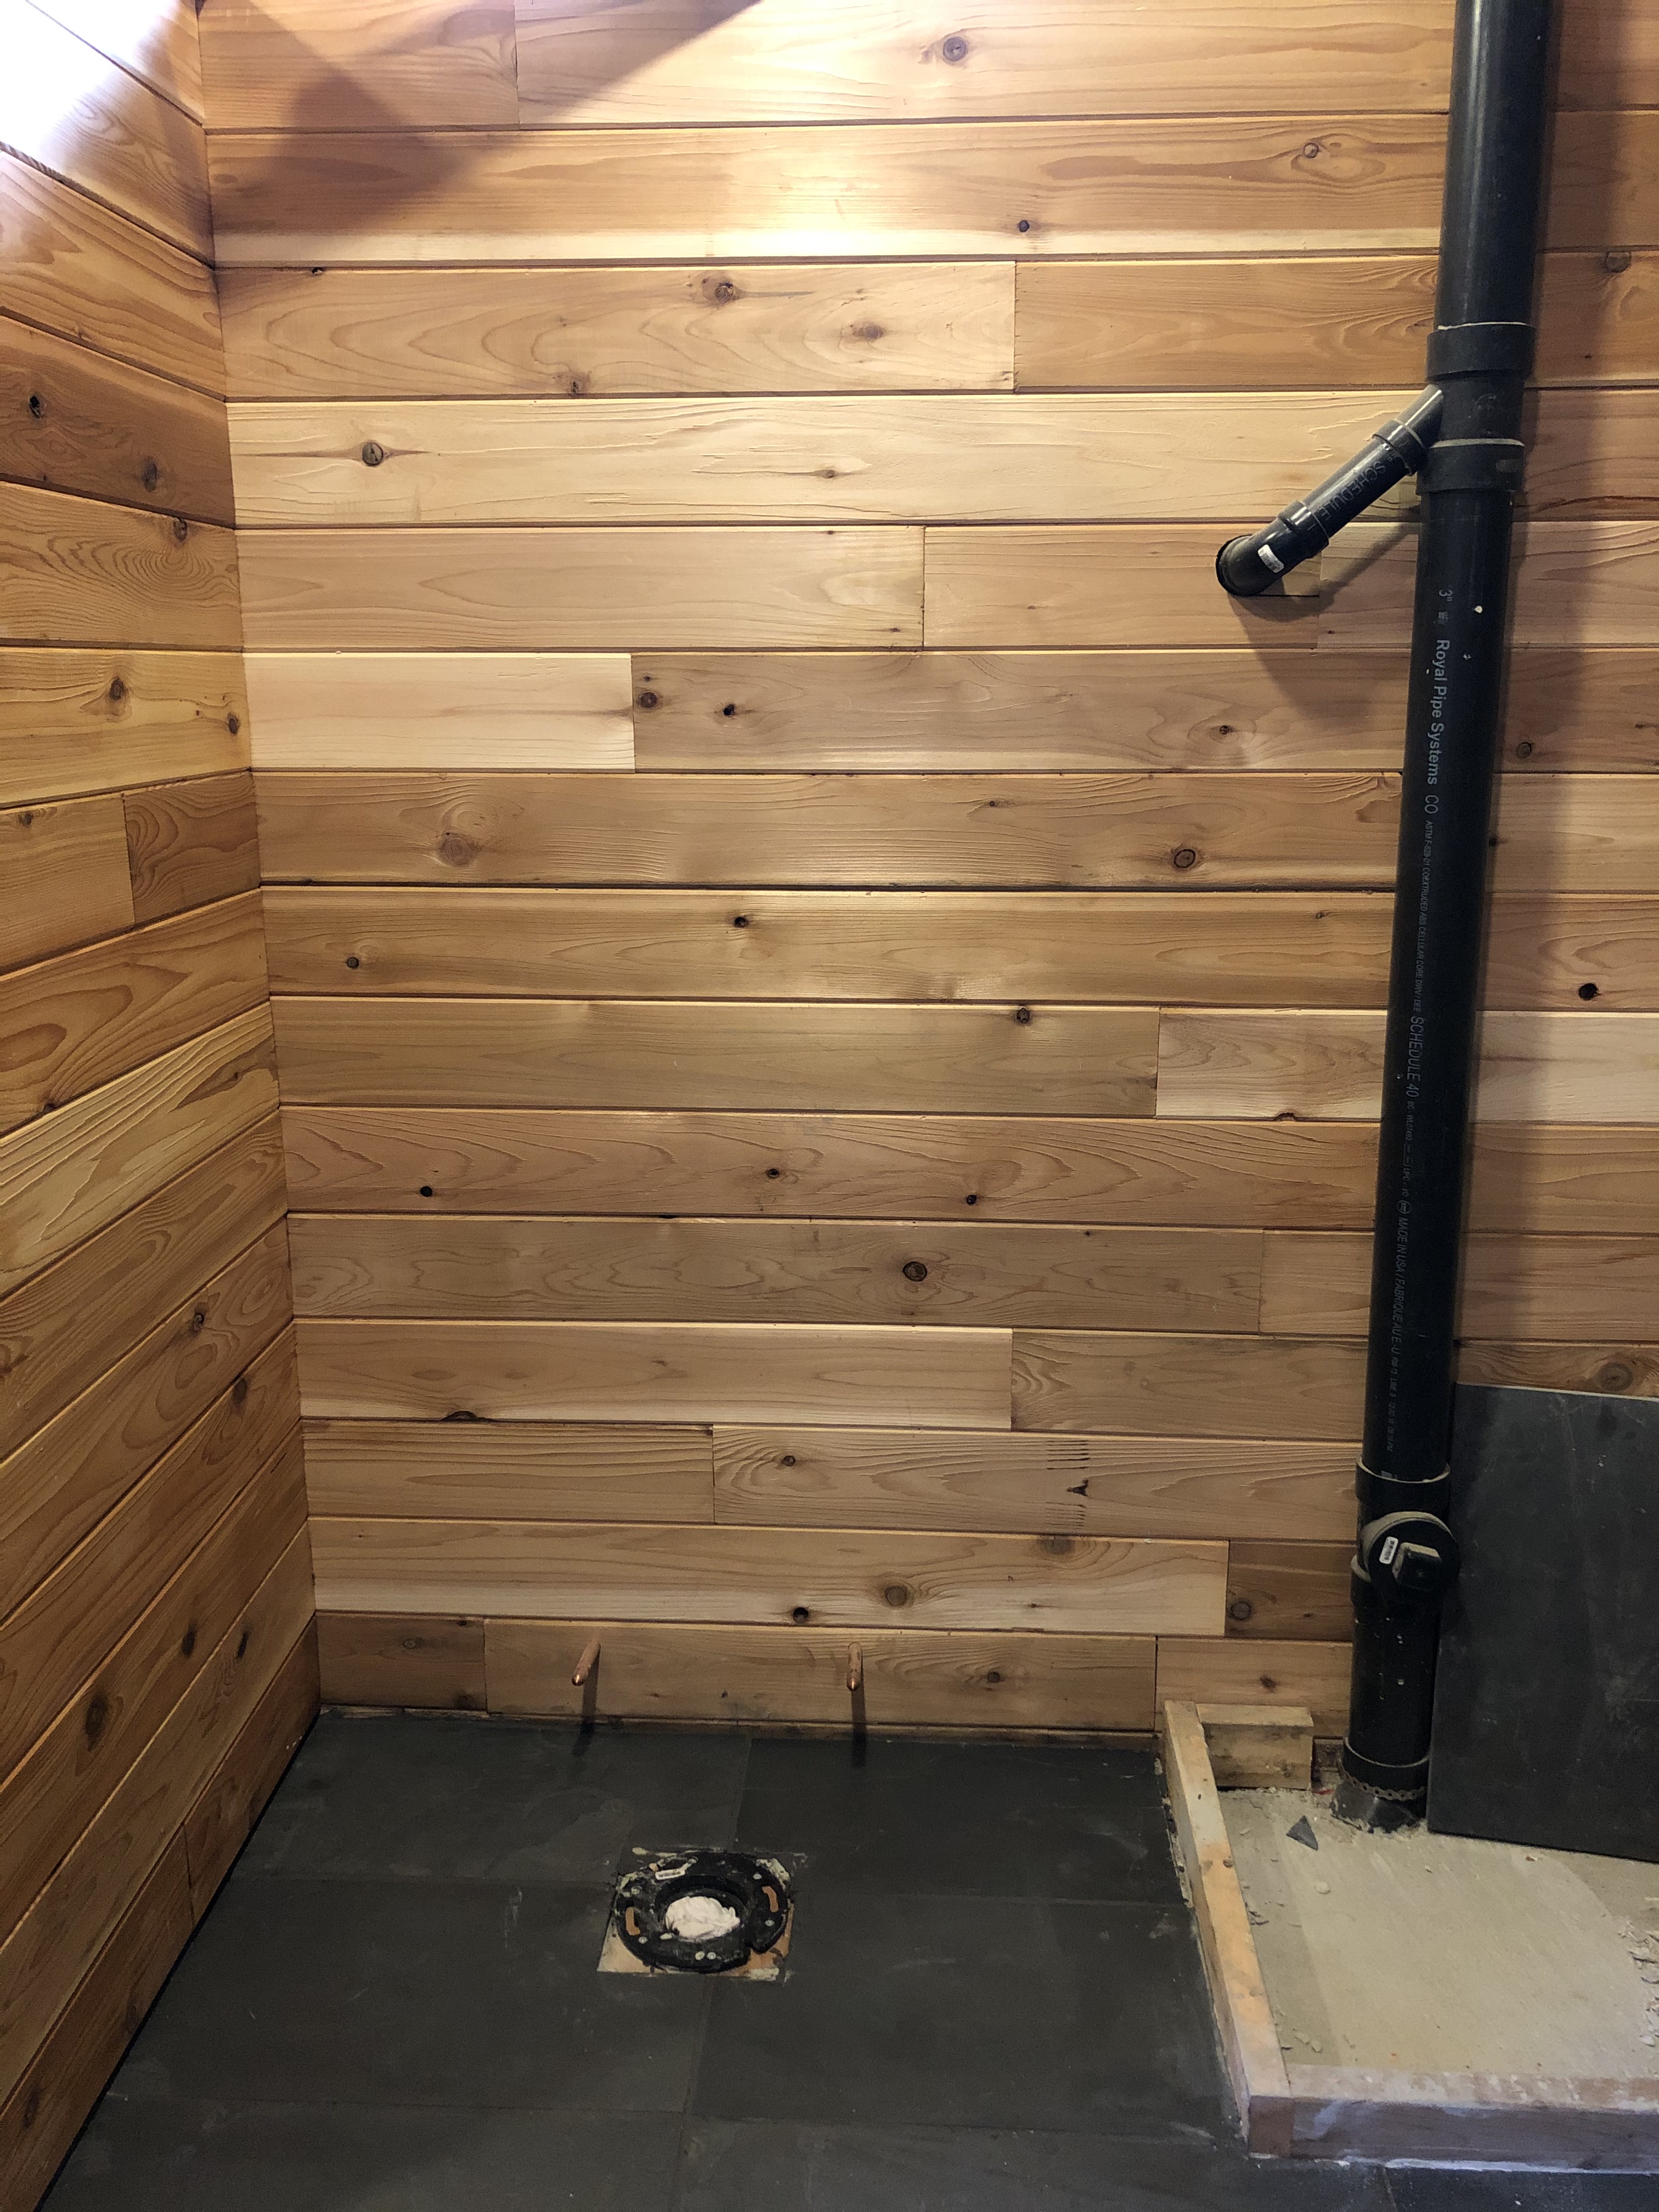
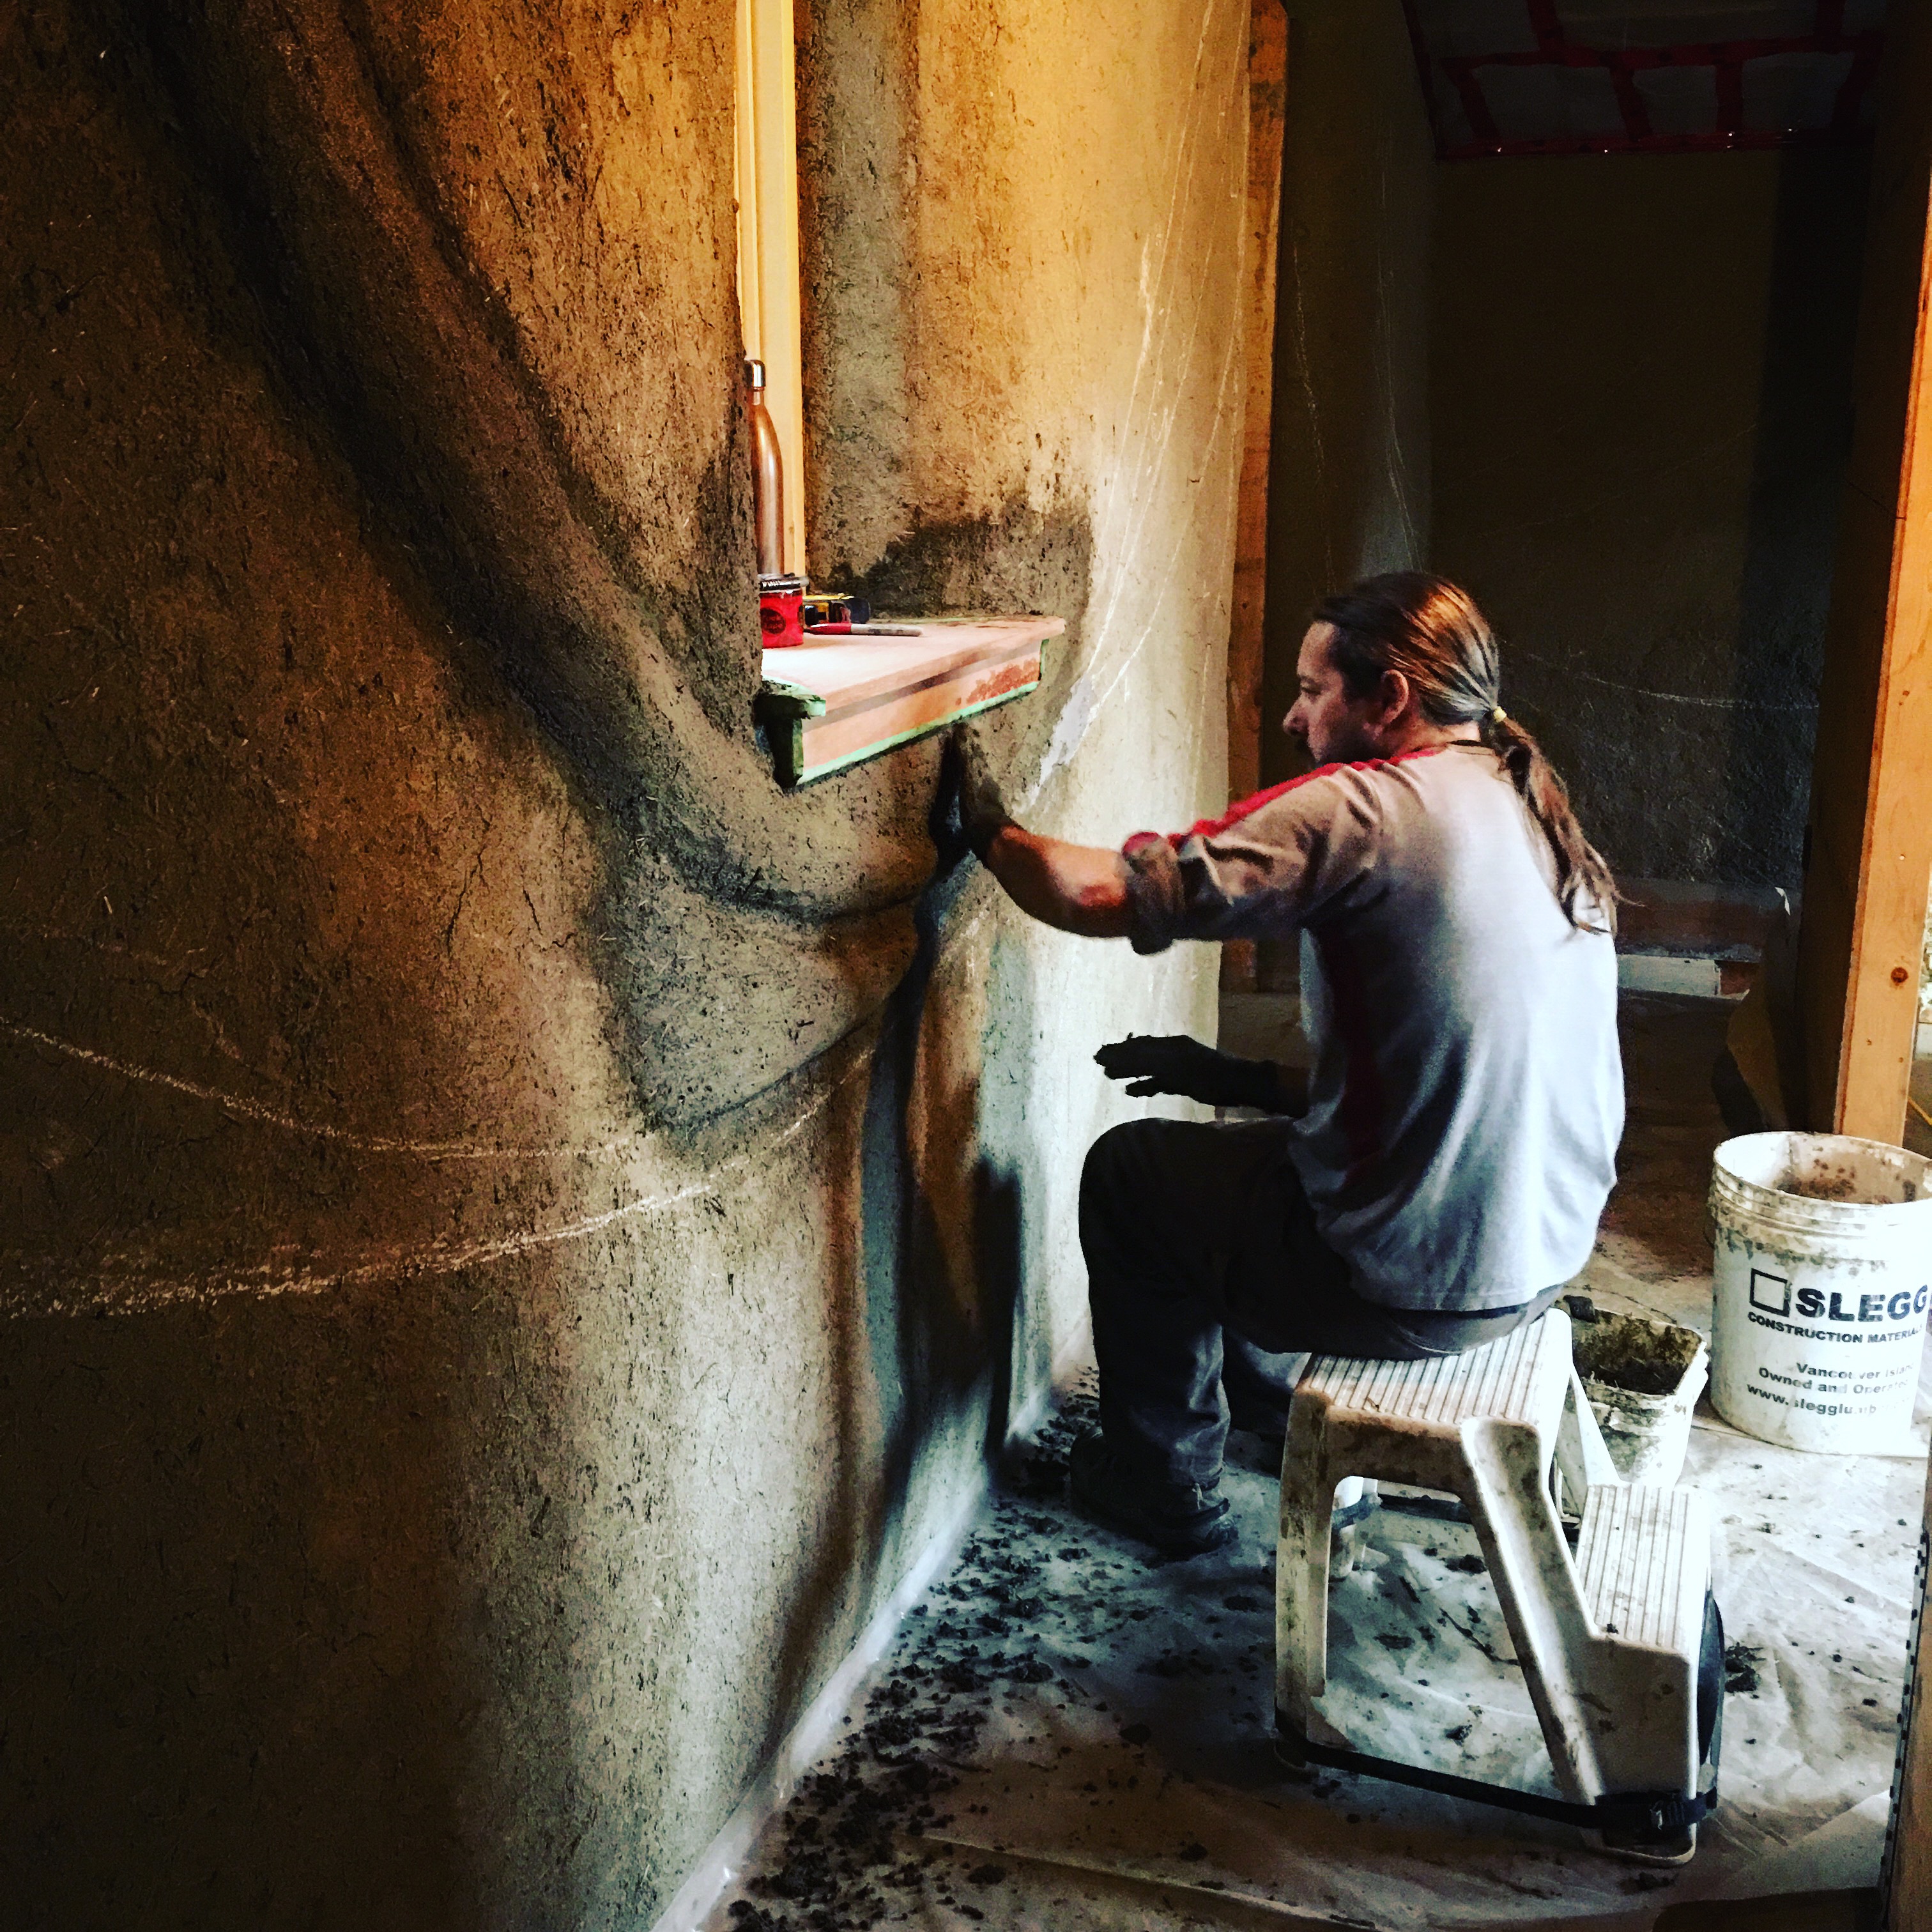
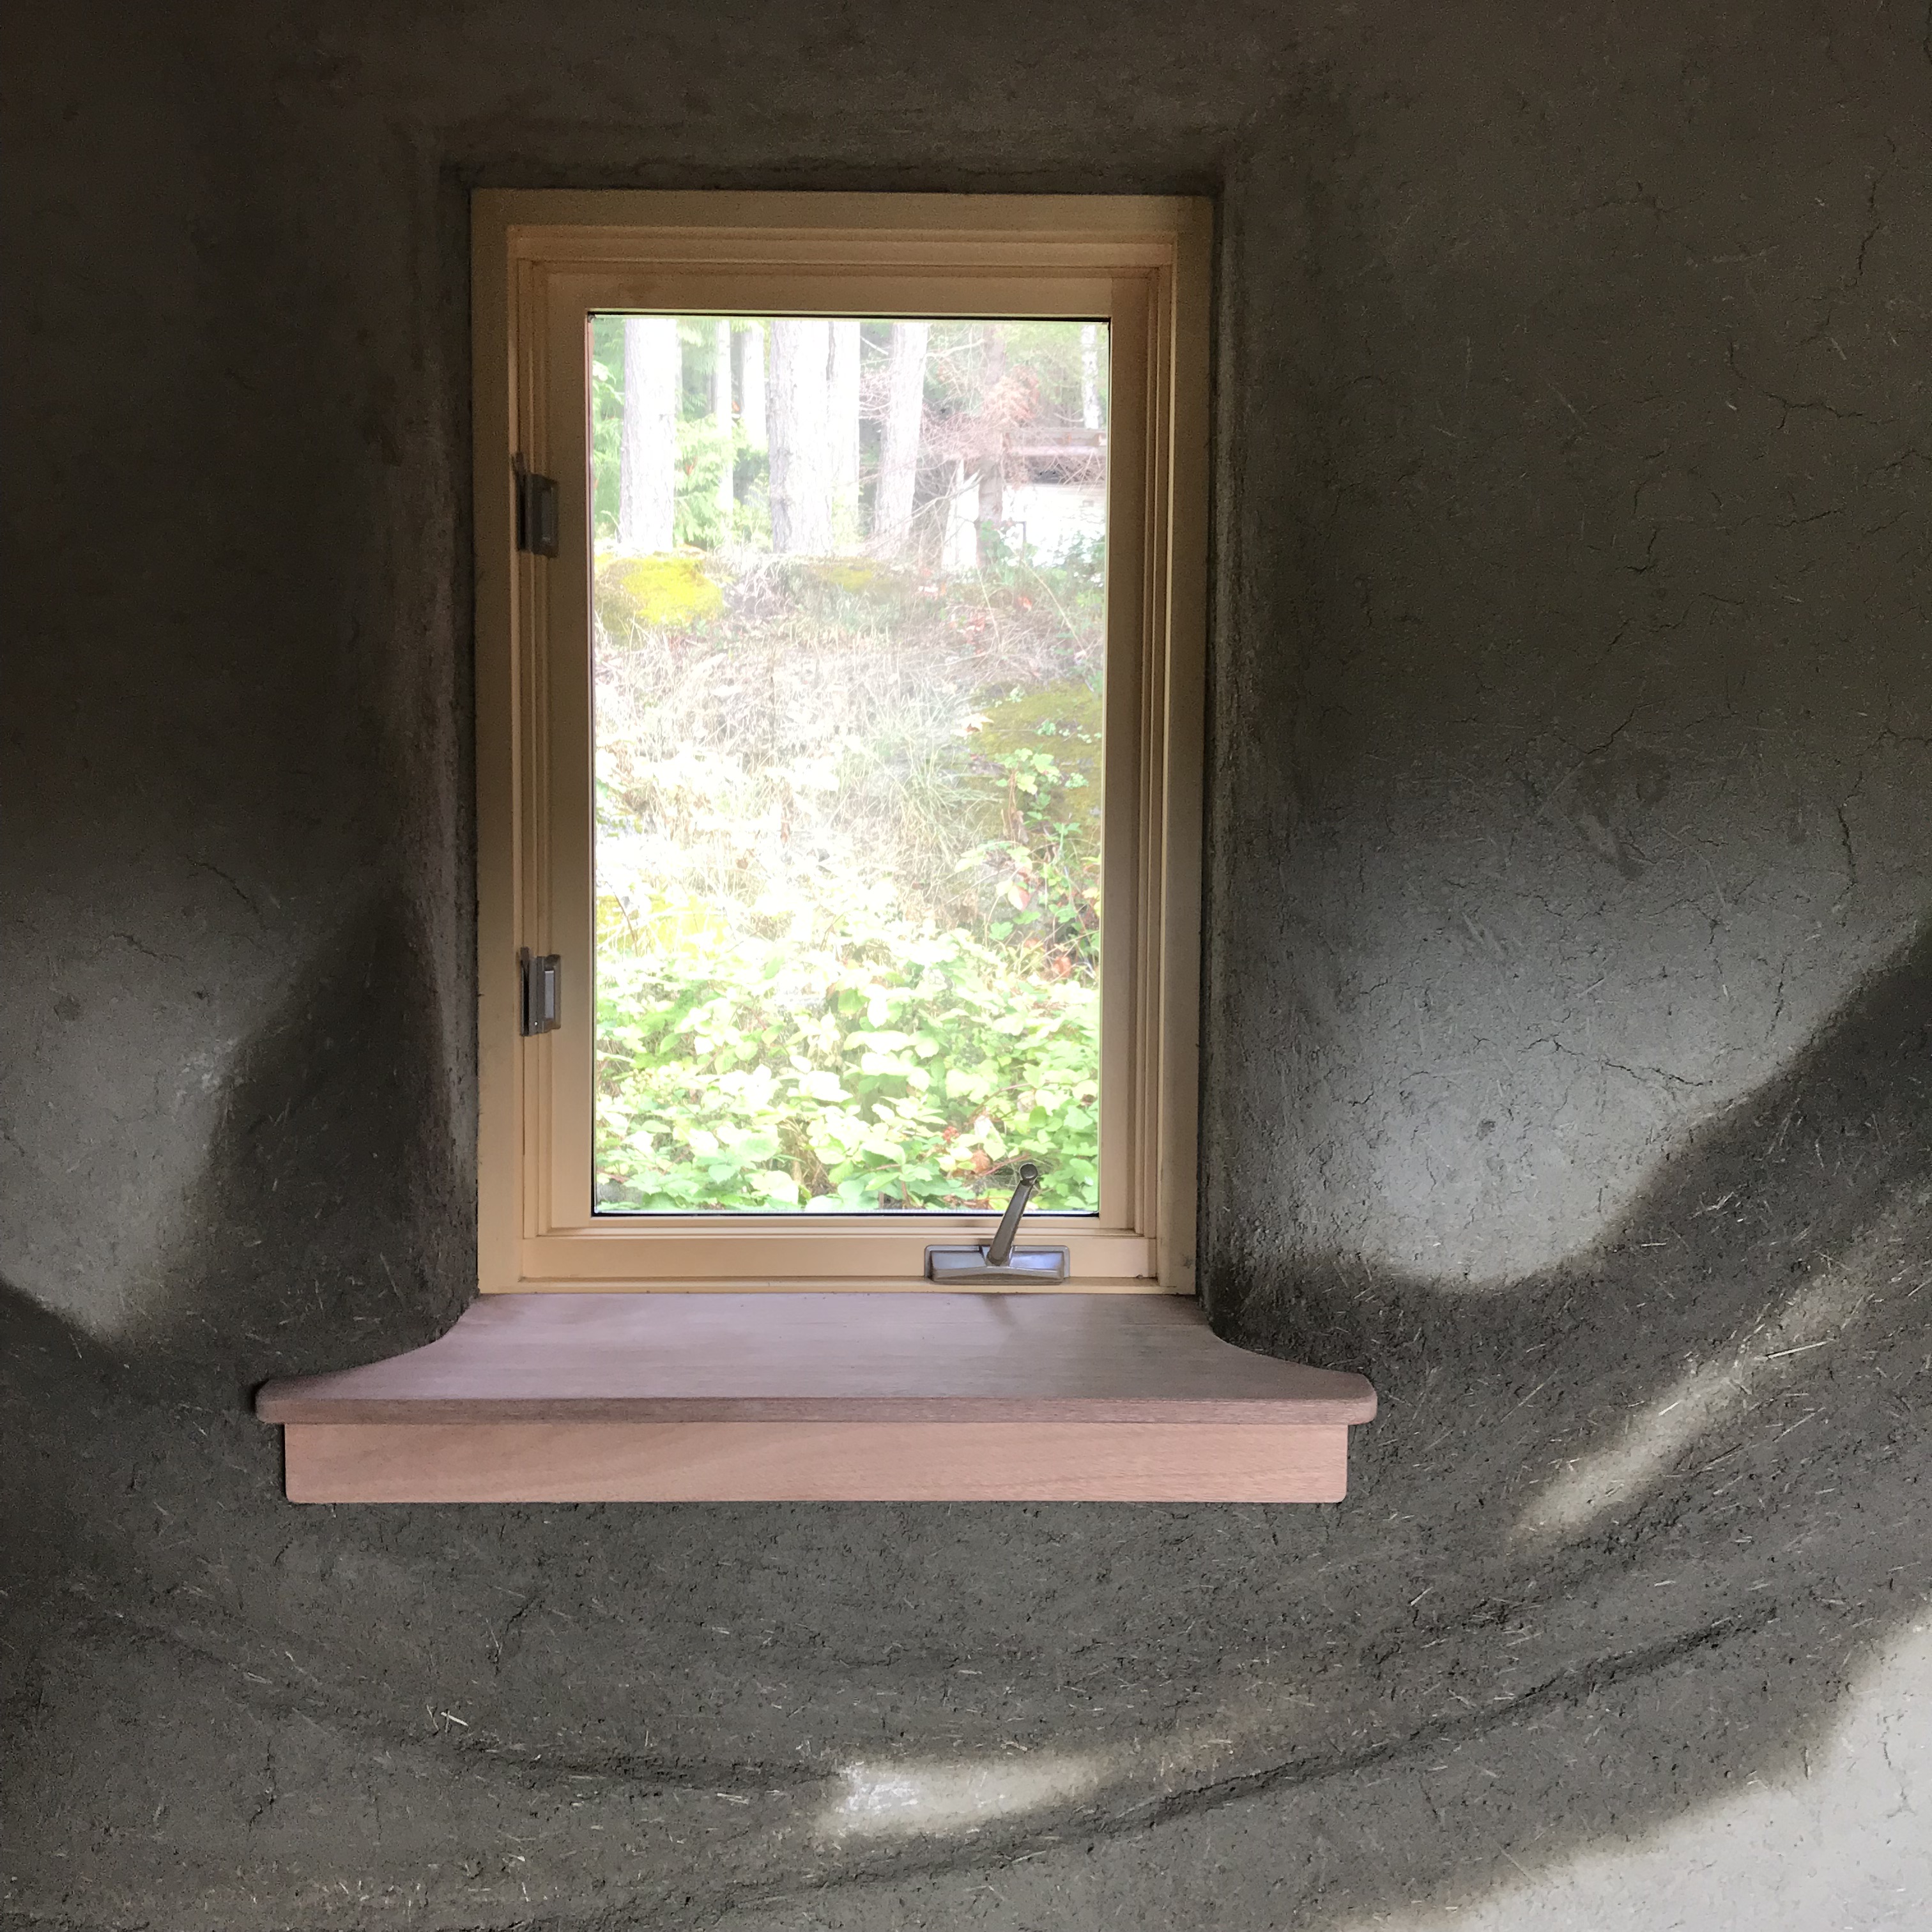
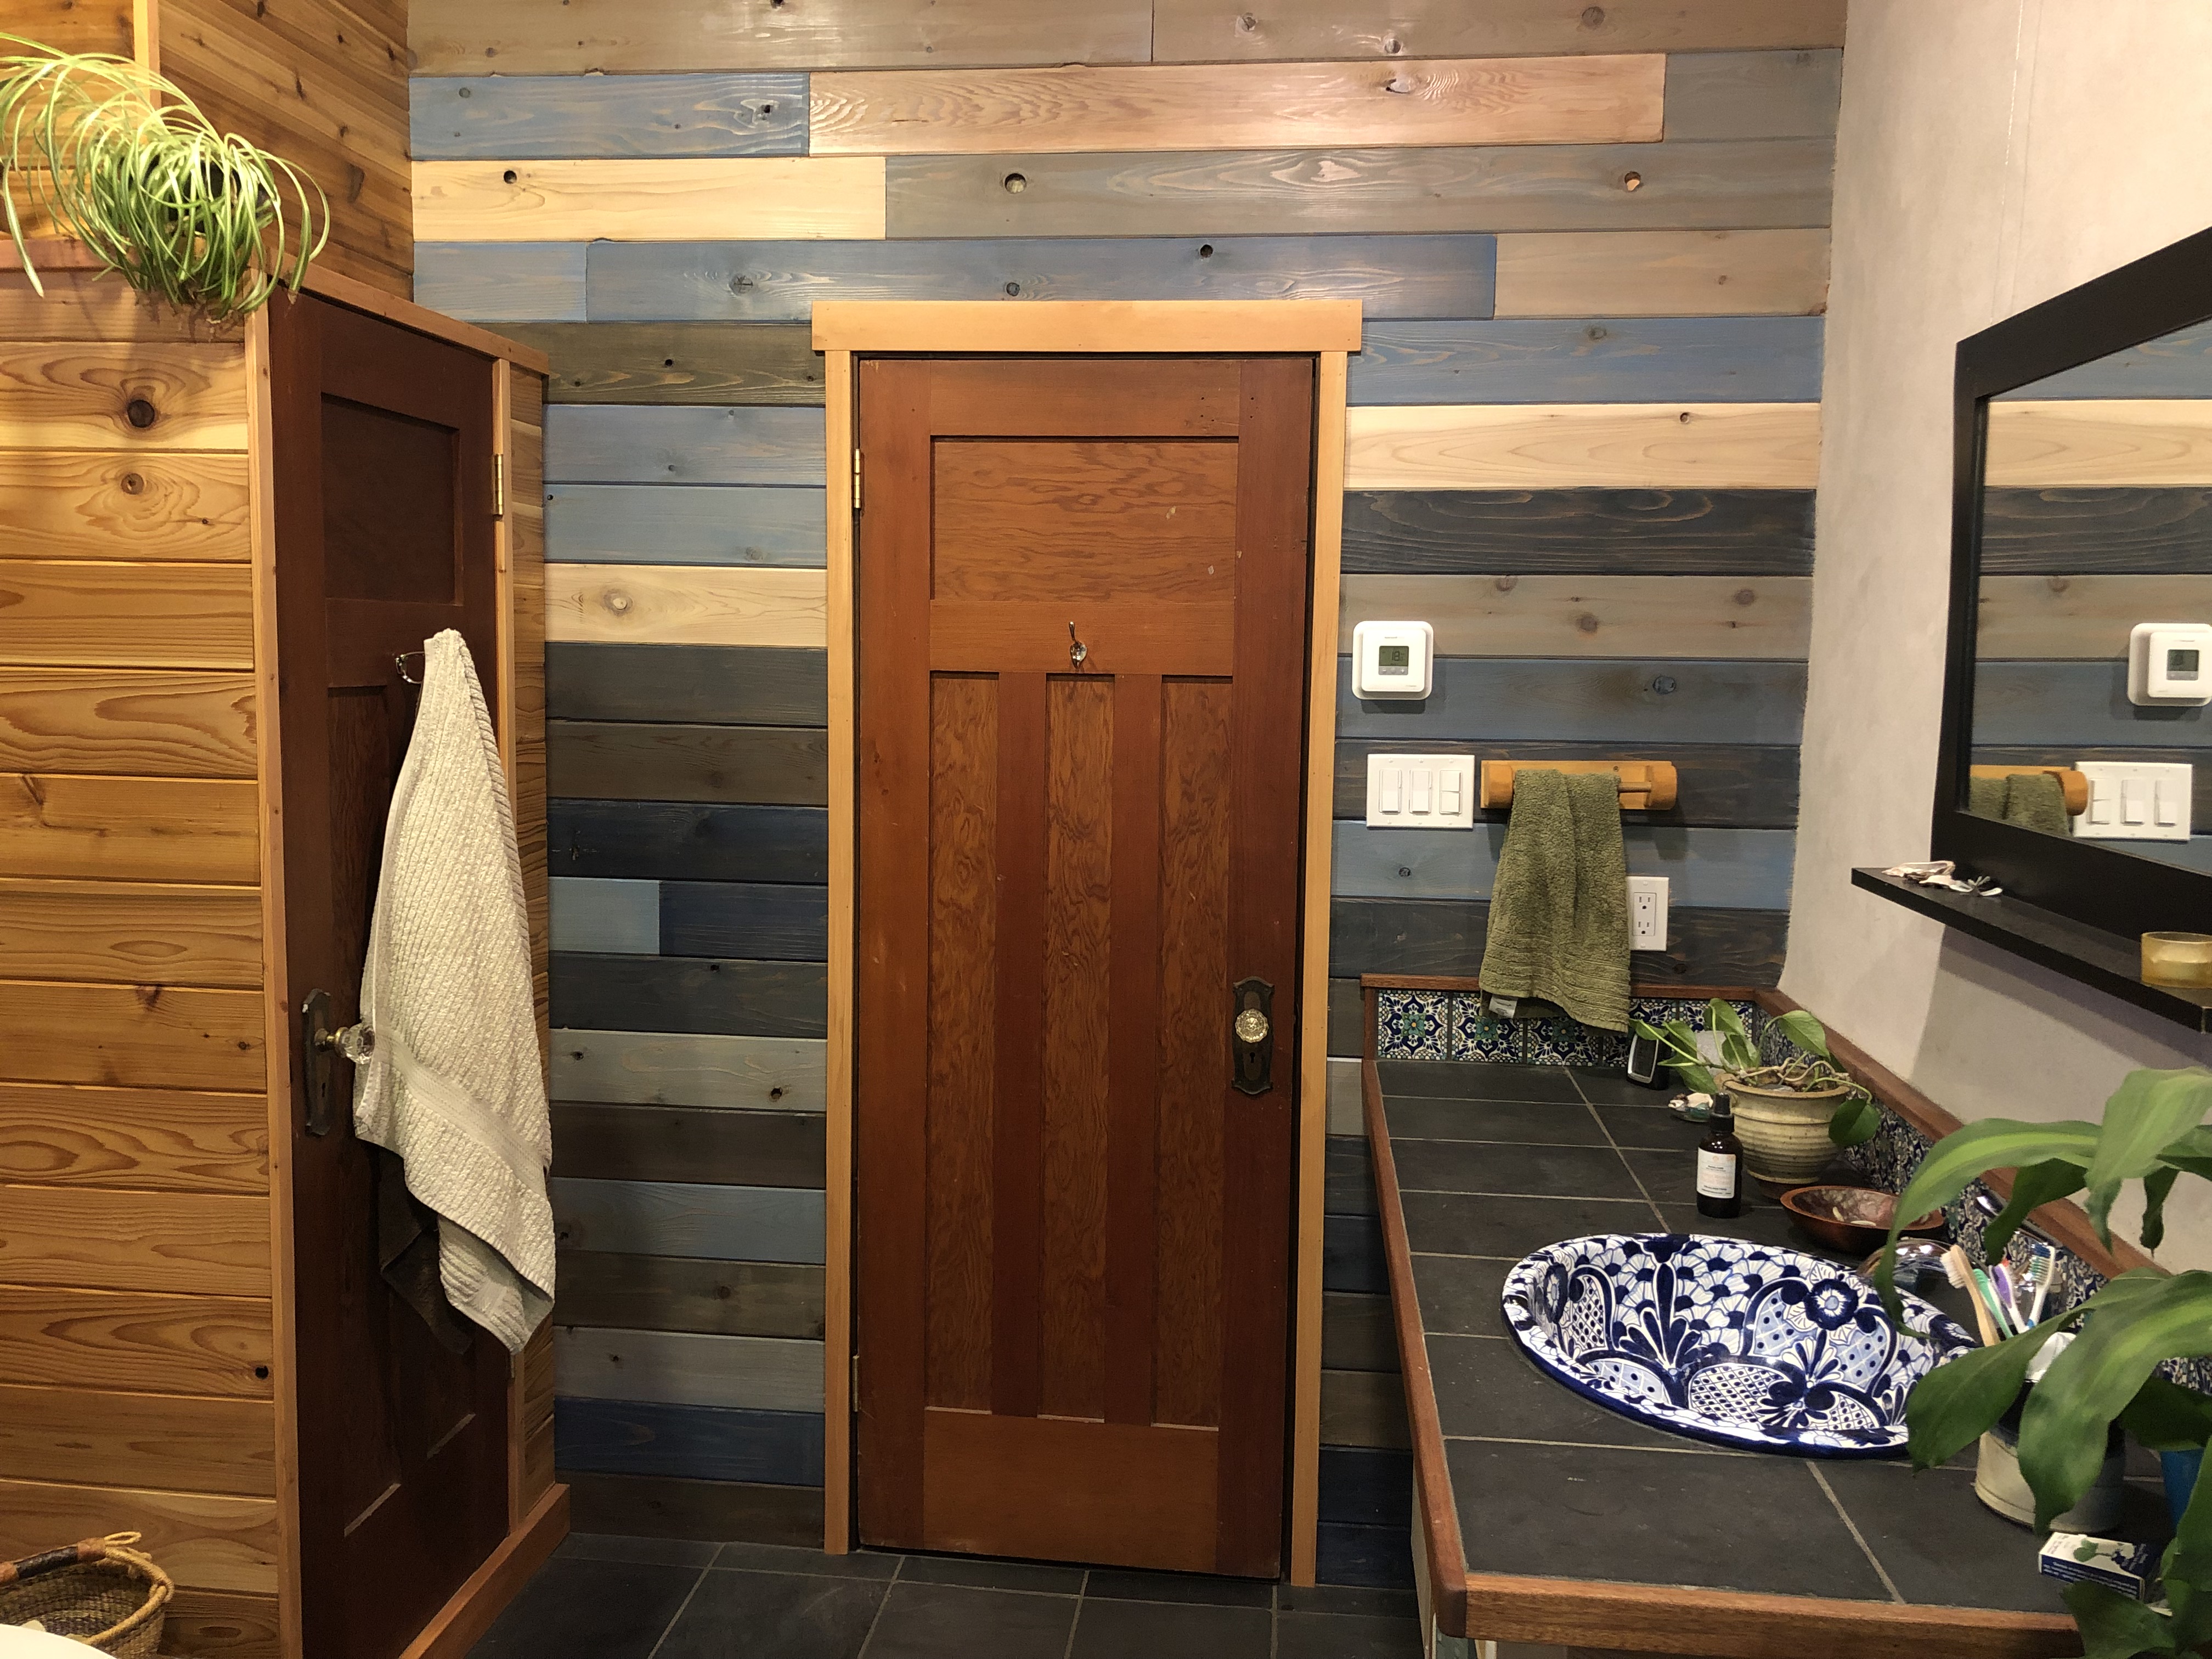
Colin trimmed everything out with the mahogany that we obtained through a work trade 17 years ago, and which has become all the window sills in the bedrooms. The toilet* was installed in a little nook, with the wall of the shower on one side, and a framed linen closet on the other, which doubles as a hide away for some awkward venting pipes which coming through from the utility room. We used all the low grade t&g cedar for the walls around the toilet and cupboard, and added the multi-toned blue and grey theme on the wall of the bathroom around the door. Both the cupboard door and the main door are solid wood doors reclaimed from an old house that Colin’s Dad had in his salvaged collection for a long time. They came complete with the old fashioned glass door knobs.

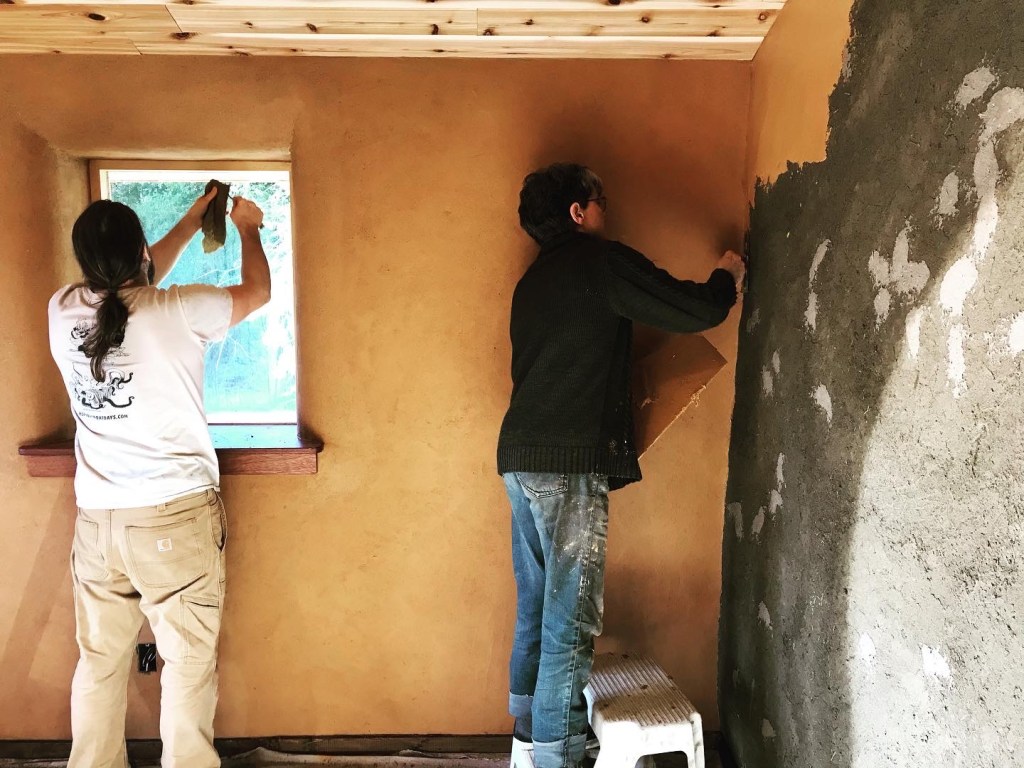
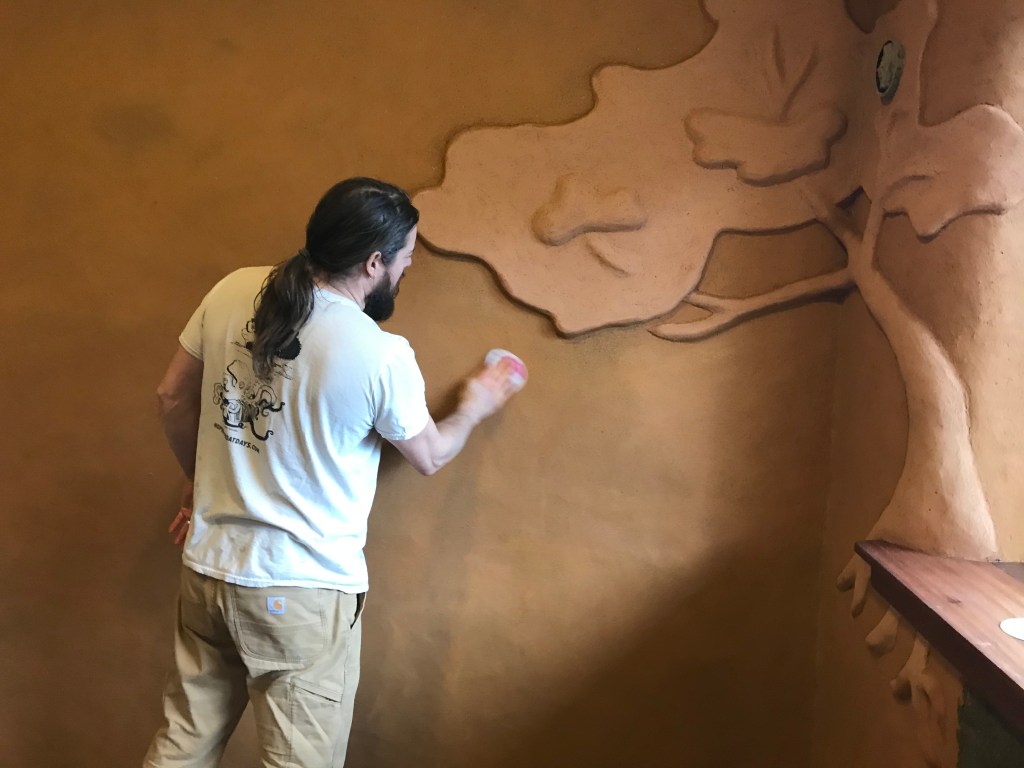
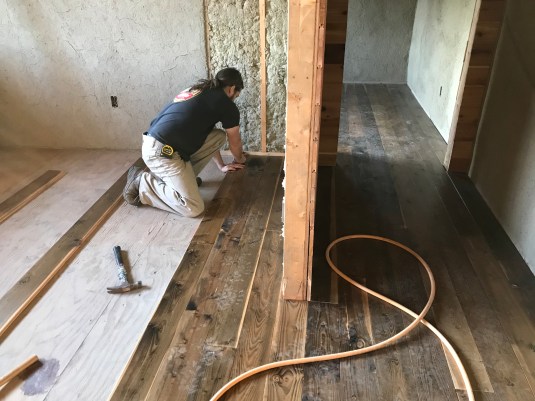
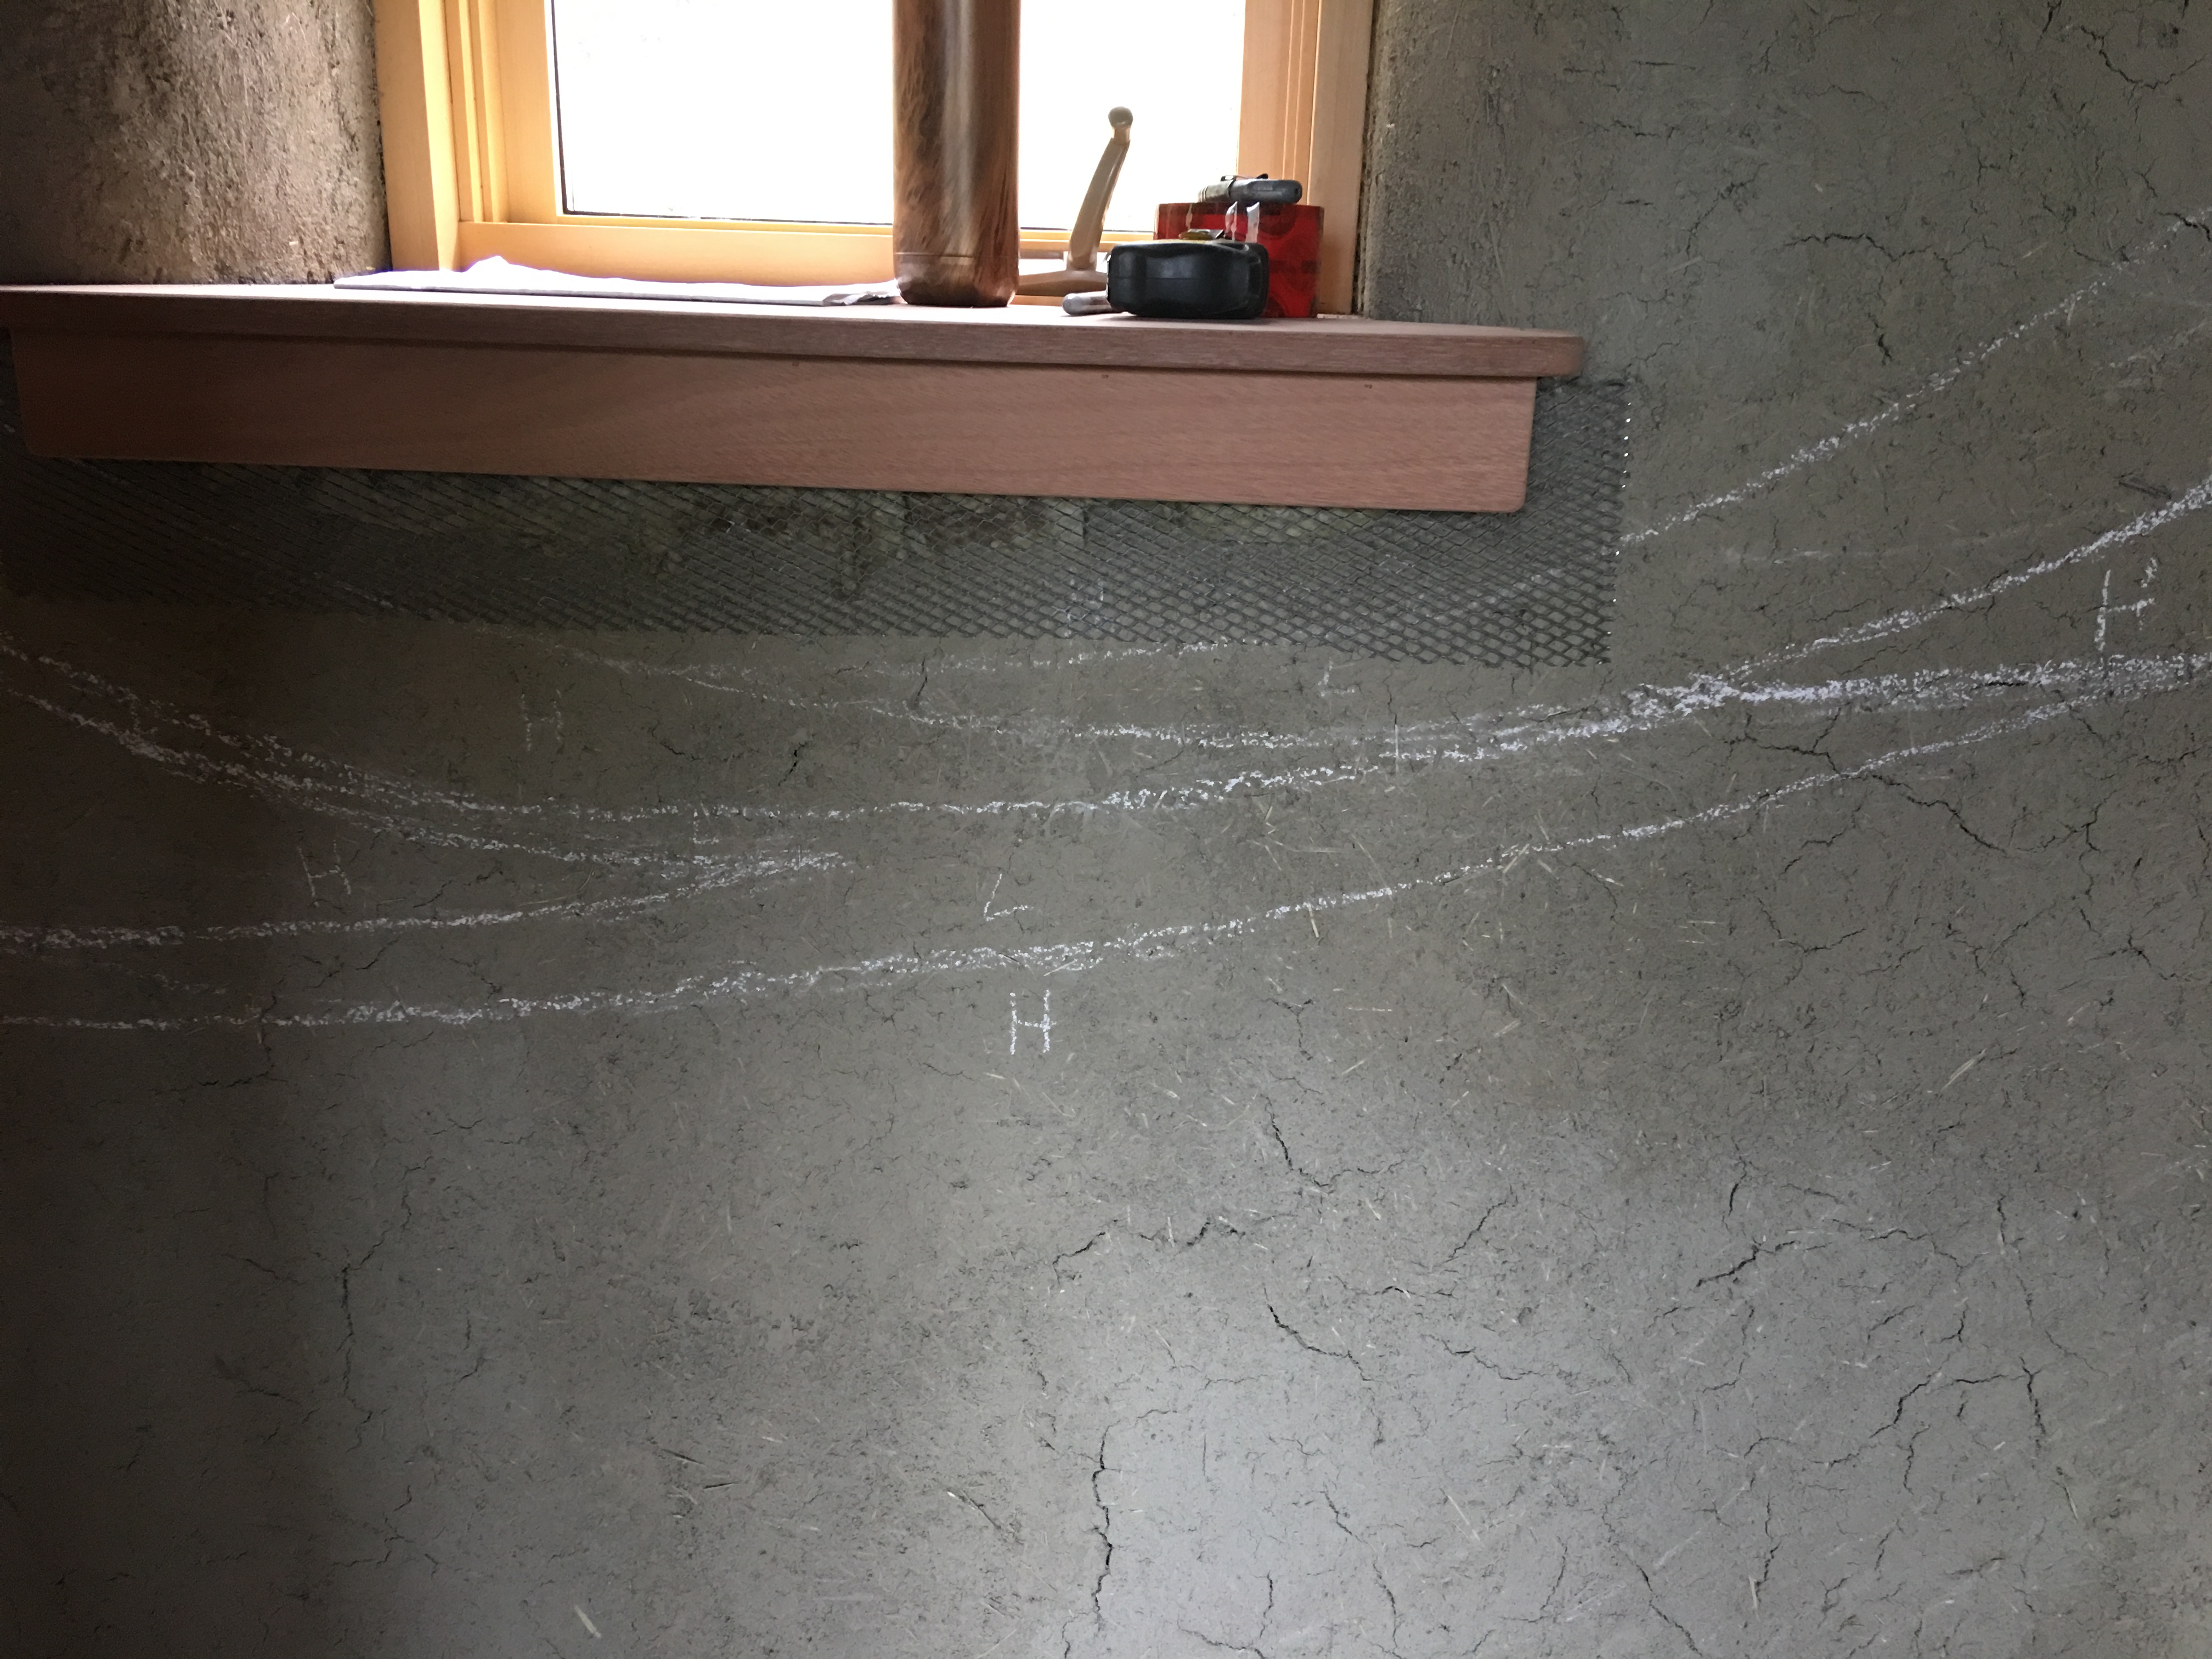
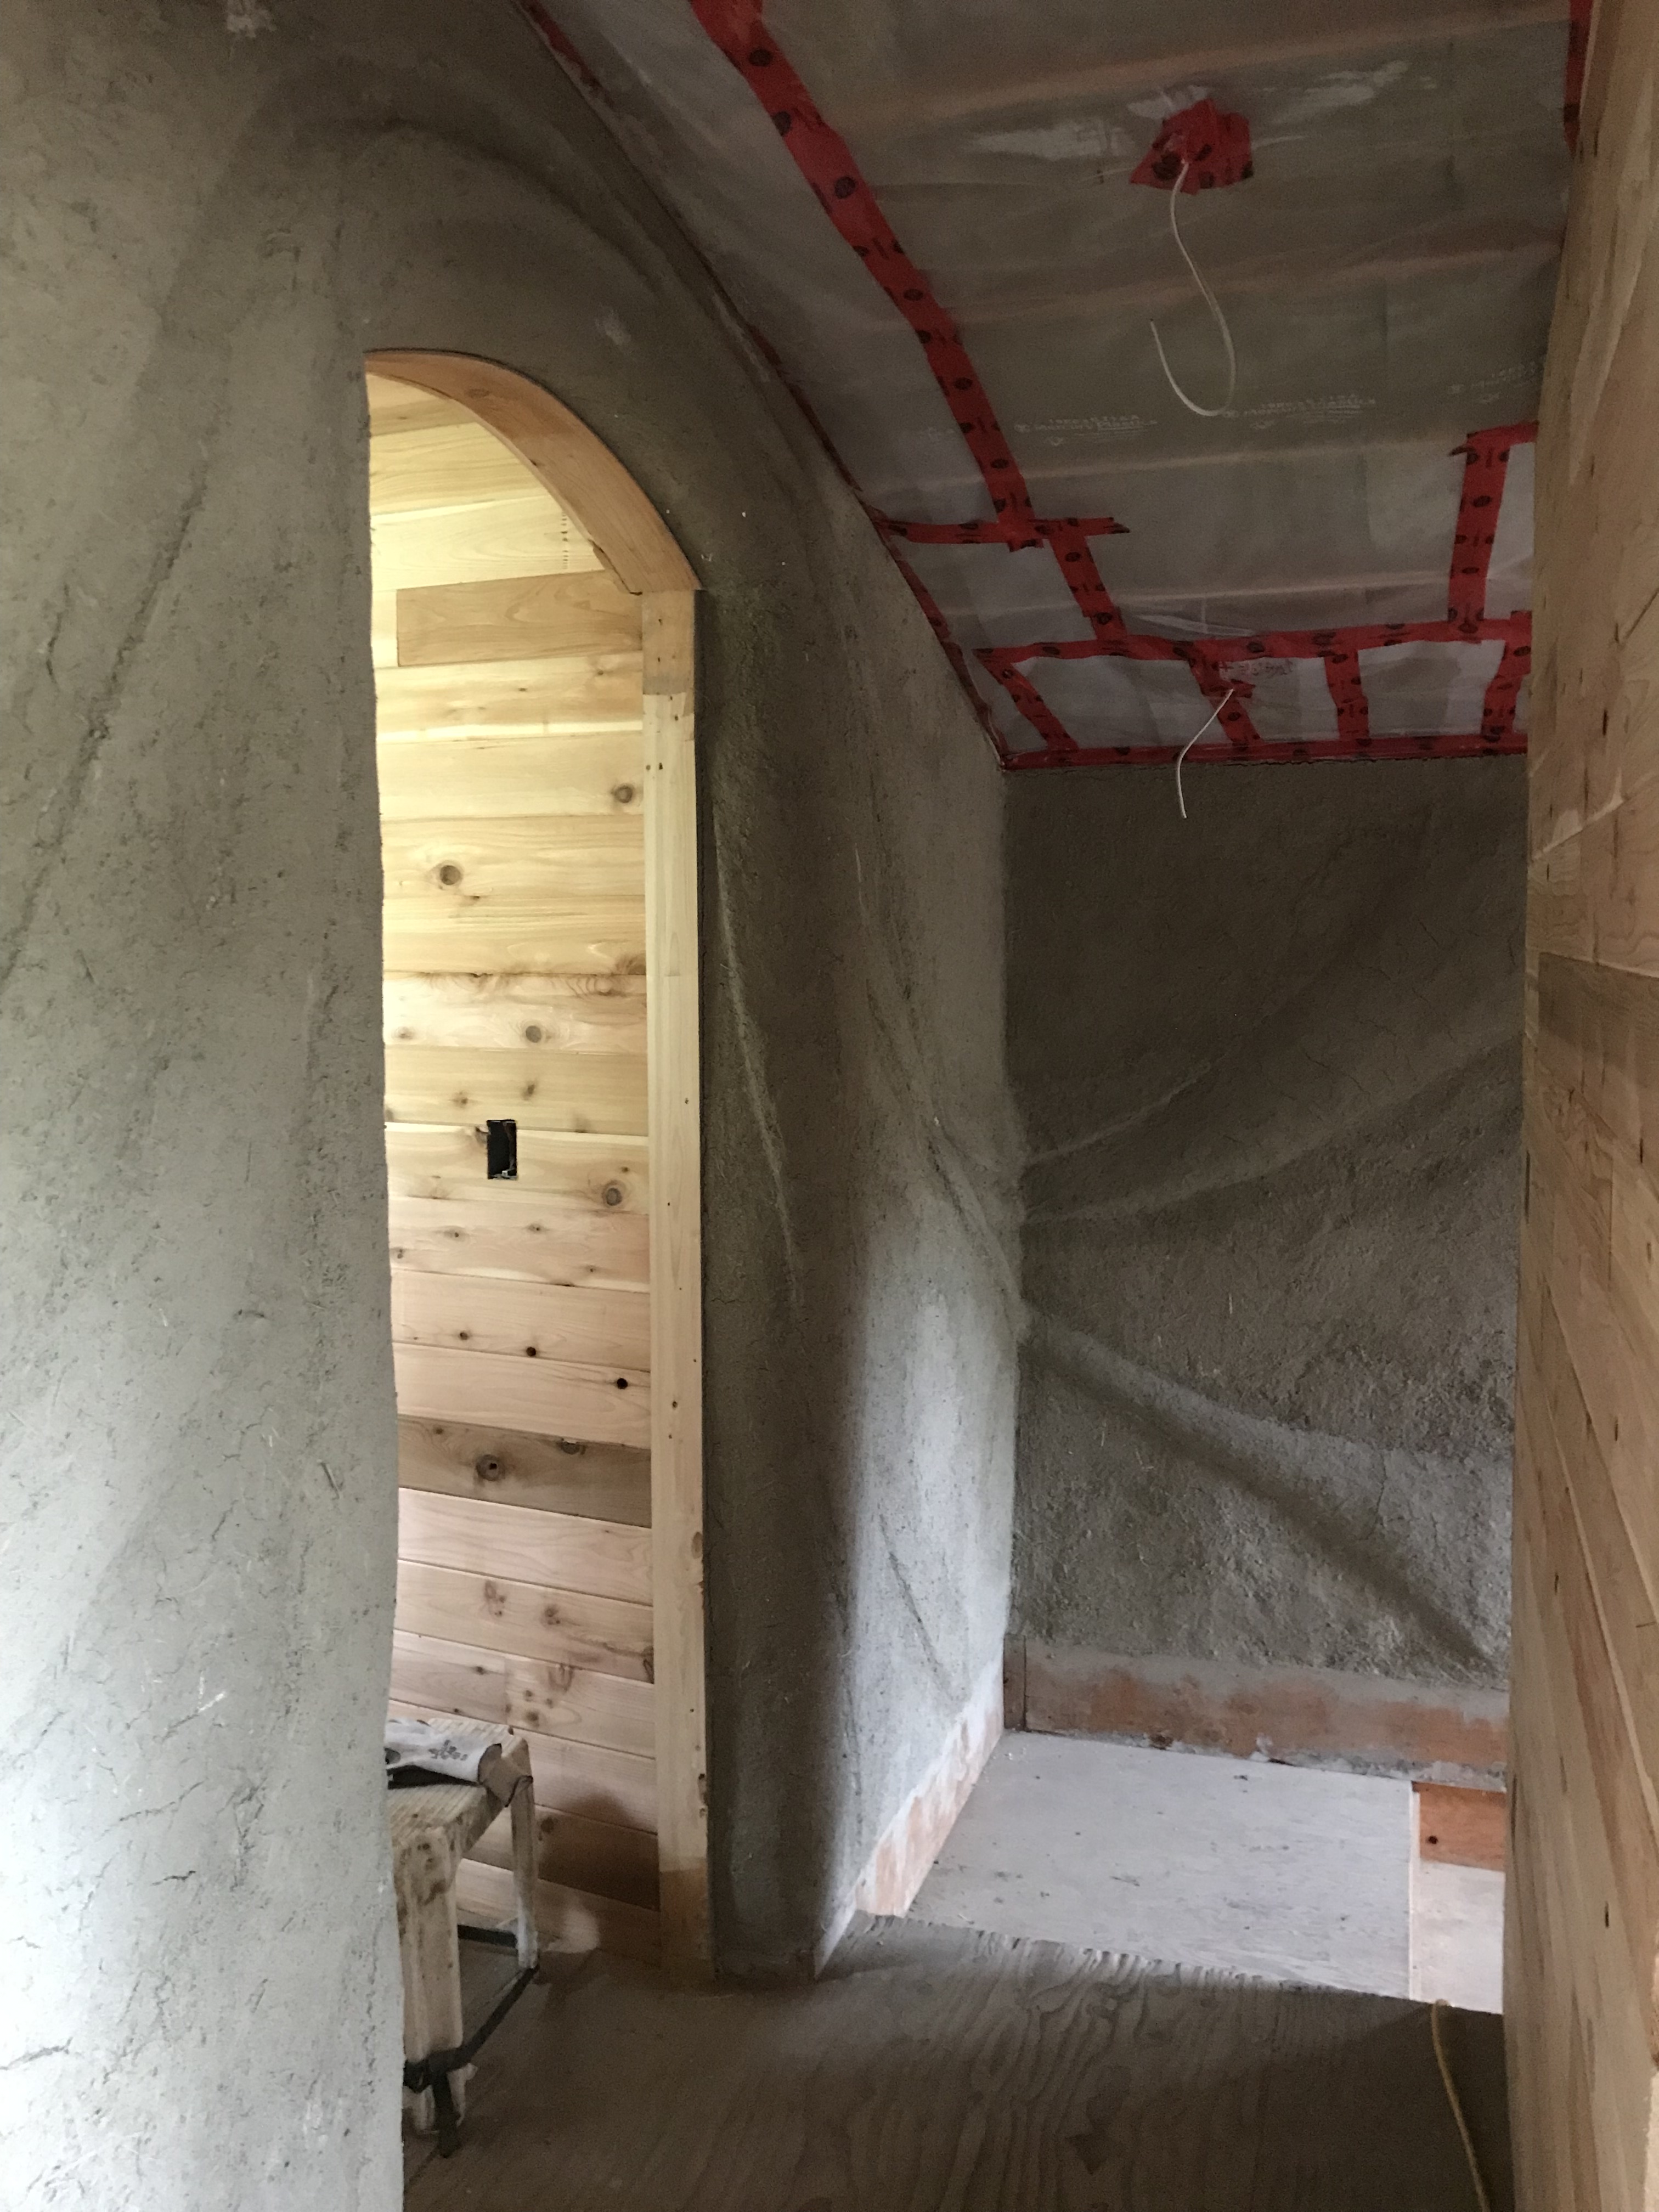
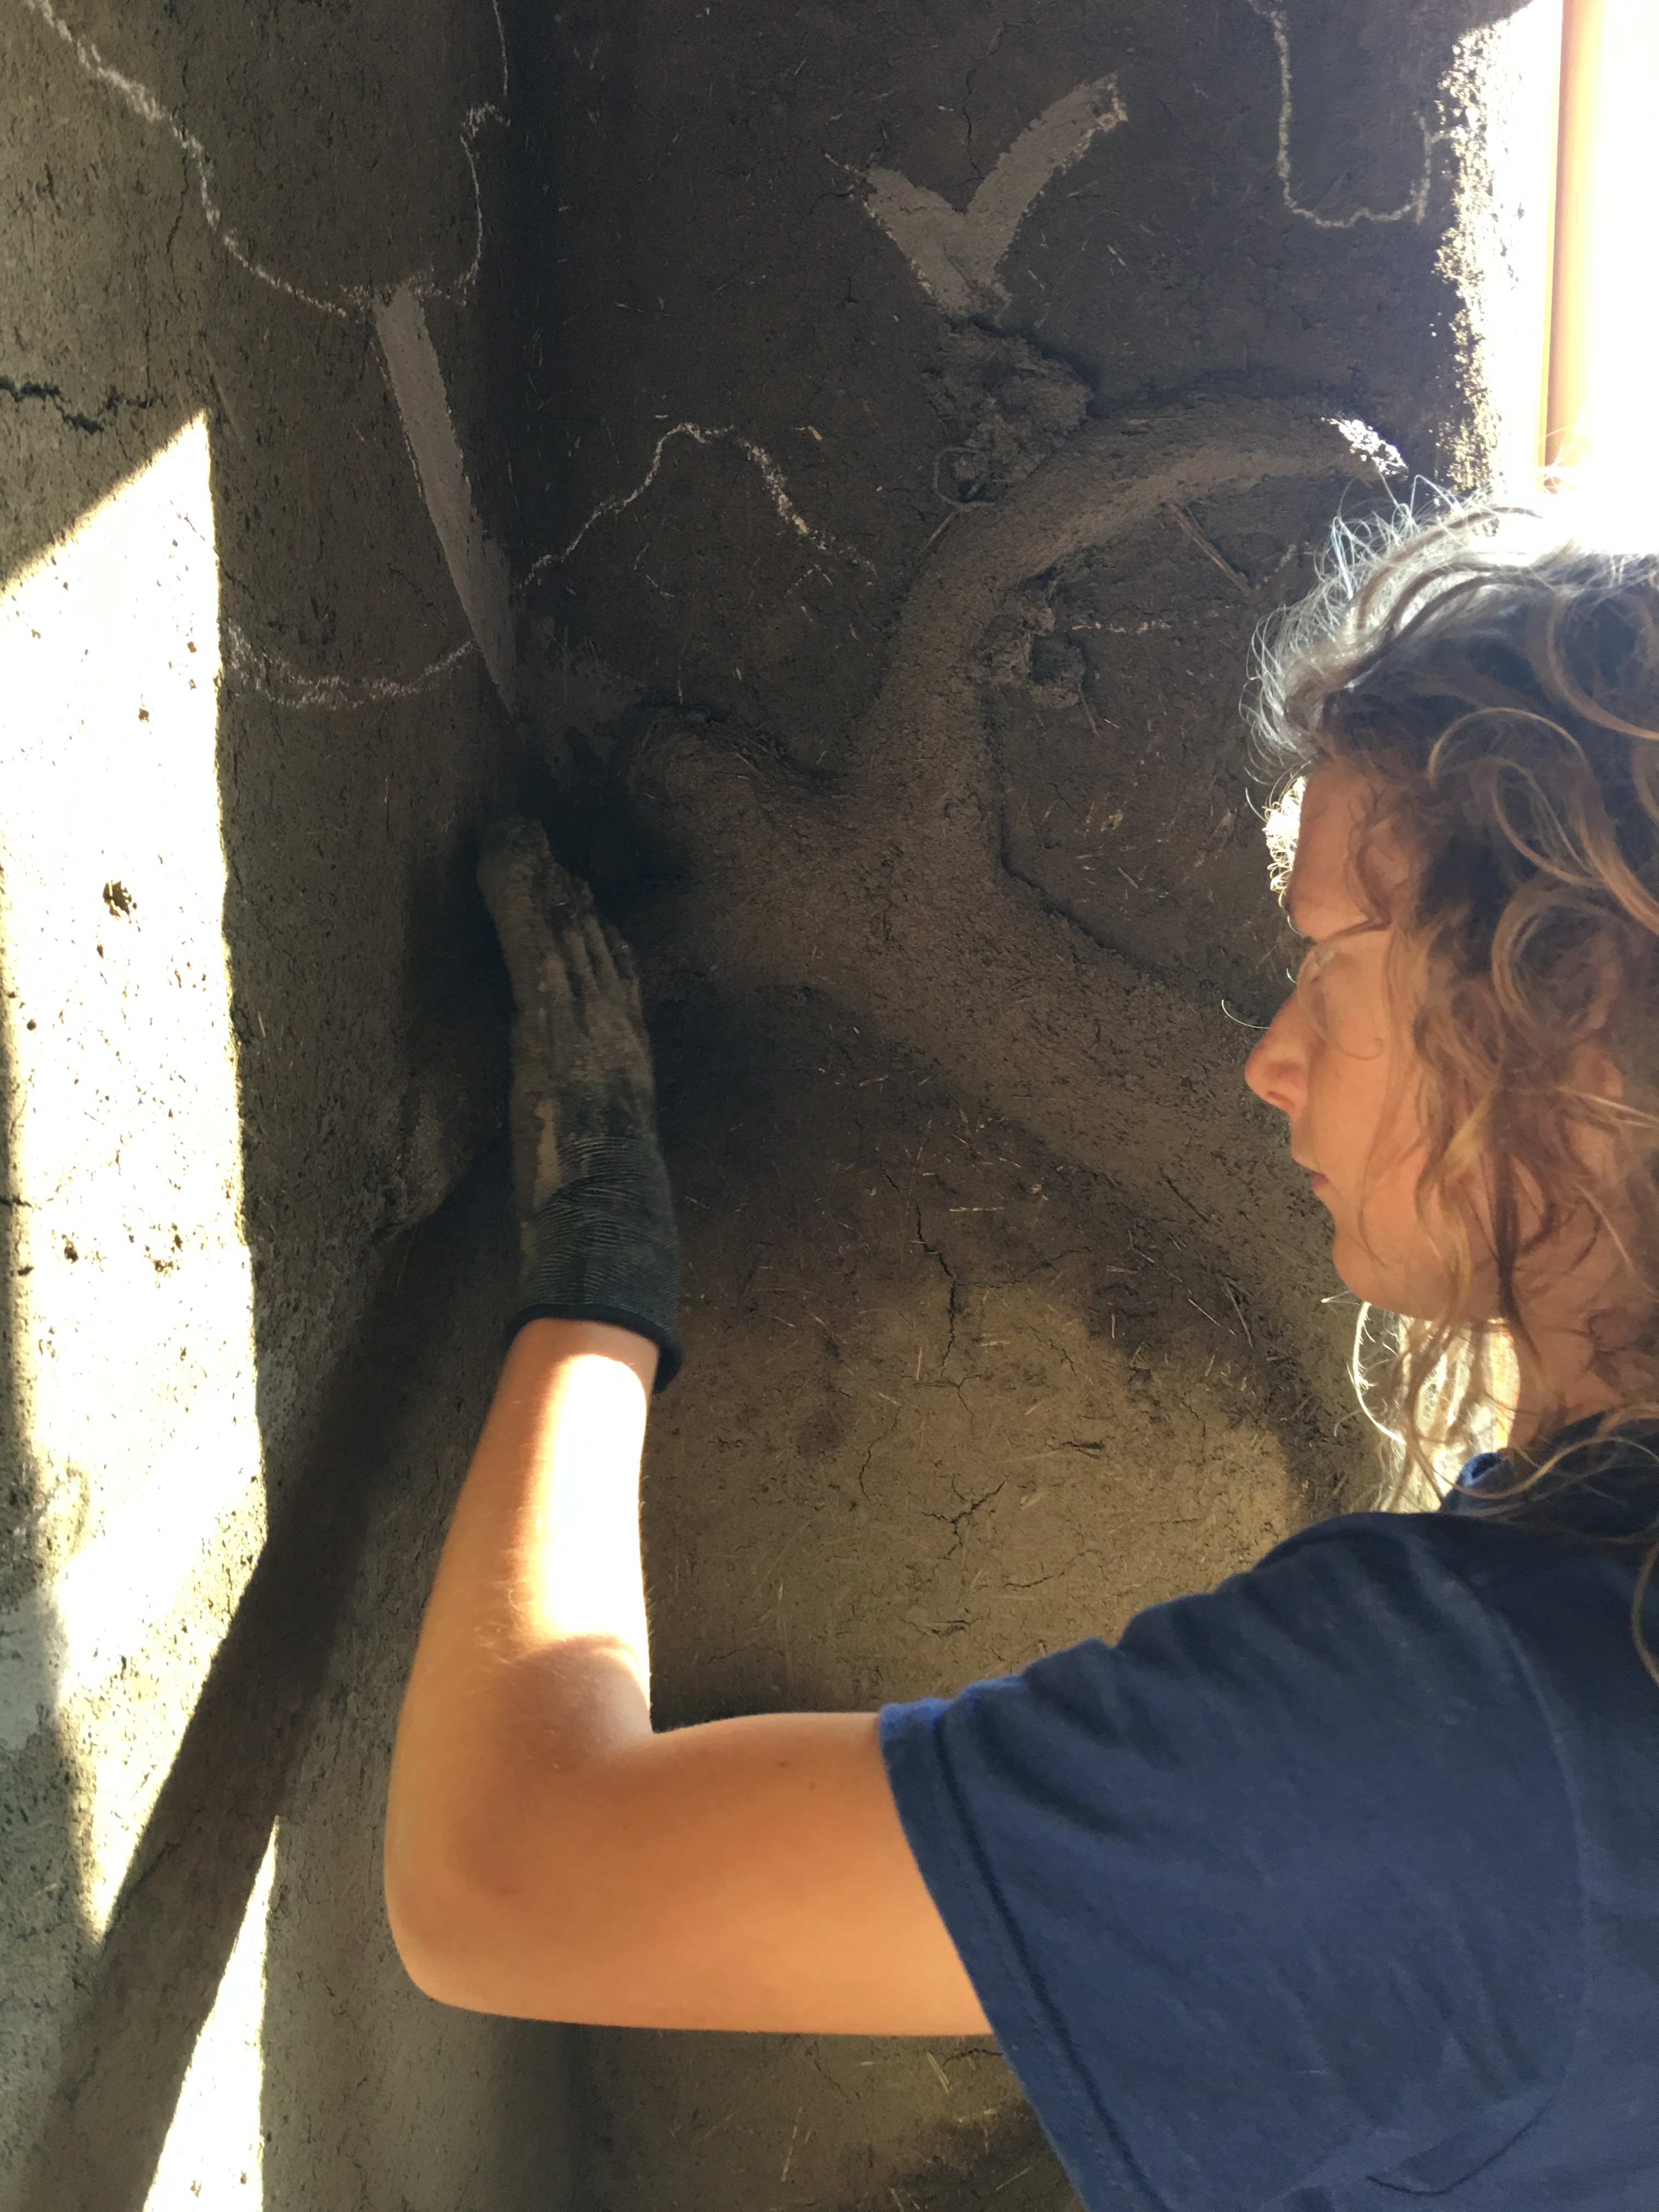
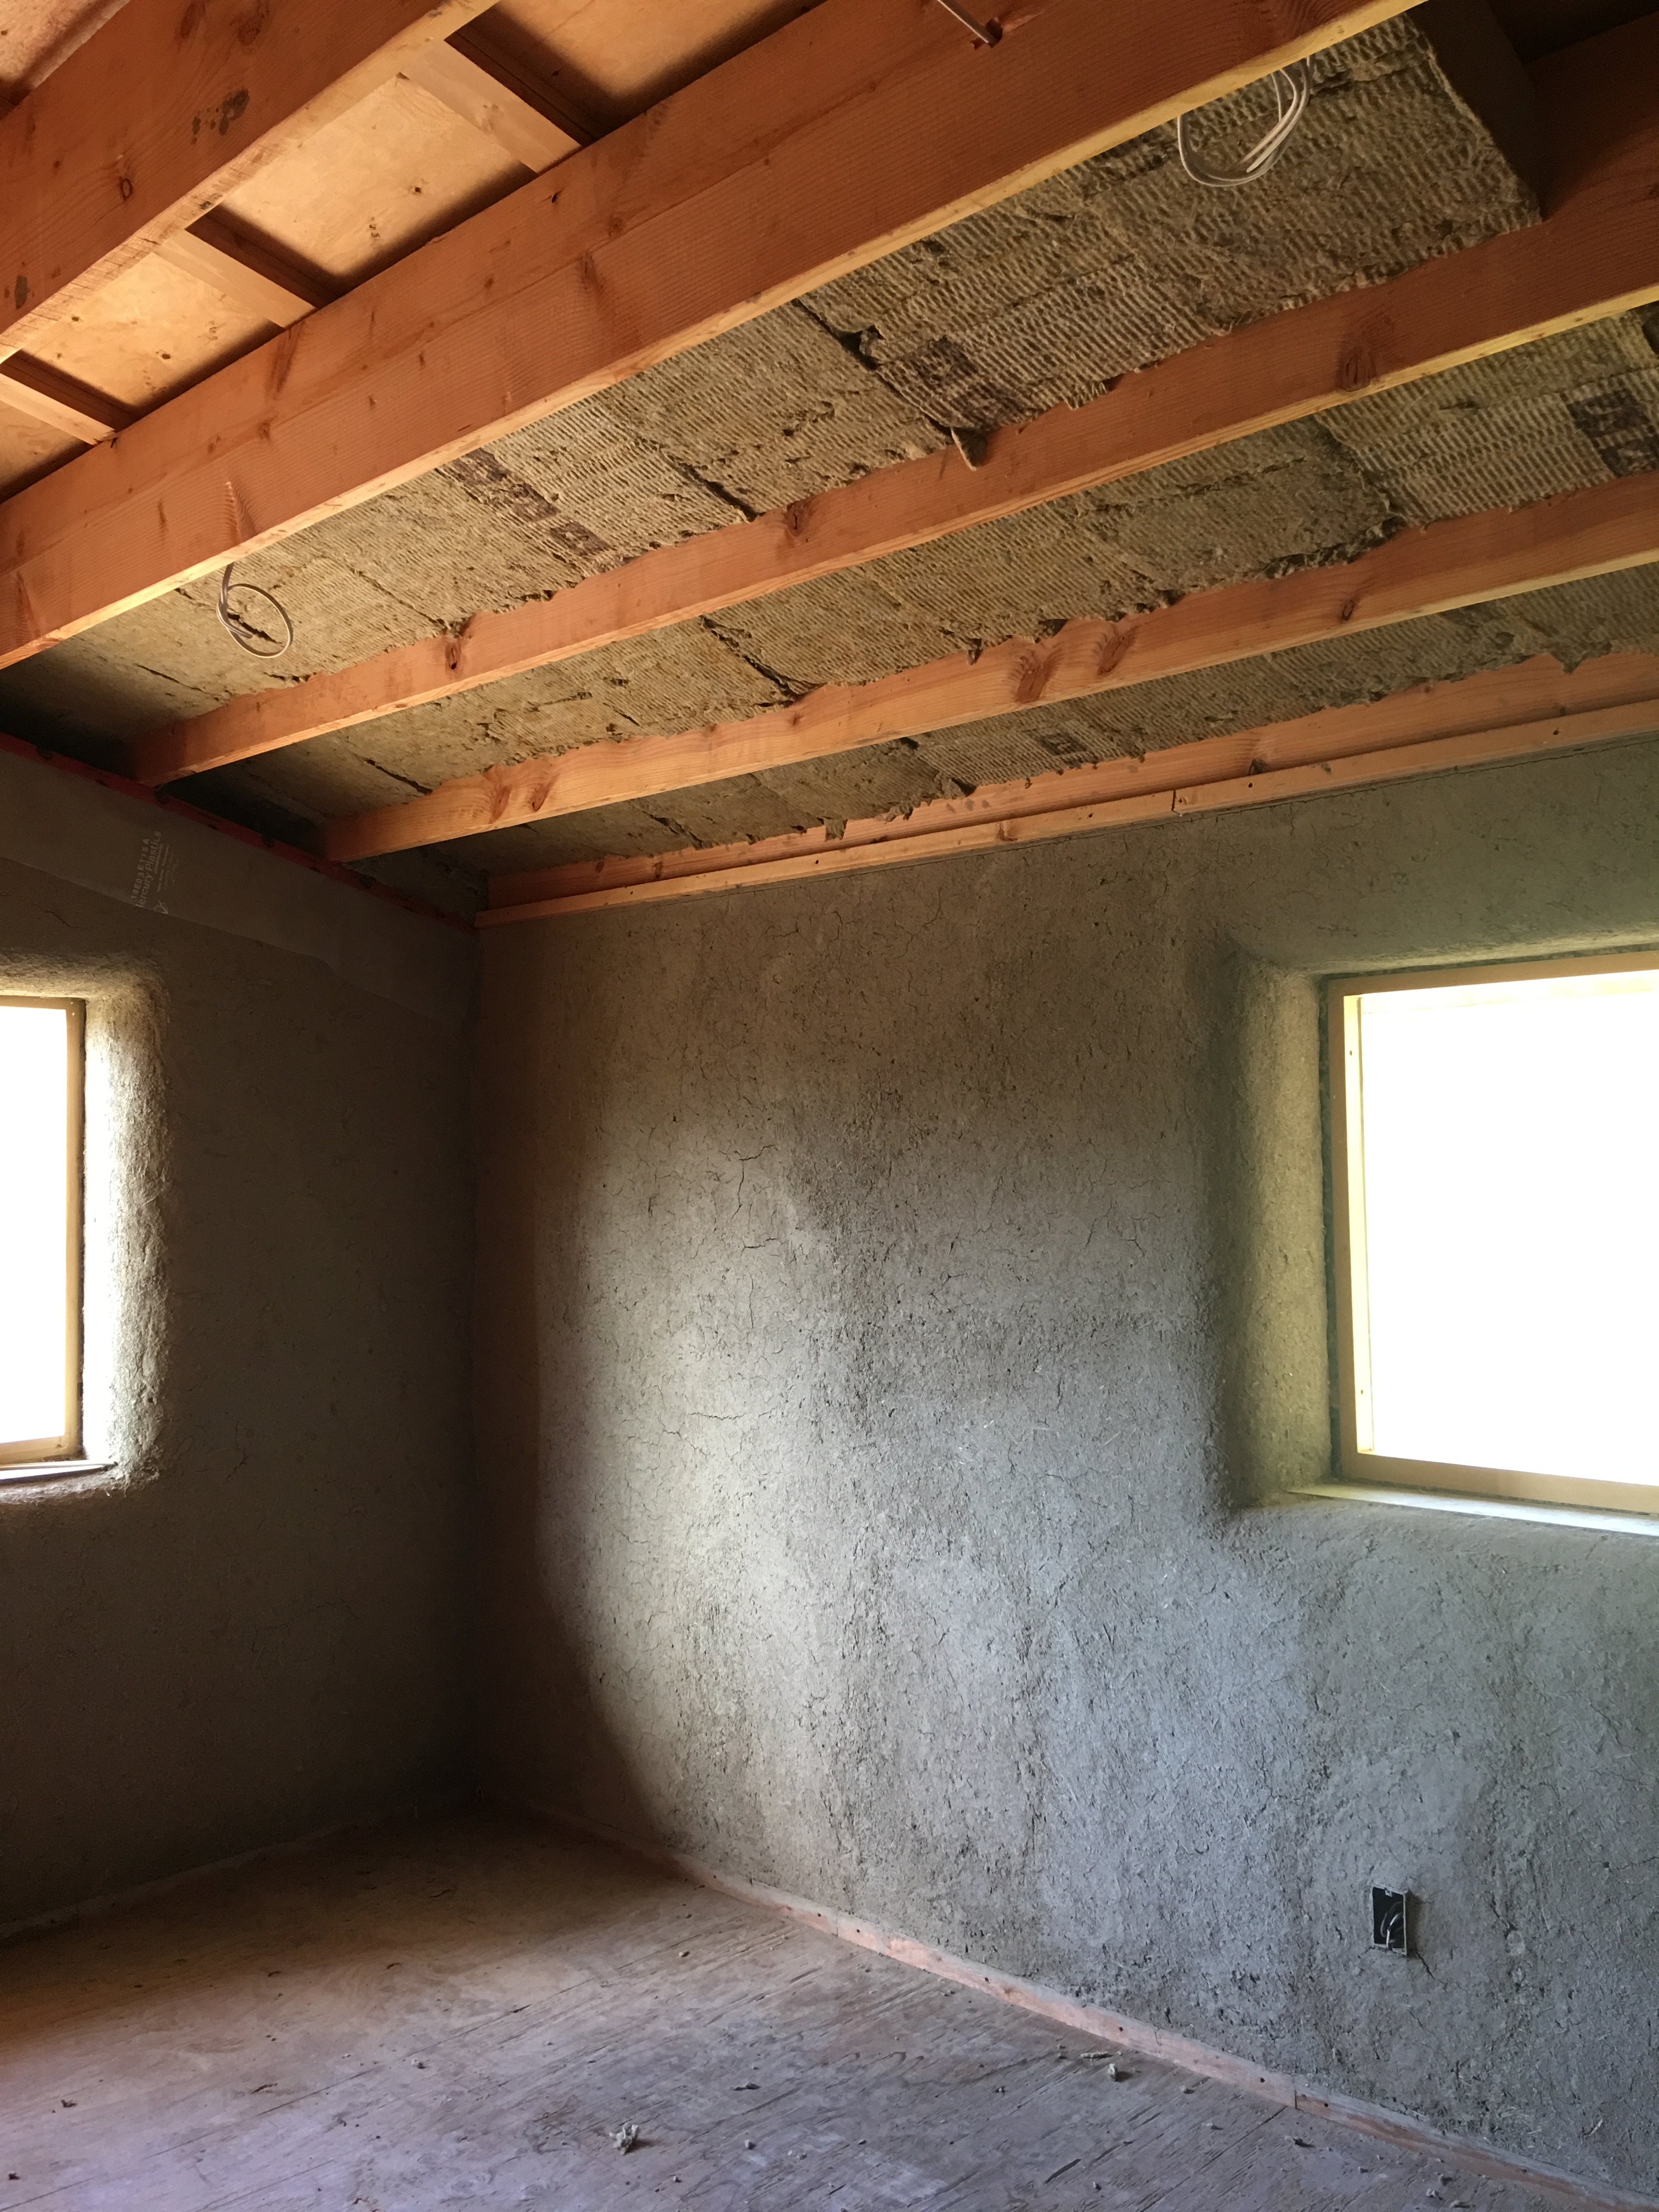
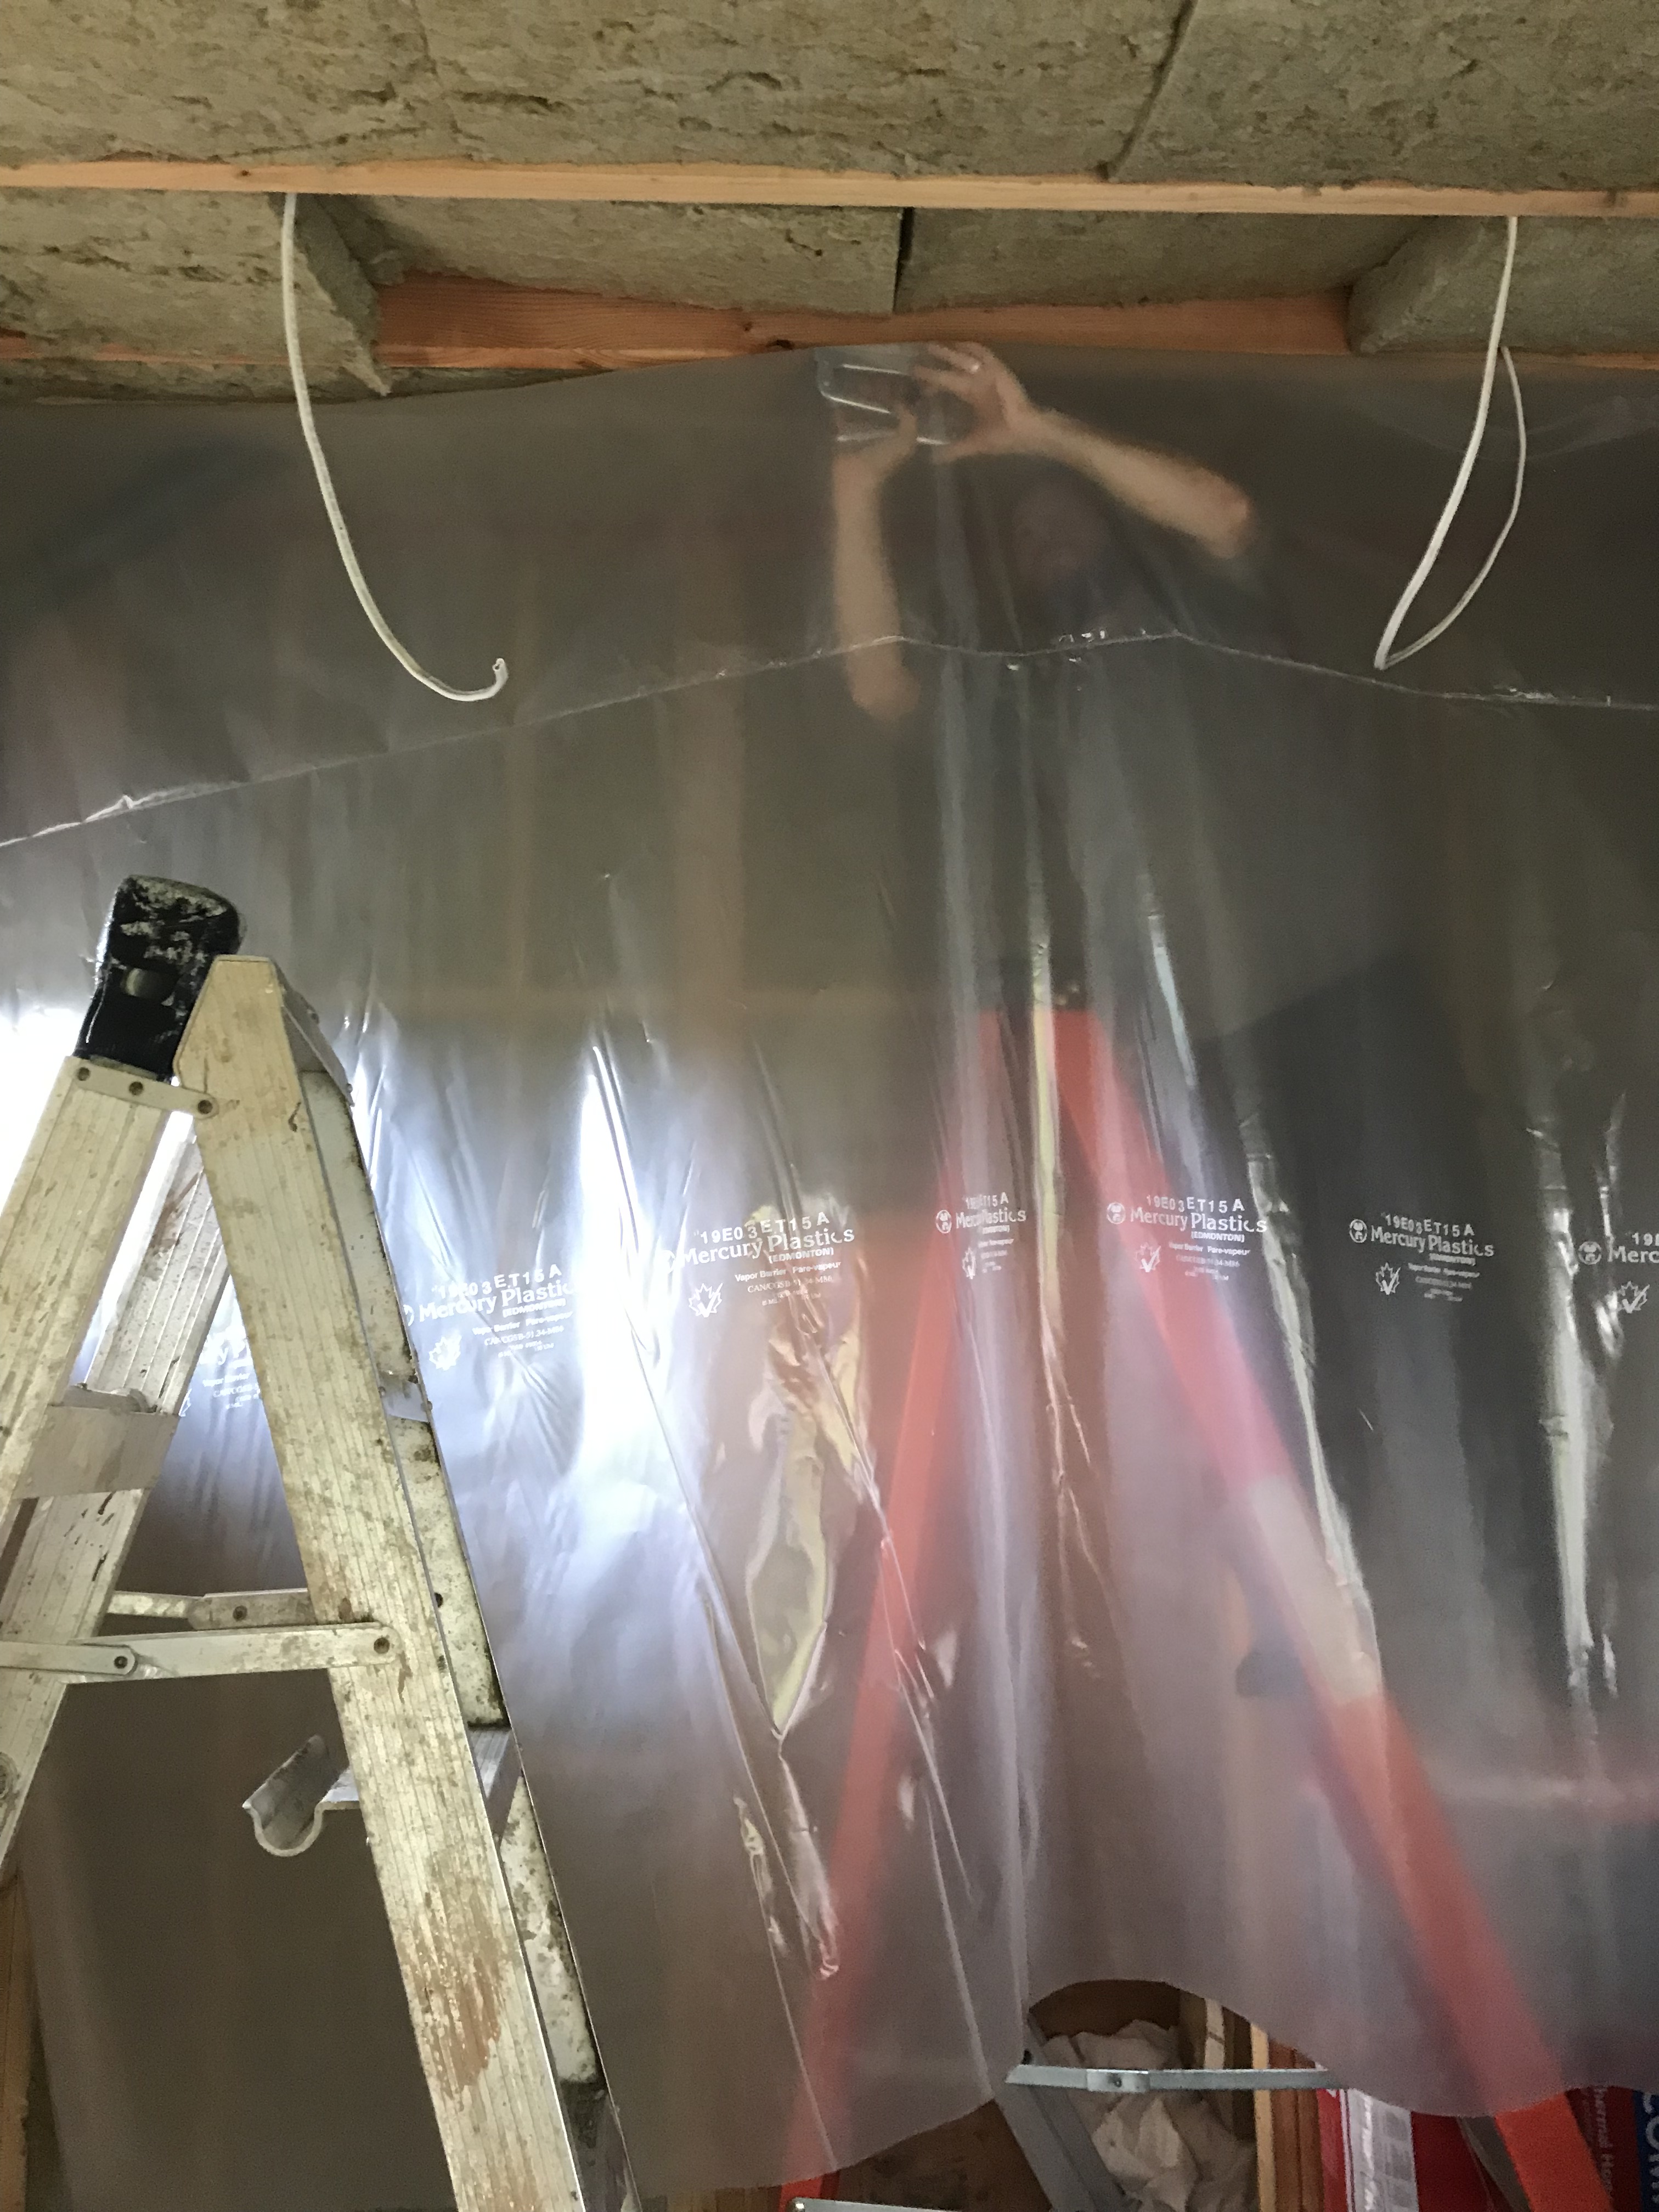
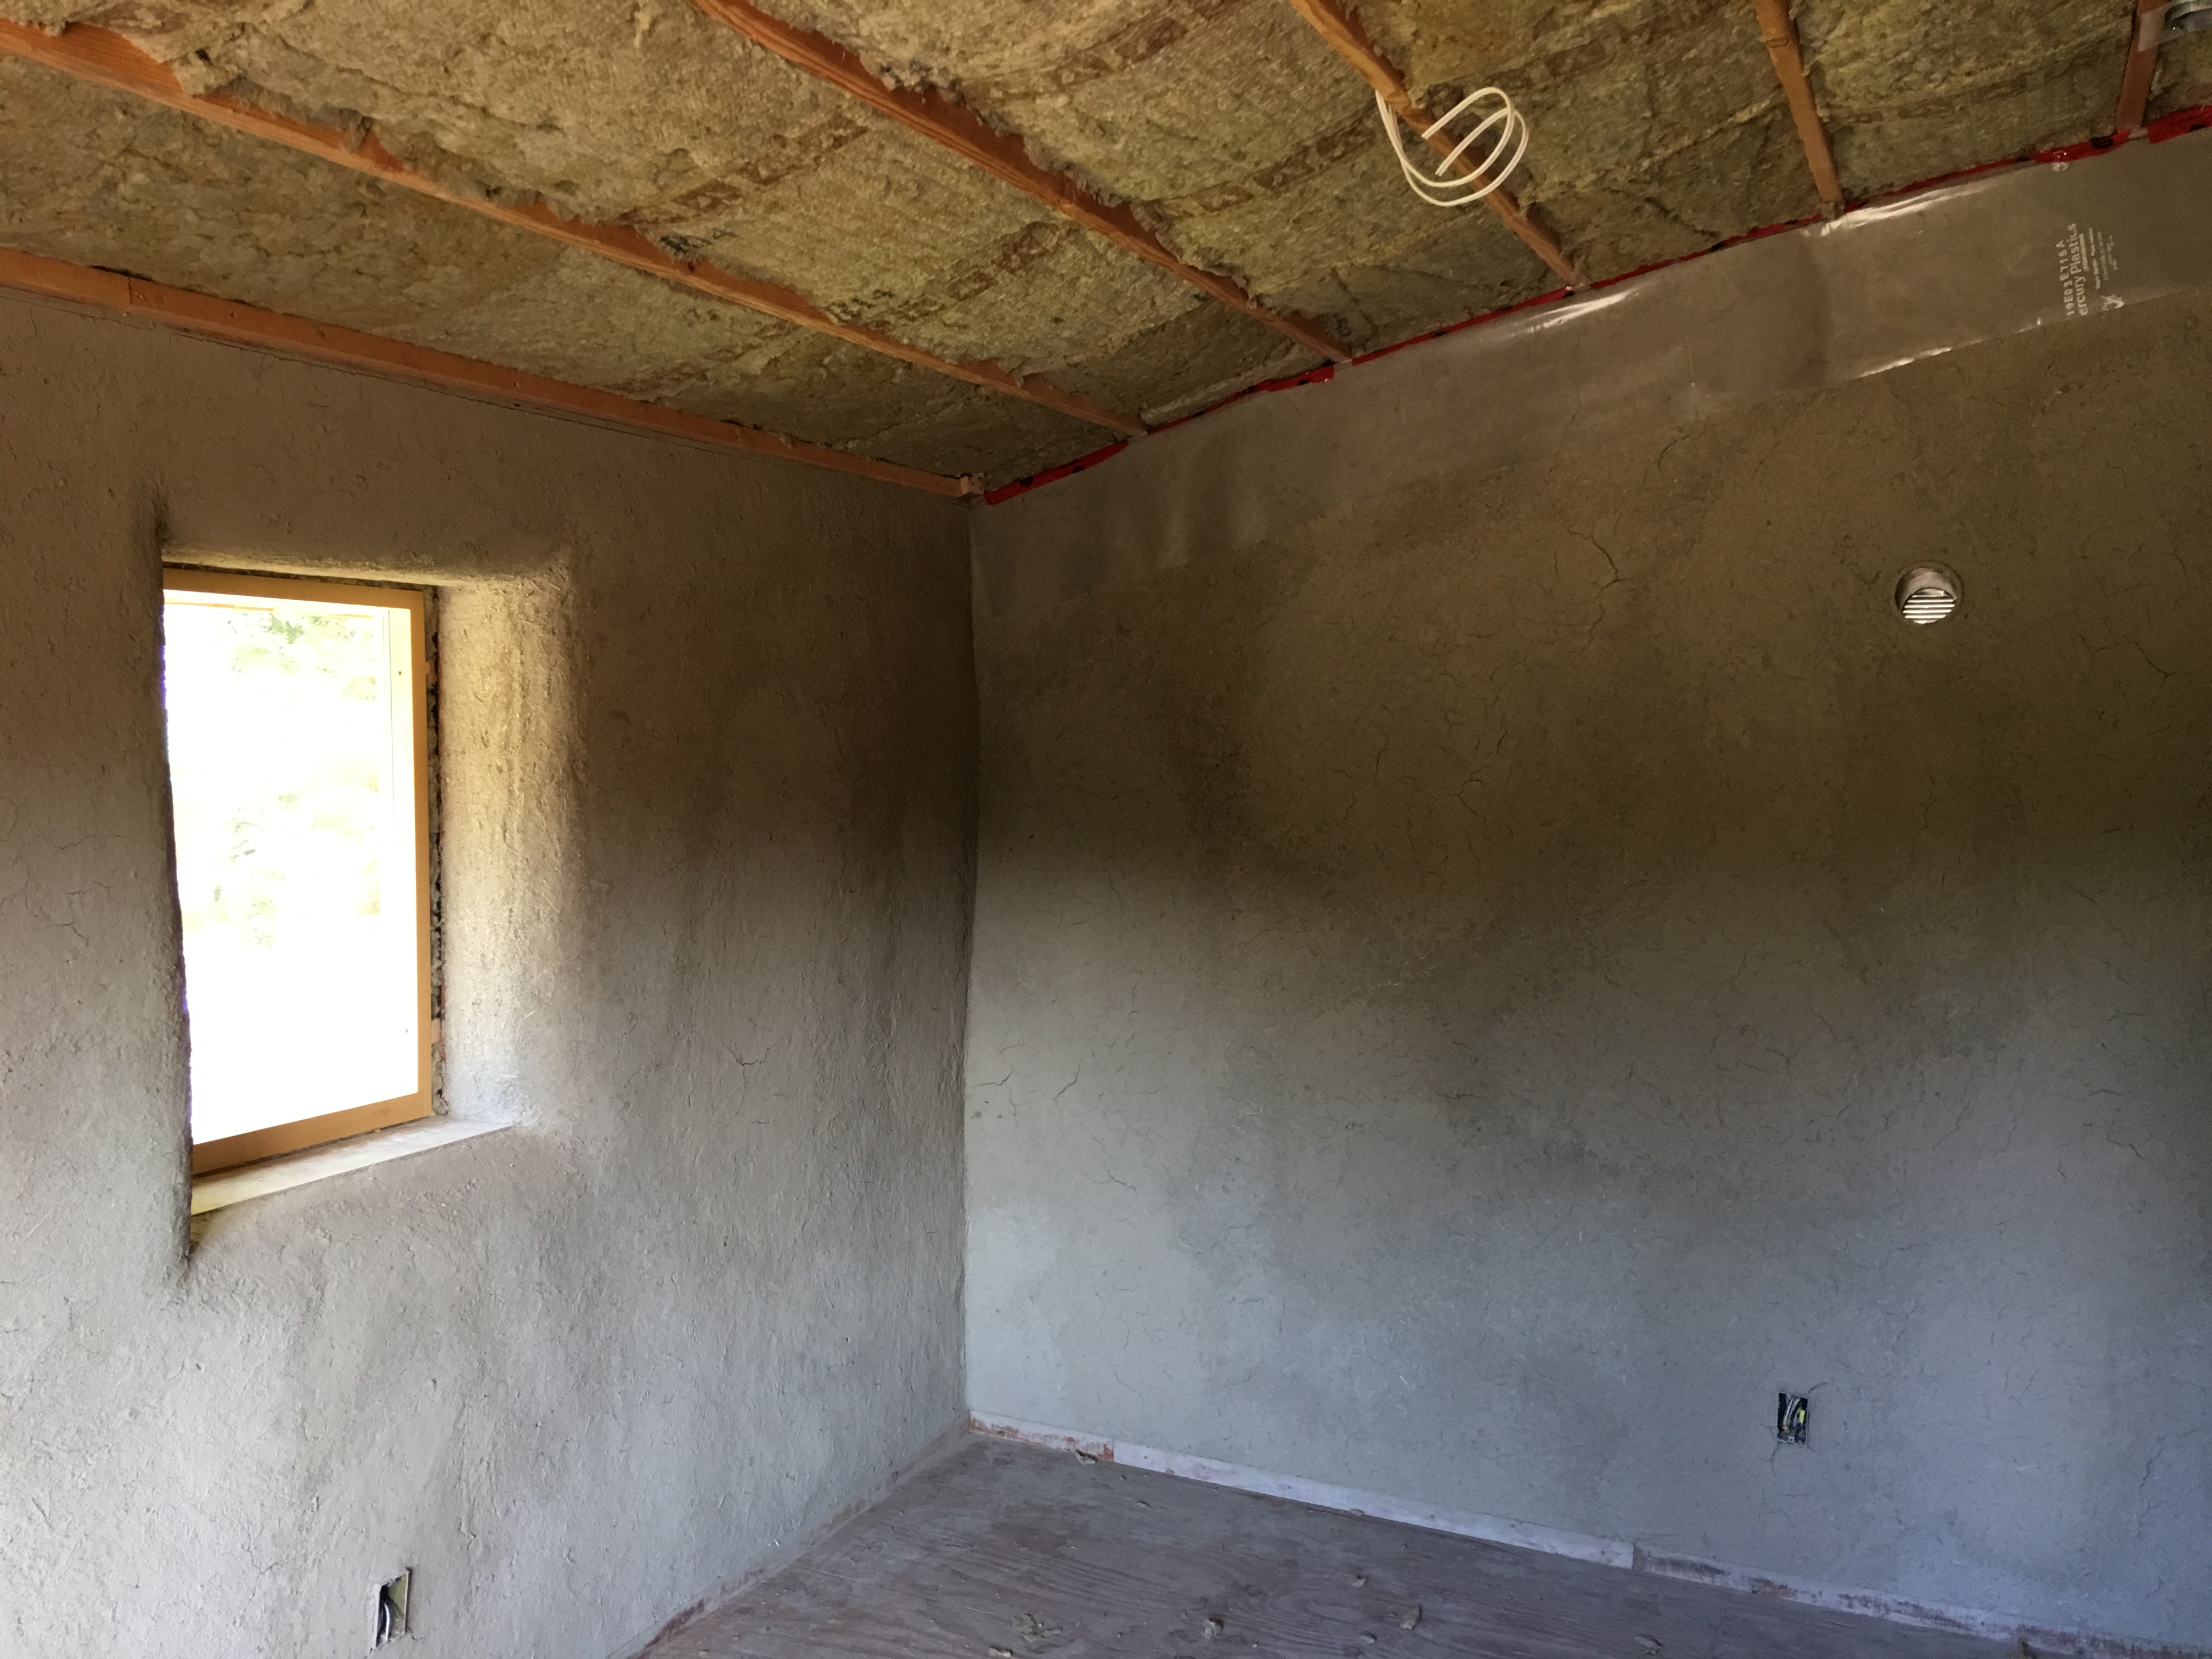
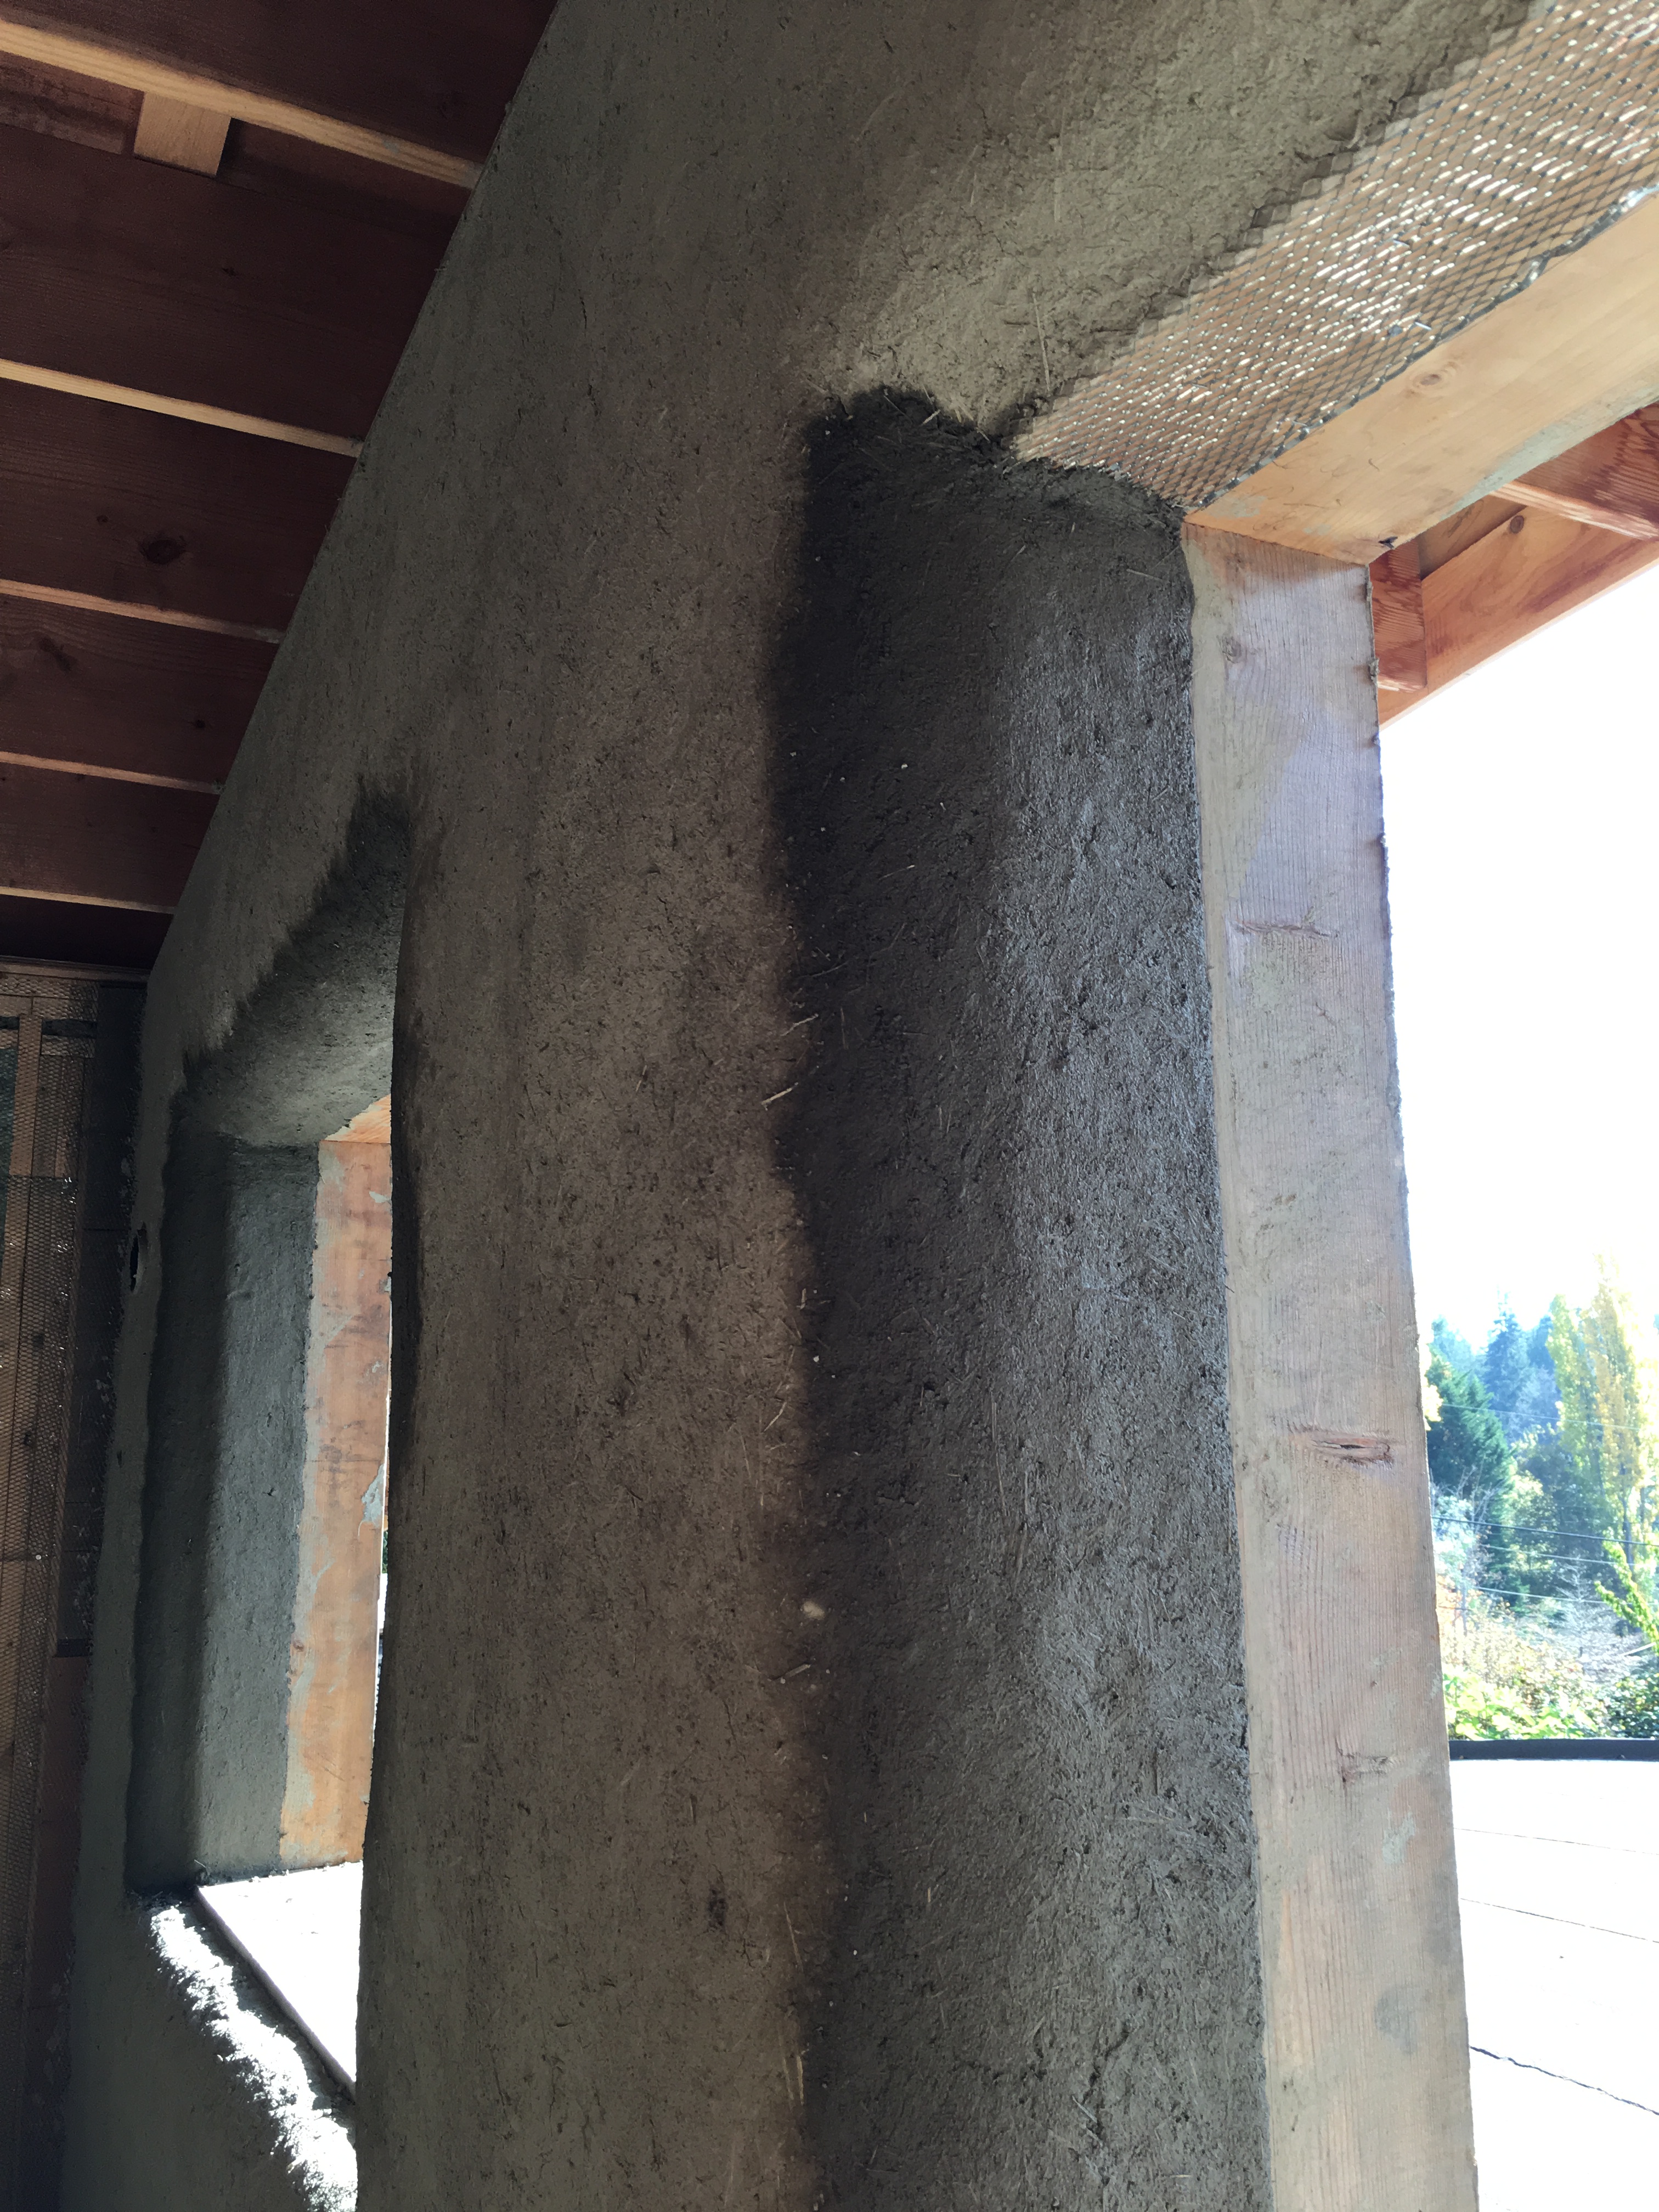
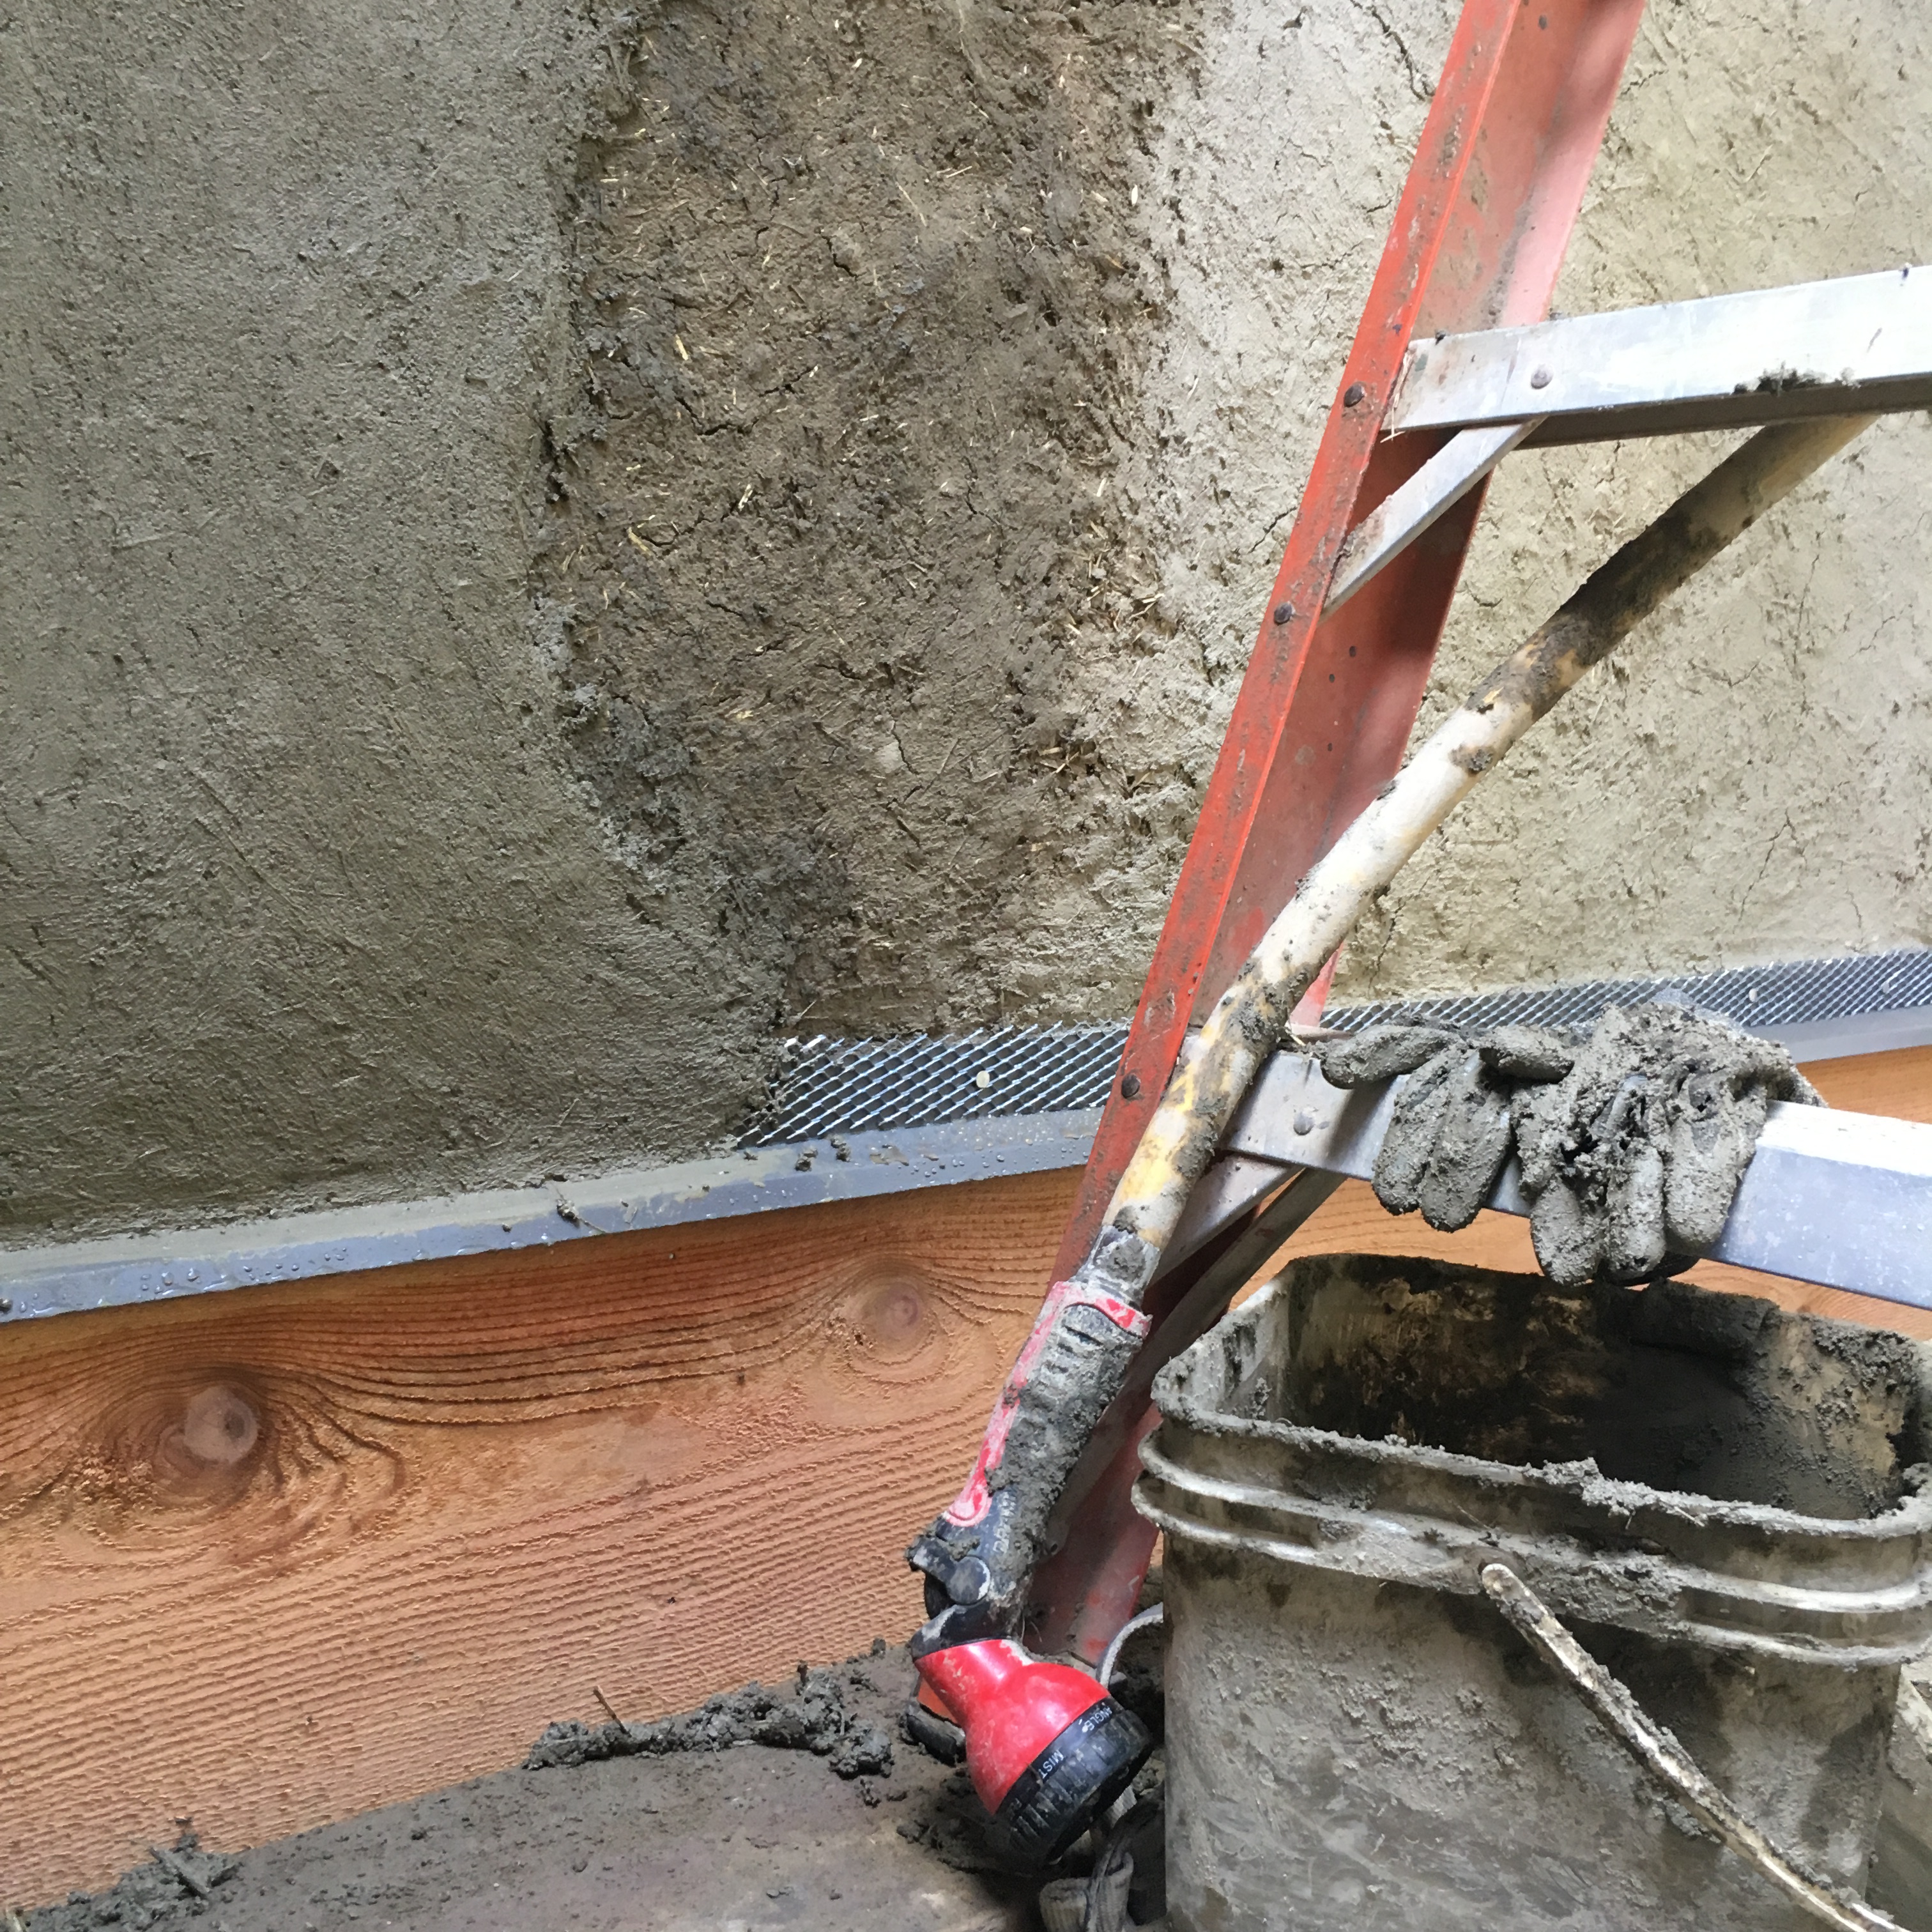
The final plaster is one of the last things to be done. Tracy and I spent one lovely day mixing a small batch of natural clay plaster, the same as in all the rest of the house, and did the bathroom and the mud room. Little by little, our slow house building project was coming together.

The bathroom counter and drawers were built with the aid of our carpenter friend Pete, who also did all the kitchen units. We used yellow cedar for the frames (from the material left over for the windows) with the same blue and grey cedar inside them, and the green frog handles were purchased 5 years ago from the clearance bin at Lee Valley. At the time, we made a very imagined estimate of how many handles we might need for all the doors and cupboards in the house. We were one short. Luckily, the clearance bin still had frogs.

The bathroom really seems to be a small story full of serendipity, friendship, patience, salvaging, flexibility, and persistence. We didn’t have everything figured out and planned ahead of time. We found what we needed and made it work. We stayed open to change. We were not fixed on a certain outcome. Materials showed up, sometimes from over many many years. The bathroom has become my favourite room, especially in the morning with the main window on the eastern side.

*One thing I highly recommend for the bathroom- a bidet! We purchased a simple add-on bidet (Tushy!) and absolutely love it. Wayyyyy less toilet paper which is such a bonus for the septic system. Also for the trees. We use pieces of cloth for drying and just wash them.

Final Clay Plaster, Part 1

In January of 2020 we made a huge push to complete the middle floor of the addition, which are the bedrooms, hallway, and the connecting passage from the existing house. After finishing the ceiling and floors, we needed to complete the final clay plaster on the walls before we could build the closets and shelves and move in. In retrospect, moving into long awaited personal space a month before we were all ordered to stay home was a serious blessing. Our kids were now in grades 9 and 12 and completing their school year at home, so providing some study and private space was an immense step in handling the pandemic.

I have already described the details of mixing and applying clay plaster back in Sept 2011, when we completed the first half of the straw bale house~ read through Final Plastering for all those details. We used the same recipe, did the same procedure for colour sampling, and plastered alongside our friend and mentor Tracy Calvert once again.

We mixed up the estimated amount of plaster needed in 5 gallon buckets. The next day we started with the hallway, which we wanted to leave uncoloured and as bright as possible since it runs down the north side of the bedrooms. Working around all the swoopy sculpture definitely takes up more time! Tracy and I did the plastering, while Colin looked after keeping the plaster mixed and refilled into our work buckets, and doing the sponging and burnishing as the plaster dried slowly.

It took us one whole day to do the hallway, and two shorter days for each of the bedrooms. It is important to remember that the amount of open, large wall space is not so much a factor of how long it will take to complete, but rather the amount of windows, edges, and sculpture. Those are the features that slow down the process and thus require time management considerations of each person’s role, as the working areas of plaster need to be monitored for dryness so the completed area will have a uniform, continuous surface. It is also good to keep in mind the changes in colour as the plaster dries, so attempting to fix up areas that have already set will result in colour patchiness. We are very happy with these walls, the hallway is indeed nice and bright and the warm orange tones in the bedrooms are cozy.

We are looking forwards to completing the last section of the addition this year!

Finishing with Fir Flooring

We decided that fir flooring would be the best material to use for the mid-floor bedrooms and the staircases that lead up to them as well as up to the top floor (the existing first half). We found 600 square feet of locally milled fir, 3/4inch by 5inch t&g, in ten foot lengths. It was very blonde, which was the only thing we felt we wanted to change.

We found an interesting technique on the internet which involved soaking steel wool in vinegar for awhile, and then using the strained vinegar as a stain on the fir. The steel turns the vinegar a deep red or brown colour, depending on how long it is left soaking. The vinegar then reacts with the tanins of the wood, turning it a varying shade of grey, brown, or red. The video we watched (and we found many!) showed comparisons of the vinegar mix on many different types of wood, which had a large variety of resulting colours.

We did a test patch after a week of soaking, and then again after another week as we wanted it to be darker. We decided in fact to do two coats with the vinegar. Coating the boards after with an oil stain also made the vinegar stain pop out and deepen the tones even more, and we did two coats with the oil stain as well. I did a lot of moving these boards around, using the open rafters of the ceilings as as place to lean many rows of boards in a organized way, trying to keep track of which ones had been stained once or twice!

The vinegar stain was a bit like a magic marker- it took about 20 minutes for the reaction to occur and the wood to deepen in colour.

It didn’t take too long to lay them down. I think we may have borrowed a floor stapler to make it even easier. The stairs were definitely a lot more work. Colin pre-glued up the stair treads with an unstained fir nosing, and then he glued up the rises (about 7 inches tall) and then glued them all down over the rough plywood stairs. The yellow fir nosing really helps with defining the edge of the stair.

I like how the darker tone makes the floor look old, and is also a nice contrast to the brightness of the ceiling and wall cedar which is quite yellow. We were so happy to find such a simple method of staining the fir.

Internal Shear- T&G Cedar Walls

All of the internal walls of our straw bale house are shear walls- meaning that they are constructed to be structural panels that can resist lateral forces acting on them. Lateral forces are those that are parallel to the plane of the wall, and are typically wind and seismic loads. In simple terms, lateral forces could push over parallel structural panels of a building were it not for perpendicular shear walls keeping them upright. In our case, the external structure of the 2×4 framing with bales stacked as infill for the walls, does not meet the structural requirements that protect against racking, particularly as we live in a high seismic event zone. Our structual engineer calculated that we needed 36feet by 8feet of shear wall, which amounted to all of the interior walls in our house. After building our walls with plywood on one side and a LOT of nails, as well as metal brackets from the foundation to the end of each wall and strapping over blocking in the ceiling rafters of the main room, we were good to go.

Mostly, these internal walls occur around the bedrooms, the utility room and staircase. The lower room of the house is basically one big open area, with shear walls separating the mudroom and utility room. We decided to buy some tongue and groove cedar and cover all the plywood with it, so we found a whole lift of 5inch wide cedar that was rather rough, meaning lots of knots (and knot holes) cracks, scrapes, scuff marks, discoloration, but in a general state of usability and affordable!

For the upstairs bedroom/hallway zone we pulled the best of the pile and used a clear natural stain product called Osmo as a finish. Luckily, with the solid plywood wall it really didn’t matter about the length of the wood. We finished the passage that connects to the upper house, which then took on a bit of a sauna feel, seeing as the ceiling is also cedar.

One of my original ideas for covering these walls was to use old pallet wood, and so to create a rustic, upcycled look by painting or colour staining the pallet material. This seemed like a good cheap option but ultimately we decided that it would be way too much work for the amount of wall we needed to cover. However I was still interested in adding a coloured stain to the cedar, which was all rather rough looking anyways. I experimented with creating multiple colour tones using blue, white, and grey water based stains from Saman, which was really easy to use and gave a nice palette. I prestained a whole bunch of boards, finished them afterwards with the same Osmo natural oil stain, and then assembled them on the walls from the mudroom, into the kitchen and then up the staircase on either side. Because the ceiling was made of uncoloured cedar, I decided to arrange the colour tones from dark at the bottom to light at the top, effectively fading into the clear boards before they hit the ceiling.

It was a fun experiment, and I think the blue, grey, and white palette creates a fun feature amoung the neutrality of the white/grey tone of the natural plaster which will cover the straw bale walls. I hadn’t really pre-thought the interior decor of this house, at least not as a priority, but as we move along into the finishing phases it is really fun to choose materials not only for their price and availability, but also for their attributes of atmosphere and tone.

We had a lot of this cedar leftover, so we also used it to finish some of the framed bathroom walls which create the toilet corner. Also, the we used it for the walls inside the utility room, which didn’t need to be beautiful, and despite the roughest boards being used in this room, looks surprisingly decent for a utility room.

Sculptural Walls

The wonderful thing about natural plaster, whether it be on a cob wall or on straw bale walls, is the potential for creative sculpture. Cob is even more so, as 3-D shaping can be accentuated into the depth of the wall, while with straw bale, the sculpture tends to be more on the surface (unless one wants to cut into the bales). In the bedrooms and the hallway, we added some sculptural elements before applying the final plaster.

In the hallway, we had rather lumpy bales, which I managed to make less lumpy with the rough coats of plaster, but there still were definite hills. Either side of the opening that leads to the upper level of the house were really rather bulgy because of the small cavity within the framing that we rather awkwardly stuffed mini-bales into. We decided to build up a kind of crossing of flowing ribbonish lines that would frame the sides of the opening and go up and over the arch we had built at the top. These lines also widened out around the staircase landing, and down the length of the hallway. We drew lines on the wall with chalk and then used water and some clay slip to moisten the wall before beginning to add the cob.

In the bedrooms, each of the kids wanted to design and create their own sculptures, so we have a bird above one window, and a tree in the corner of the other room. We built a small half moon shaped shelf in our room that is wide enough to hold a tea light candle.

The sculptures look so much more effective when the final plaster is done, but that will have to be another post! The additions of the sculptures definitely makes the work of the final plaster a lot slower and more tedious, but in the end, having these personal touches of creativity enhances the intimacy of the house. Too much sculpture, I think, can be visually overwhelming, so finding a balance between a nice smoothly finished wall and a specific placement of sculptural detail is good to consider. However, considering how much work it is to build a house in the first place, I think it is equally important to take the creative opportunities when they arise- and cob/natural plaster is a wonderful way to incorporate such creative moments.

Ceiling Layers

Getting the ceiling finished was the next important step, allowing for lights to be turned on so we could work past daylight hours, and enabling us to finish the walls with the final plaster. We were also keen to get the insulation above our heads as soon as possible, since the cold space of the addition was effecting our heating abilities in the finished part.

We did the same as before, adding 10 inches of rock wool insulation in two layers- R14 and then R22, giving us a total value of R36 above our heads. Since the strawbale walls are somewhere around R35-40, it made sense to match that in the ceiling, even though it is way above code for this area, is twice as much work to install, and ups the cost of the insulation dramatically. We did the same in the first build and are incredibly happy with the heating and cooling effect of the high insulation.

Because of the changing angles of the rafters, pieces needed to be cut on varying matching angles to stay held in place. It is not a pleasant job, with the configuring of ladders and the rub of insulation across one’s head and face, but at least the rock wool is less irritating than fibreglass, and eventually it gets done and then it’s… done!!

Covering the whole ceiling with the vapour barrier afterwards is way better as a two person job. Crinkled and oddly stapled plastic is just annoying.

We had acquired (for a fairly cheap price) 5inch wide tongue and groove cedar in 10 foot lengths, which needed to be stained previous to being installed- we used a natural product called Osmo which is a Geman product of natural oils and waxes. The wood is quite varied in colour tone and has a fair amount of knots, but none the less is a beautiful material to use and the oil stain made it even more brilliant in tone. Because our rafters run the width of the house (15feet) but curve the length of the space (40 feet) we needed to put strapping across the rafters so the ceiling boards could go up in the same direction as the rafters. Initailly we thought we could find ceiling material that would flex a bit with the curve, and so run lengthwise, but without incurring the high cost of custom milling something thin enough to bend, we had to change plans.

We had round LED lights to set into the ceiling, and of course other required things like the bathroom fan, stove fan, and smoke detectors to work around. Having the ceilings done really changed the whole space!

Windows and Doors

Installing the windows and doors is a major step of the house building process. It usually arrives after a very long time of quiet and perceived inaction, when in reality, the various components are being cut, sanded, constructed, fitted to glass, glued, nailed, oiled, and dried, all in a little hide-away shop which in our case, was down the road at a friends’ house. One of our favouite windows is a double paned, bevelled glass design that has been in the collection of my father-in-law for many years. We made a yellow cedar frame for it and set it within the day bed nook on the west side of the house.

Two huge 8 foot by 4 foot double pane windows were hauled from the recesses of the workshop, where they have been moved around and stored for some 10 years. The two windows, which are fir on the inside and metal clad on the outside, had been part of an even larger array of glass, built in place (for someone else’s house) with a set of double sliding glass doors which arrived on the island with a faulty metal track. The window company that had custom made them was required to make a new set, and the offer of free windows to us was not passed up. We cut the two window panels from the array and stored them in our quiver of building supplies ever since. We essentially re-built them into the south wall with fir double french doors in between them instead of sliding doors.

Similar to our first house, we used yellow cedar for the windows from the same wood salvaging supplier on the next island over from us, and fir for the doors. The spaces in which they fit needed to be shimmed, braced, and stuffed with insulation before the trim is set in place, and the windows finally become the imbedded and framed view we imagined from the beginning.

The doors can be more complicated, with wide sills at their feet needing to be installed, catches and locks set in the correct place, weather stripping attached, and the fine art of hanging them upon their hinges can be a painstaking task of patience. However, the details eventually get attended to and the house takes on a completely different feel of shelter- with a clearly defined boundary of inside versus outside.

Creating the Living Roof

The addition of the straw bale house also has a living roof on both sections of the house. With 4 foot overhangs on the south walls and 3 feet overhangs everywhere else, the two levels of the new section total 2,000 square feet of roof over 1,100 interior square feet. Both roof lines have an element of curvature over the 25′ sections running east/west, and are otherwise flat over the 15′ depth.

We elected to go for a torch on roof underneath our soil, rather than the pond liner that we used on the first build. Over that, we laid out the vapour barrier plastic and then rolled out the drain mat. Also at some point, Colin fitted the flashing over the lip of the roof in one foot sections. We also added drain rock to the roof sections that are under the overhang, and made gravel beds around the drains that funnel into the downspouts so those areas don’t get clogged up with dirt and roots.

Next was the job of loading soil onto both levels of roof. We had our friend and neighbour come over with his excavator, and he loaded up his bucket and lifted it onto the lowest corner of the roof. More friends and neighbours then transferred buckets of soil up to the second roof, also at the lowest point, which was then spread out by more amazing friends and neighbours. Our depth of soil was set at 3 inches, calculated by our building engineer as the weight capacity for the roof based on the framing structure we used. The soil type we used was simply a mix of local sand and soil.

I waited until the fall to begin planting, as I didn’t intend to do any watering. Mostly the plants collected were from the first roof we planted, which was rather fully grown and could use some thinning. Many of the local sedums were lifted from the rocks on either side of the house, but also we were gifted with succulents thinned from crowded patches from friends’ gardens. There were spaced about 4 inches apart, with each variety planted separately inside linear sections that I imagined flowing across the curves of the roof, so that eventually when they are filled in, the colour diversity of the plants as well as the flowering times and colours will show up as differentiated sections. Eventually it may be too time consuming to keep the plants inside their own sections and succulent chaos will rule. Each following spring and fall I have added to the planting, thus, it has taken 2 years to get the roof covered, although not filled in. 2,000 square feet is a lot of plants.

Varieties include- ice plant, sempervivum (hens and chicks), sedum spurium, broad leaved stonecrop, oregon stonecrop, spreading stone crop, and various other sedums of unknown names. These two new roof sections are visible from inside the house, as each floor is stacked like a terrace down the bedrock, which makes the prospect of design and colour more interesting. Our first living roof is not at all noticeable except from a place outside and to the east of the front door, which is not a highly used space, and so the plants on that section are rather unattended, which suits us just fine. I am happy knowing that the ground space our shelters occupy is not being wasted on the birds and insects that might have otherwise foraged for food in it’s space. Each morning I watch as the chickadees tumble all over the roof, and in the summer the bees cling to the range of variously flowering plants. It is reassuring to know that we can continue to provide habitat for those that live side by side us in this world, while we clear hillsides and raise buildings in the pursuit of comfort.

Second Coat Plaster- Filling and Detailing

Second coat of natural clay plaster

The second layer of plaster for this strawbale house consisted of layers of fills and details to level out the lumpiness of the bales, which was a result of not doing any trimming to the bales once they were installed. This is because of the orientation of the bales as they were stacked into the framing of the walls, which meant they were string side out and unable to be cut. (See this post for details!)

Generally the same process for second coat plastering applies that I described during the building of our first straw bale house (see this post…). The main difference here is that I did a round of filling in the sections that were significantly dippy, (which was generally around the perimeter of the bales), letting that dry, and then covering the walls fully with the attempt to keep the plaster thinner in the lumpy spots and thicker in the indented areas. If the plaster is too thick in the dips, it will crack too much as it dries. The window edges also had burlap which needed to be embedded into the second coat to keep the plaster from pulling away from the wood, and there was some extra shaping needed in the curves of the window openings as we couldn’t trim the bales ahead of time into the curves we wanted.

We created wire forms above the hallway openings to create a curved archway, which then needed two coats of plaster. We also plastered over the interior bedroom walls that are constructed with 2×4 framing and rock wool insulation covered in metal lath. The bottom of the upper story exterior walls needed flashing installed, which we plastered into the wall also using metal lath.

The final purpose of the second coat of plaster other than protection of the bales, is to create a surface that supports the final clay plaster, especially at all the various edges. Once the windows and doors were installed, more plastering details were attended to- wherever the clay plaster meets window sills, frames, counters, kickboards, ceiling boards, etc., there needs to be a tight edge to within 1/4 inch for the last layer to fill. This can be finicky and involve a lot of unique areas that need extra attention and thought, and will be different in each build.

First Plaster Layers

With the baling done by September, our goal was to get the first layer of plaster on the bales before the winter rains began.  Plastering has to be done while the weather is still suitable for quick drying, since it is not advisable to have wet clay against the straw for long enough to develop mould.  The faster it dries, the better.  Because it was September when we started, we decided to make this first layer no thicker than 1/2 inch.  If it had been June, we would have taken the seasonal opportunity to fill the dips, which would mean much thicker plaster in some areas.  However, we will probably go around in the spring and add plaster just to the places that are dippy, so the next layer will begin to smooth out the surface of the walls.

Once the baling was done, there commenced the job of stuffing.  This entails going over each wall and looking for spaces that push through the bales, generally where one bale meets up against another bale.  All along the tops of the bales needed stuffing, and sometimes where the framing separates the bales.  Tucking in tight little twists of straw to fill these places becomes methodical but doesn’t take too much time.

After that, comes the messy job of applying clay slip to all exposed straw.  We collected waste clay trimmings from a pottery studio, and soaked it in buckets so it becomes soft and scoopable.  Then we mixed it with more water to dilute it to a thick chocolate milk consistency, using a paddle mixer.  It was thick enough to not drip very much off a dip stick.  I created a little wearable square bucket to hold the slip while I slapped it on the bales with a big brush and a gloved hand.  The bucket, equipped with old belts that went over my shoulders, could catch any excessive dripping and free up both my hands to massage the slip onto the straw.  It dries a much lighter colour of pink.

Then came plastering!  We used local clay from an excavation job on the island, pitt run sand, (also from the island) and all that straw we collected from the bale trimming.  We built a soaker pit from damaged straw bales, lining it with tarps and then filling it with clay and water to make it soft.  On tarps, we mixed 4 or 5 shovels of the soaked clay with 10 shovels of sand by rolling the tarps around and then foot mixing, adding water as we went to get a good consistency without allowing the mix to be sloppy.  Adding a few handfuls of straw (equivalent to 2 or 3 shovels)  soaked up a bit of water, so sometimes we would add a bit more if it became too stiff.  The test is to make a ball, and not have it ooze or slop, but also not have it be too stiff and crumbly.  The other test often comes from actually applying it, and becoming used to the ideal consistency while working with it.  The hands on experience of plastering generally becomes the best way to really learn!  We had to adjust things as we went- our ratios changed as we dug into our clay pile and found less high quality clay.  We noticed that our mixes were more silty, difficult to apply, and orange in hue instead of blue/grey.  It was a subtle change as we filled the soaker pit, but after a few mixes we realized we needed to amend our clay from a different pile we had saved.  (After so many years of natural building, we have all sorts of little and big piles of resources hanging around!)

The clay slip gets sprayed with water before applying the plaster, just lightly, not so that water runs down the wall but the slip turns darker in colour.  A handful of plaster is then smeared onto the wall with the heel of the hand, and massaged in so that it doesn’t peel back off.  Everyone finds their own method, but the important thing is that it isn’t too thick, or too thin, ideally the same thickness, and it doesn’t peel off! Our first group of plasterers were my son’s school class, a group of 24 kids ages 10-14.  They spent a whole day rotating in groups between mixing, plastering, and hiking around our part of the island while birding and geo-caching.  They got so much done!  We also had a visitor staying with us for two weeks, learning all the steps of plastering.  For the next month, we had a variety of friends and community people coming by for a few hours or a day to get their hands muddy on our walls.

Partially dried wall

We focused first on the north walls, and the places where there is less sunlight and wind movement.  Then we moved to the inside when the weather got rainier in October.  Luckily, the fall was generally sunny late into November, so when we finally got to the south walls, the warm sun was still shining most days.  We used a fan to help dry out some of the inside walls that weren’t getting much sun.

plaster over clay slip with insulation at the top covered with metal lath

Plastering the bales in this build was different than the last house we did because the bales were oriented differently- instead of placed like bricks and plastering the sides of the bales we have stood the bales up and plastering the faces of the bales, where the strings are.  In the last build, we trimmed the entire bale walls, shaping the curves of the windows and removing any shaggy straw, so the plaster went onto the evenly cut ends of the straw.  This time, we couldn’t do any trimming because of the baling twine, and the plaster went onto the length of the straw.  While we didn’t need to take the extra step of trimming, it was a little more challenging to apply the plaster.  The walls are more lumpy and will need some extra work in the plastering to get a nice smooth wall.  Smooth walls, of course, are a matter of aesthetic preference over function.  Maybe in the end we will incorporate more creative sculptural elements into our walls.

first coat plastered dried. Burlap will be plastered into the next layer of plaster.

This winter will be a time for these seed ideas to take root while the house building projects are on hold.  We can take some time to sit in the house and imagine the different possibilities for the next phases.  It can be frustrating at times to have to be patient, but often the results come with better decisions and a renewed sense of creativity following the flurry of building.

If you read all this and want to see more photos and more descriptions of plastering, please refer to my previous post on the last house we did~ Natural Plaster

Building Straw Bales Walls

The last two weeks of August kept us busy as we were finally ready to place the straw bales into the walls of our house.  This was a completely different process from the first part of the house that we completed in 2013, in which we stacked the bales like bricks around a traditional timber frame.  This time we constructed a regular stud frame to support the roof, placing the stud’s on 16″ centers to accommodate the width of the bales in between the studs.  The stud wall effectively disappeared as the bales were placed between them and stacked up end to end to the ceiling.  At the base of the walls were toe-ups which the bales would sit on- filled with drain rock and rigid insulation (which also included some rough electrical).

The straw bales were reported to be 18″ wide, 36″ long and 14″ deep.  However, as we discovered when we got them, they were more like 19 or 20″ wide, which didn’t work too well with our framing.  So we set up two stations where the bales were cut before we could place them.  The first was an electric chain saw placed in an Alaskan mill device so the chain saw could slide easily across the edge of a bale at a set height.  Then the bale would get notched~ a second station in which a jig holding a grinder with a chain saw blade would carve a 4″ wide notch down the center of each side of the bale.

If we needed any specific length bales to fit into smaller spaces, which happened all along the tops of each wall, we would manually resize the bales first, then send them to station number one.  Eventually a system of tagging the bales with their length, as well as having a written order of the needed sizes on a piece of paper meant that when they were ready to go into the walls, we could just refer to the paper and the tags to put them in from one side to the other.  To make mini bales, baling needles, baling twine and a measuring tape are needed.  Thread the needles with twine, poke them through the bale at the needed length and in the same place as the original twine, pull one end of each through and then wrap the other end around the bale to tie them together… tightly!  Then cut the original twine.  Save those pieces for making other smaller bales.

An integral piece of equipment for getting the bales in was the CRAZY CARPET!!  It was quite difficult to shove the bales in, as we had to place the bale in against the open stud, place a crazy carpet against the straw of the bale on the other side, force the width through to the other side of the stud, then remove the crazy carpet.  Depending on the density of the bale, we had stakes to push with, mallets to slam with, and 2×4 scraps to persuade with.  Depending on the height, we could karate kick or shoulder check them as well.  The higher bales proved more difficult as we were working on ladders.  We had to be systematic in working right to left, (or left to right) along a wall as shoving a bale into a space with bales on both sides was pretty much impossible.  This meant that we had to be prepared with all the odd bales as we went~ we couldn’t just place all the easy ones first!  It also meant that things slowed a little sometimes while custom bales were made.

We inadvertently made a lot of cut straw byproduct.  The chain saw station produced 9 large garbage bags and two large mountains of 2 inch straw pieces.  The notching station made 5 large garbage bags of finely chopped straw.  We kept the piles separate, as the longer straw will be perfect for the first two coats of plaster, and the fine straw will be great for the final plaster.

The whole process called for continual creative problem solving.  The stud framing made for some very awkward spaces, especially around window bucks and in the corners.  We sized the window bucks to glass that we already have, otherwise we may have changed the sizes to fit evenly between the studs.  We ended up making a lot of 8″ or smaller bales and flipped them lengthwise in the spaces.  The corners also had a lot of these small bales stacked up, and we placed extra 2×4’s to hold them in place on the outside, and also to secure expanded metal lath around the outside corners so we could hand stuff those areas with loose straw.  We considered making forms and stuffing the corners with light clay, but the lateness of the season made us worried that the clay might not dry fast enough.  We will apply the clay plaster right over the metal lath, which is secured to the wall using zip ties attached to the baling twine of the bales in place.

The other awkward area is where the bale walls meet the main rafter on the south and north walls.  The rafter is made of two 2×10’s cut into a curve and joined together, and arches over the center of the bales, above the stud’s.  The bales come in underneath this rafter, leaving a 10″ space before the soffits and interior ceiling.  We cut strips of insulation and fit it on either side of the rafter, and used the metal lath to cover it and join in the with bales, so the plaster will extend up to the roof over the lath.

We ordered 350 straw bales from the Saanich Peninsula last August (2016) which is a mere 20km away.  Optimistically, we hoped we could get them in that fall- however, as our time line stretched into the winter, we resorted to storing them under a large tarp until the spring, when we moved them into the house in June after we completed the concrete slab floor.  There were many damaged bales, and after a huge sorting process of fully damaged, partially damaged, mildly damaged and good as gold, we ended up with about 250 in various piles.  We estimated that we might have needed to purchase up to 25 more, but in the end, we used every last one that was deemed good enough right to the last space.  Luckily, our enthusiastic gardening community purchased our damaged bales for their gardens.

So many of our friends came out and helped with the process during the two weeks that it took to get all the bales in.  It is always so humbling to have community members take time out of their own busy lives to volunteer for an afternoon or a day of slamming bales into our walls, or tying up smaller bales, or running the grinder or chainsaw.  The swimming pond became the ultimate spot for breaks, and many great conversations and smiles and eating of fresh fruit filled up the moments between hard work.  It truly made the daunting task of building our walls so incredibly enjoyable.  Thank you again to everyone who helped out!  We feel so supported and blessed.

Sub-layers of the Floor

Getting the sub-floor completed adds a whole new level of progress, allowing the next stages of the build to continue with greater ease.  The main floor of our straw bale addition went from an 18″ deep mucky clay hole to a finished concrete surface that we can directly lay the final tile floor on.  Here is an outline of the different layers and the process of putting them in.

1.First we filled the bottom with 6″ of gravel to cover the 4″ drain tile that runs under the house (as we are on a hillside with many springs weeping from the bedrock) and will allow any water that gets under the house to drain away easily.

2.Preliminary plumbing- all the plumbing is laid out across the floors and supported by the drain rock to create a slope across the main floor towards the septic.  The bathroom, utility room and kitchen water fixtures all come together into one 4″ main drain that exits to the east where it will end up in a septic tank/lift pump to take up to our existing septic field.

3.Insulation layer- placed directly onto the drain rock, we used whole bags of perlite that we laid out tightly side by side and gently flattened (by foot) to create a solid layer of 8″ insulation, which gives a R value of 25.  We chose to use perlite because it is an amorphous volcanic glass that has a relatively high water content, typically formed by the hydration of obsidian. It occurs naturally and has the unusual property of greatly expanding when heated sufficiently. (Rigid foam insulation is the usual building material for this use, but it is made of polystyrene.)  In some places we had to customize the bags by emptying them partially to help fill the spaces which were not the same shape as the bags.  Here is a link to the Perlite Institute which has complete information on using perlite for construction insulation below slabs – https://www.perlite.org/library-perlite-info/insulation-perlite/Perlite-underslab-insulation.pdf

4.On top of the perlite bags we put 2″ of sand, filling the spaces around the bags and then compacted the whole floor.

5.The next layer we put down on top of the sand was the 6mil construction poly vapor barrier and then laid out the metal rebar mesh that would be pulled up into the 4″ slab.

6.And the last thing we had to do before pouring the slab was attach the hydronic infloor heating Pex tubing to the metal mesh.  It is best to consult someone about the layout and spacing of your tubing as it will greatly affect the heating potential of your hydronic system.  It is also important to use sleeves to cover the Pex tubing where ever it comes up through the slab.

7.Once everything was ready we ordered the cement and Colin worked with a crew of 3 others to pour the slab in less than 3 hours.  The slab is flat, but not super finished as we will be putting 12″ mexican tiles down as the finish floor surface on the lower floor of the house.

The upstairs currently has a plywood subfloor.  We haven’t yet decided what we are going to use to finish it.

bathroom- exposed is the box with water lines for the bathtub, as well as venting and drain openings


Light Clay

The framing of the house created some interesting areas that were challenging to fill using straw bales, so we decided to do a little light clay instead.  In the upper level, the framing of the roof joins in with the framing of the floor, leaving a narrow wall space that widens out with the curve of the roofline, so filling this oddly shaped wall space with light clay was a great solution.

Light clay is a mixture of loose straw coated with clay slip and packed into a form.  The form is removed right away to allow for quick drying time, and there you go… a nice flat straw surface solidly held in place by the clay.

The process is fairly simple.  We spread loose straw on an old piece of plywood, mixed up some clay and water into a nice thick slip, poured it over the straw, and tossed it with a pitch fork.  We were looking for an end result of long straw that would stick together when squeezed, with no clay dripping or running off, but with the colour of the straw no longer golden.  Like a salad dressing… lightly coated.


We did the first foot of wall, adding screws or nails into the framing to give a little something for the straw to tuck into, and packing it in securely but not densely.  After we took the forms off, we let it dry out for a week, then did the rest of the wall up to the window bucks.  Our wall section widens out once it gets above the roof framing, but we didn’t want to fill the whole space at once and risk the centre staying moist for too long.  We put the forms back on higher up and did our second lift in another few hours.

This was the first time I had done any light clay, and I know it is another whole natural building method in it’s own right.  We have helped some friends build their house with chip slip, which is the same as light clay but uses wood chips instead.  The mixing of clay and straw has been used as an infill material for timber framed buildings from at least the 12th century in Germany and elsewhere in Europe.

It was really great to so easily utilize a variation of natural building in our predominantly straw bale house.  I think we would have done more in some of the other awkward spaces, but the timing of the summer sun was a bit late for ensuring a complete drying out of the clay slip, and we ended up making lots of small oddly shaped bales to stuff with.  But that will be another post~ the results of baling above this light clay wall and then plastering over the whole thing was quite positive.  The flatness made for a lovely plastering experience, compared to the lumpyness of the bales… but that will be another post as well!  Stay tuned as I catch up on a busy summer and fall of building.

Straw Bale House Building Work Party

NATURAL BUILDING WORK PARTY!  Learning opportunities for straw baling, light clay, and plastering starting now and continuing throughout September for our straw bale addition on Pender Island, BC.

It has been a rather unpredictable summer in terms of our building schedule, but we are finally at the point of putting the straw bales into the walls of our house.  These things just always take longer, right??  We started off on Monday, August 21 with an enthusiastic group, gathering in the morning to check out the partial solar eclipse that was visible from this part of the continent, and then spending the rest of the day getting the order of operations sorted out.

Our method of placing the bales standing up in the columns created by the stud frame is different from what we did for the other half of the house, which was a timber frame structure with the straw bales stacked like bricks and secured with exterior vertical bamboo.

We would like to invite everyone who is interested in experiencing building with straw bales to come for a few hours, or a few days, to take part in a variety of jobs which will shift over the next few weeks as the work progresses.  From this point onwards, there will be many tasks to complete, and while it will be difficult to schedule the type of work being done over this next time period, we would like to offer a general list of natural building components that we will be looking for help with:

  • trimming, notching, sizing, and stacking bales
  • stuffing
  • light clay- we will be filling some areas
  • clay slipping all the wall surfaces
  • mixing and applying the first coat of plaster

light clay- filling the forms

Give us a shout and let us know when you can come and we will try our best to let you know what we will be doing.  Or, let us know what you want to do, and we will contact you when that job will be happening as soon as we know.  Things will be much quicker depending on the amount of help we have, but realistically, we also have to consider the cooling of the days as we get into the plastering part of things.  The plaster needs to dry completely within a certain time frame… same for the light clay.

trimming and notching bales

This week, August 23 – 25, and August 27-31, we will be working to fill the walls and we are looking for extra help.  Anyone that is interested in learning a different way of building with straw bale is welcome!    We also have a lovely pond for swimming and will be providing snacks.  If you are from off island, please send us a note of your interest and we can provide more details.

GROUNDWORK- Building with Straw Bale

Last year we were approached about being interviewed for a short documentary about building with straw bales.  We are excited to share our story as well as our reasons for choosing straw bales and other natural materials to build with, and it is delightful to be among other home owners and builders who share the same sentiments about the homes we create.  We are currently on this journey once again, and the reminder of why we are doing this is truely valuable in the face of the various challenges that manifest during such a large and complex project.

Our wood working shop is also featured in Episode 1-Building with Cob.

Other episodes made are Episode 2- Building with Timber and Episode 4- Building with Rammed Earth.

*Made by TELUS Optik Local~ supports compelling, original stories told by filmmakers from BC and Alberta by providing production funding, training and exposure to new audiences.

Previous Older Entries

%d bloggers like this: