Learning the Medicine of the Forest

mahonia tincture

mahonia tincture

As late winter gave its final nod to the delicacies of spring and the plants in the forest around us began to put on their greenery,  it seemed the perfect time to learn about the medicines that the natural world offers.  Our friend and neighbor has been studying and using herbs and wild plants for medicine for a number of years, and so another home schooling family and I asked if she would be willing to meet with us every few weeks and teach us about the qualities of wild medicines during this season, working with whatever plants are ready for collecting as the spring progresses into summer.

 digging mahonia
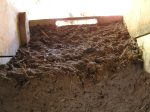
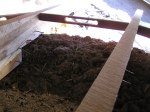
The first plant we learned about, one that is prolific in these pacific northwest forests, is oregon grape root, or Mahonia Nervosa.  In the late winter (or in the fall) the brilliantly yellow roots of mahonia can be dug up, cleaned, chopped, and soaked in alcohol to make a very strong tincture.  It didn’t take long for our four enthusiastic children to get their hands into the dirt and gently coax up the long sections of root.  They cleaned it, tasted it, smelled it, chopped it, and covered it with alcohol.  Each step was accompanied by many observations about how the plant affected our senses, and sometimes these sensations were different for each of us.  After labeling the tincture clearly we each had a turn swishing the jar, and sending our own thoughts of love and healing into the mixture.  chopped mahonia rootWe learned about the quality of bitter as we tasted the roots, as well as when we collected the earliest spring greens that we can eat, one of which is the common dandelion.  Bitter flavours have the effect of instantly sending a message to our brains, which then send a message to our stomaches to release certain digestive juices which stimulate easier digestion.  We don’t eat very much bitter food in our diets these days, and often our bodies do not get the opportunity to use this system of response.  The root is also blood cleansing (minerals/ detoxifying), astringent (tightens and tones), anti bacterial, anti fungal, and anti parasitic. It expels heat type conditions, urinary tract infections and has long been used for skin disorders such as eczema and psoriases. This is largely due to the action that mahonia has on the blood system.

wild saladBesides dandelion leaves and flowers, we also collected chickweed, plantain, sheep sorrel and it’s garden cousin lemon sorrel, lemon balm, miners’ lettuce, peppercress, and cleavers, all of which were growing in a small area around our house and in our garden.  Because of the small size of our group, we were able to engage in rather intimate conversations about our individual observations of smell, tangy or mild flavour, and dryness or juiciness.  Our kids are all quite familiar with the practice of eating wild greens, and their openness to explore more options and use their intuitive senses is quite real.  So is their caution, however, and on a few occasions they found look alike plants that they were able to discern as being different and so unknown in safety.  We all went off in scavenger hunt fashion, to find and collect  a handful of each plant.  After mixing in some kale and early lettuce, and adding a light balsamic dressing, we sat and munched on an incredibly fresh and nourishing salad.  Ange served up lemon balm iced tea to refresh the senses even more.

straining tincture
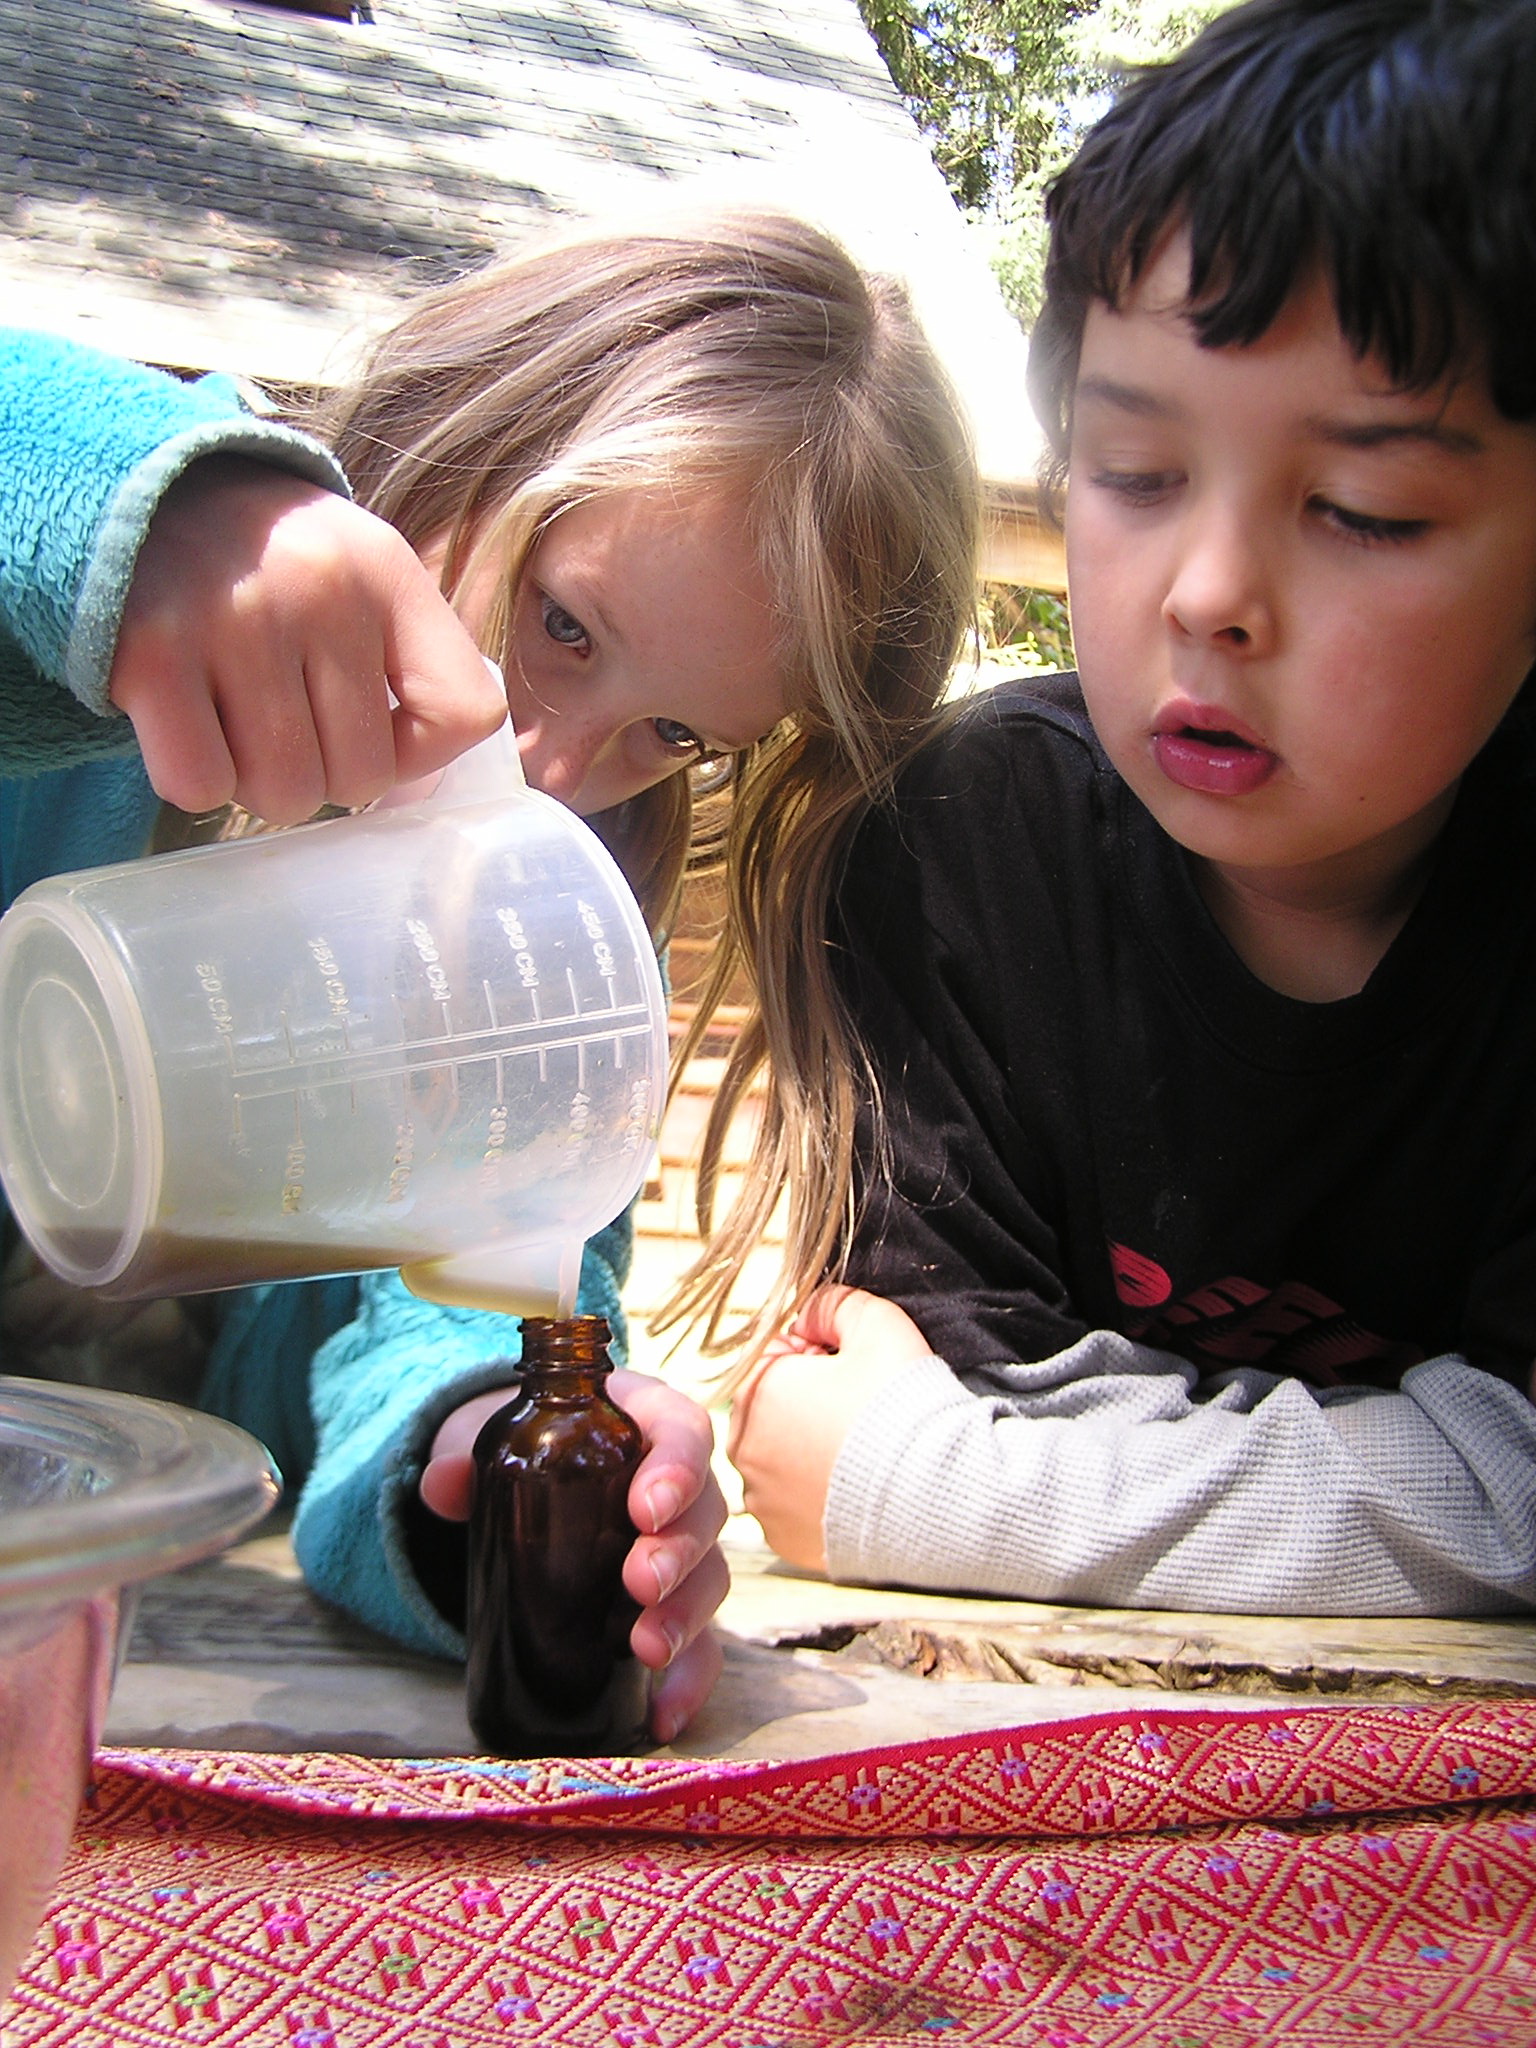
A few weeks later we met to strain out the chopped pieces of the mahonia tincture and bottle the medicinal liquid.  We all found that it smelled horrible, and even tasted horrible, but it was evident that strong medicine was present.  Everyone took turns in the pouring, bottling, and labeling, and we learned that to evaporate the alcohol for children, we could pour boiling water over the dosage needed and mix it with honey or licorace to sweeten it up.  Mahonia heads

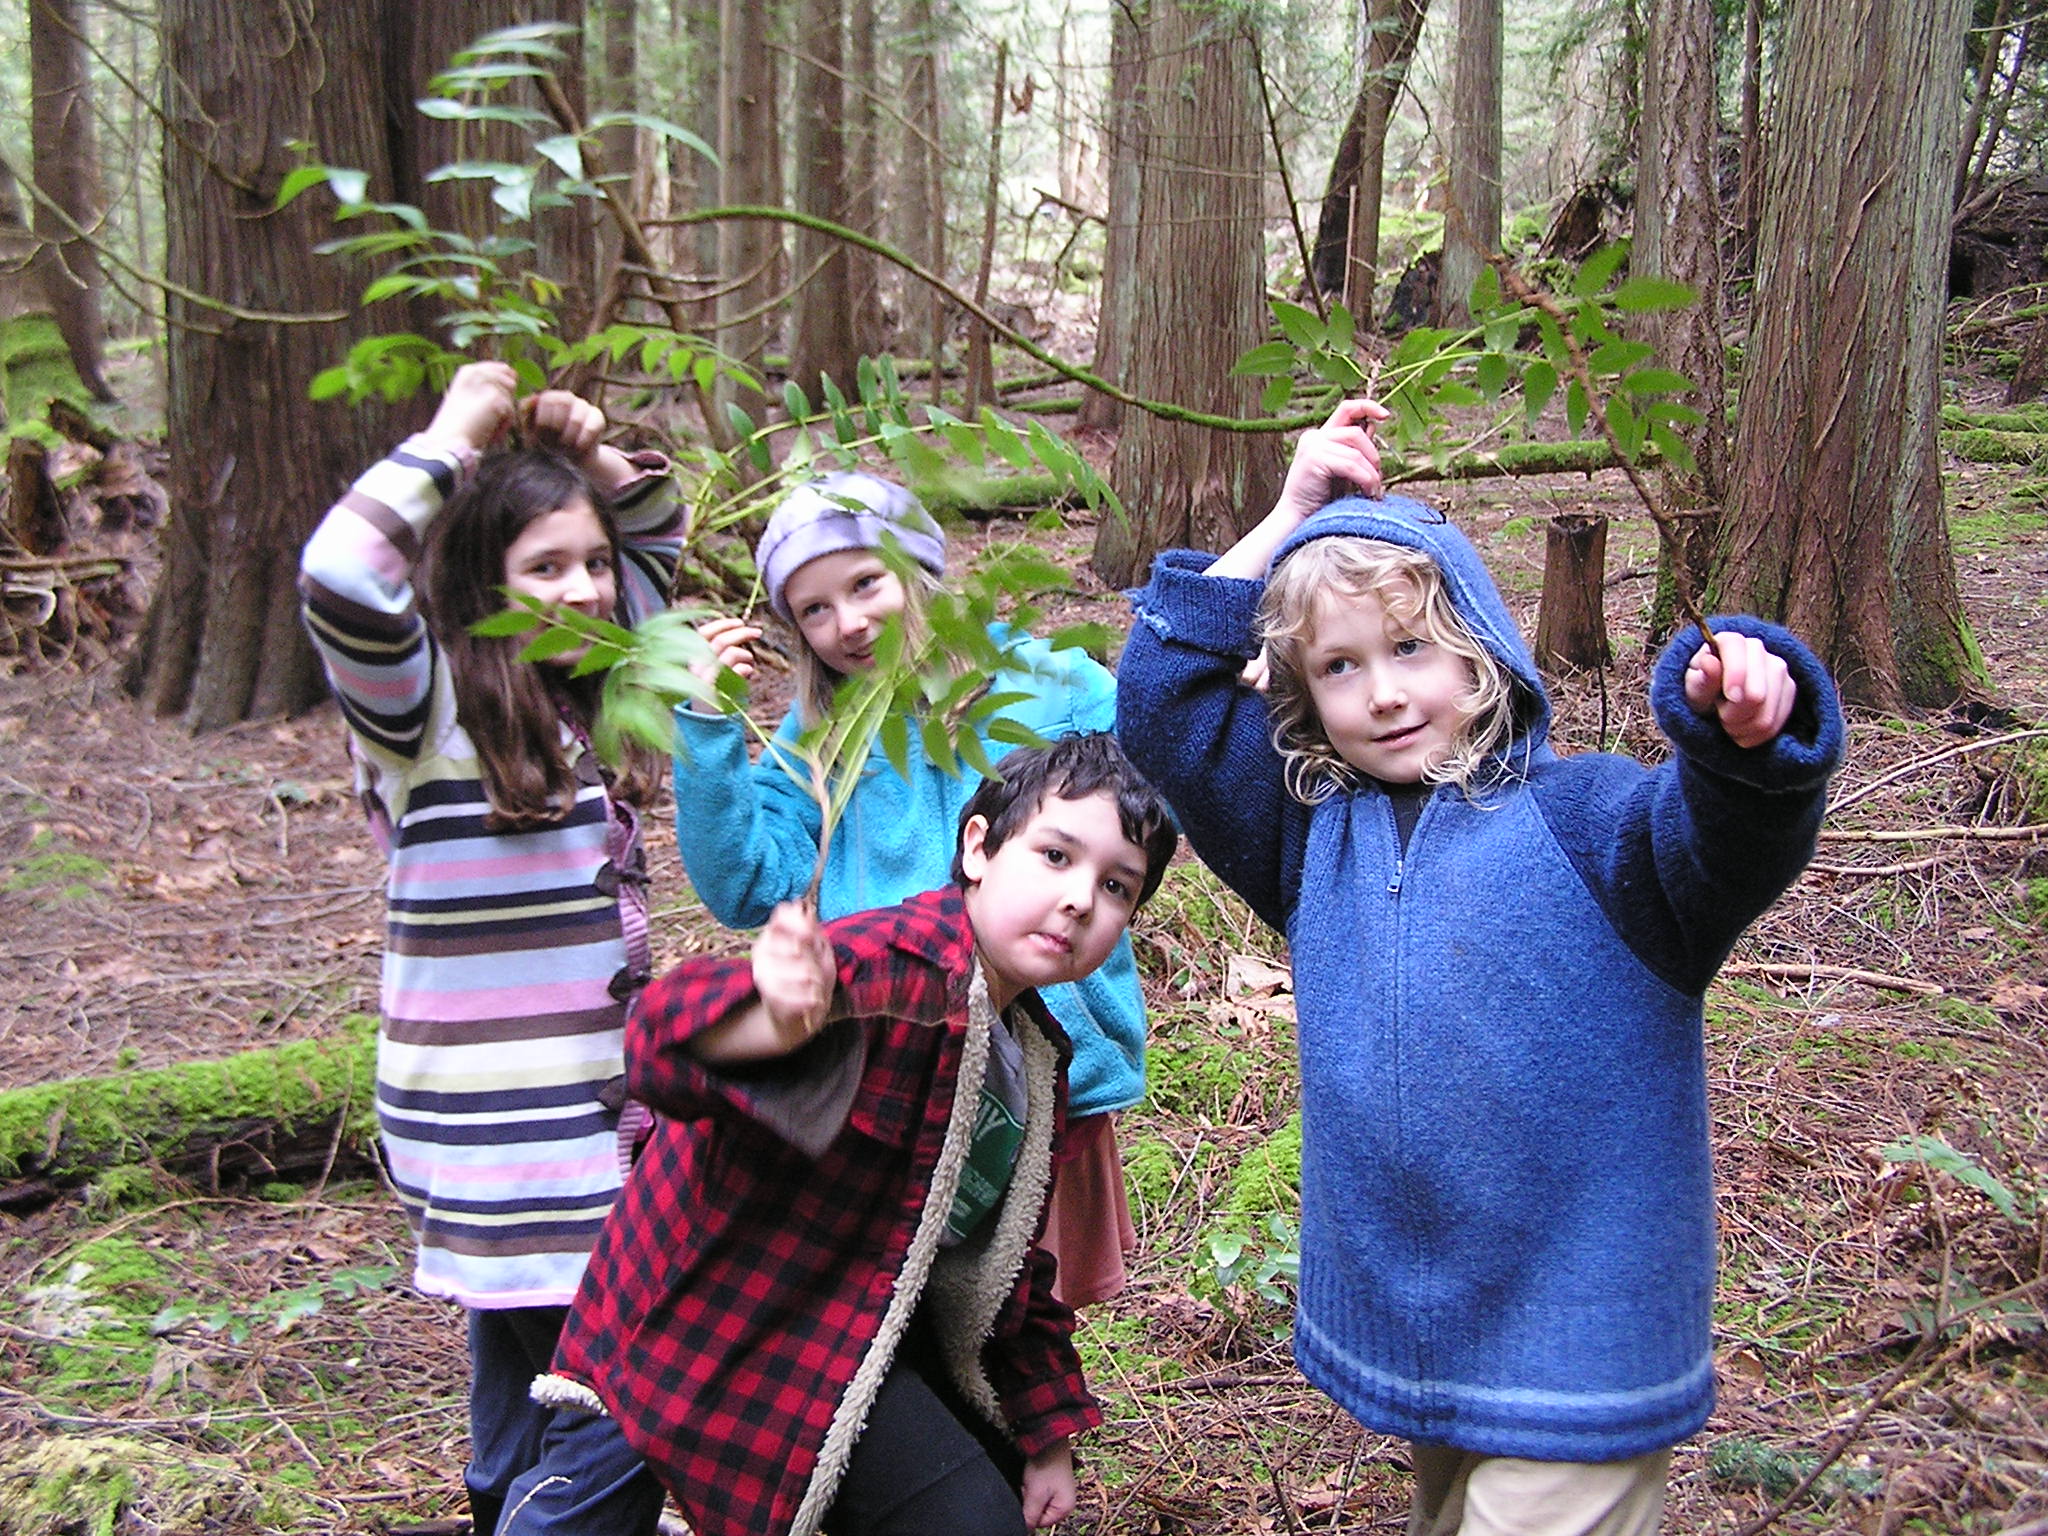
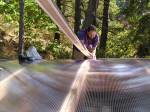
Then Ange turned our attention to the Douglas Fir tree that was growing right above our heads and the picnic table we were working on.  We noted the needles lying flat on either side of the stem they grew on, rather than circling in a directions like other kinds of fir.  At the very ends there was the lighter green flush of new needles.  As each of us each chewed on a few needles,  an incredible interchange of flavour and texture ensued with different observations about sensation being expressed by us all.  douglas fir needlesWe were going to make a fir vinegar.  After clipping the new growth off the branches we could reach, the stems were plucked and the luscious needles placed into a large mason jar.  Then we poured apple cider vinegar to cover it, and labeled it.  Joanne took the fir needle vinegar home to let it sit until we meet again to strain it.  I wasn’t familiar with the idea of tree medicine, and I am so grateful to learn more.  The trees hold so much for us, and I am always astounded at our forgetfulness.  fir needlesAll of the medicines we have made follow the folk method of measurement, which means approximate amounts and intuitive reasoning.  Whether adding alcohol or vinegar as the medicinal carrier, we have used just enough to completely cover the plant material without leaving too much extra liquid. If the plant material swells a little, a bit more liquid can be added to keep it covered.   The vinegar or tincture is kept in a dark place for about a month before being strained.

“A plant is always much more than it’s constituents. The action or energetics of the plant can be felt through our unique sensory organs, which can be a very personal experience. This is the foundation of herbal medicine and how we can reconnect to a beautiful wisdom.”  Thanks so much to Ange for her insightful words, and the opportunities that she has brought to us through her own journey.

Workshop Update

cob workshopThings have been progressing slowly but steadily in the workshop since we finally got the roof finished in the winter.

Colin focused on getting the doors in right away, refining two old doors that came from his Dad’s work of deconstructing old houses on the island, and refitting a pair of salvaged french doors.  He also built a raised stone hearth from the pile of stones we have on the property, put in the stove pipe, and wired in the rough electrical circuits.  We got the insulation in the ceiling and the plastic vapour barrier secured over that and ready for the finished ceiling layer, which we think will be some kind of bamboo or sea grass mat.

rough sculptureI spent a couple of weeks on and off getting the rough coat of plaster on the inside and outside of the building.  This layer of clay plaster is the only rough coat needed on a cob wall, and is the same layer as the third layer that we put on the strawbale house.  (See my previous post called Natural Plaster for full details).  A mix of 4 parts sand, 2 parts clay, and 1 part straw with water to mix it to a troweling consistency kept me busy in the warmer days of late winter. rough plastered windows I cleaned up and shaped the sculptural aspects of the walls so they were ready for the final layer of plaster, which Tracy and I completed earlier in May, while the temperatures were still cool enough to give the plaster time to dry.  The final clay plaster took us 2 days to put on, a seemingly record pace for any one job to be completed in.  We mixed up the kaolin clay, sand, straw, paper pulp and whiting in the buckets the day before, and then added the rice flour paste, and borax and mixed multiple buckets together the morning we started plastering.  (See my older post Final Plastering for more exact details).  We got much of the simple walls done on the first day, then completed the wall with the windows and arched shelf the next day, cleaning up our tools by the afternoon.  I am always so amazed at how quickly the finishing layer goes, compared to the time it takes to get all the other layers beneath it built.final plaster

Last weekend, Colin and I built the one interior wall that separates the workshop from a small storage room.  It will also be the wall against which will be built Colin’s work bench.  It holds the majority of the electrical outlets and is a standard 2×4 construction filled with rock wool (Roxul) insulation and covered in plywood.  final plastered windows

There is not too much left to do in this simple building for Colin to finally move in and use the space for his wood working.  Right now he is coming to the end of a giant stone facing job and is looking forwards to working with the more forgiving medium of cedar wood.  I can turn my attention to finishing the outside of the building later this summer, playing with some creative designs for sculpture as well as getting the last coat of lime plaster done when the weather begins to cool off once again.     interior wall

Archipelago!

plants booksOur home schooling journey this past spring has somewhat exploded into new territories, both real and imagined.  With the resources and creativity of a neighboring island teacher, principal, and outdoor education leader Steve Dunsmuir, our group has embarked on an adventure involving the discovery of an archipelago of islands that have never been explored before-  because these islands exist within the imaginations of the kids.  But as the children learn to shape these islands and dress them in plants and animals, they also learn the real life skills of living on these islands without the modern developments that we live with today.

The game is called Archipelago, and it started off with one of our parents, Karen, and her dramatic performance announcing to the kids that our facilitator Julie and her husband drifted off to sea the evening before.  They had called in to the coast guard with co-ordinates of where they were, saying that they were safe and sheltered within a group of islands that, strangely, were not on their charts.  Just as we were hoping that they would be brought safely home, (and many children were glancing around suspiciously as the word “archipelago” started to remind them of the name of a game we had been talking about learning), Julie burst into the room in a life preserver and a paddle, seaweed tangled in her hair, and with exasperation, staggered to a chair and excitedly told us of these islands that no one even knew were there, just right off our coastline!  (I mean, how far could they really have drifted?)

island outlineWe grouped the kids into 4 island groups and gave them a large piece of paper and they worked together to draw the outline shape of their island.  Then they traced that shape onto a piece of graph paper, and then the originals were placed on the wall of the room onto a big blue background, which then determined the directional placement of the island.  Each island now had a defined shape and a compass rose, and a proximity to the other islands.  compass roseThen we rolled dice to give elevations and water ways.  First roll was with a six die, and it determined how many high points there were, and then each high point was given an elevation with the roll of a 10’s dice.  So if 4 high points were rolled, and then 60 was rolled, one of the high points would be 60 meters.  The kids then worked together to decide where each of these elevations would go, in regards to the compass directions of the island.  The same was done for lakes, and for rivers.  Eventually the kids learned to draw contour lines, giving visual dimensions to their new islands.  We did a fun exercise of placing a large rock in a tub and pouring water on it, marking a line around the rock at each 6cm interval to show the changes in elevational contour.  We determined, with the scale of 1 square=1 hectare, that the islands are about 3.5 kilometers long and 2 kms wide.  That put a perspective when we compared it with the size of the island we live on.  One day we all went out for a hike, walking a route that spans the length, and then hiking up a ridge that is similar to the elevations of the imaginary islands.  They are not very big islands, but considering there will be no roads, paths or trails when we get there, they are just the right size for two or three kids to imagine exploring and gathering from every side of it.

Iisland creation haven’t mentioned yet the other imaginary aspect- characters.  The kids all created their own personality- age, name, attributes, skills, and abilities.  Some of the abilities and skills are real life learning experiences, and some are imaginary with a bit of research.  For instance, from a list of 100 skills, each child picked one for their character that they already have, one that they would like to learn, and one random one (determined with rolling dice).  The one they want to learn is one they came either learn for real, or just research about it and present the information.  Taeven picked cooking, and so we have embarked on a more exciting journey of learning to cook, something which was always a bit of a struggle before.  Cedar picked archery, and lucky for him, Julie had already organized 4 weeks of archery lessons because most of the kids had requested earlier in the year to do archery.  The kids also have a record of other attributes, such as endurance, balance, aim, and finding.  They can earn greater points during our real life adventures for these attributes.  We also try to offer this aspect of attributes on a personal level, so achievements are kept as a reflection of each child’s individual abilities.  It is also light-hearted and fun, so we are not strict with our standards in any way.  Often the kids will decide for themselves if they feel they have achieved a greater level of ability.  Taeven and Cedar have been in the habit of awarding points to each other even!

plant legendWe spent a flurry of time and activity discovering all the plants that grow on these islands.  From a list of 100 native flora divided into groups of habitat, the children rolled dice to get a plant, then roll again to find how many squares of that plant they have.  Then they decided where on their island that plant would grow, and a symbol would be created and added to a legend of all the plants on their island.  The kids could then do additional research to find out how the plant could be used, either for food, shelter, water, transportation, safety, communication, first aid and medicinal, or happiness!  The possibilities of going deeper into any area of this game is staggering.  Because we only meet twice a week, and because our kids are all so diverse, we have taken a loose approach to each of the deeper explorations, leaving those who wish to learn more the chance to do so in their own time.  plant cardsEven just researching one plant can be plenty- Cedar has ocean spray on his island, and when he found out that the long, thin, strong branches were traditionally used to make shafts for spears, arrows, bows, as well as other structural uses, he went out and began crafting himself a harpoon.

mappingWe had an afternoon of discovering the animals that live on these islands too, through more rolling of dice.  Julie had a computer hooked up to a projector and was searching for photos of each animal as they came up around the room, giving the kids visual identification and opening opportunities for other “islanders” to share what they might already know about each animal.  We learned that there are many different types of mussels, and that sea cucumbers can indeed be eaten, and we listened to the call of an oyster catcher.  The kids kept track of their animal populations by placing them in appropriate habitats and creating a legend.  We watched a slideshow of all the animals in the archipelago, and learned what lives on neighboring islands.

That is where we are at so far with the Archipelago game.  Soon we will be traveling to the islands and using our skills to set up a homestead so that we can enjoy the wild foods, the fresh water, shelter ourselves from the elements, and interact with neighbors, human and animal, with the best of both the imaginative world and the real world.  From what I have observed, this game has created a sense of group unity amoung our 16 diverse children while celebrating their unique qualities.  Their abilities to work together and share ideas while remaining individuals has created a beautiful atmosphere of positive energy in all the exciting activities we have taken on to complement the focused paper work of the Archipelago.

Paint Me In

Here again the day
draws up the colour,
sucks it in deep like
sap, sticky and pungently sweet,
splashing the green
against the blue
with great licks and sweeps,
dotted with pebbles of yellow
bounding birds flashing
their orange song,
little beaks streak between
the rust brown pillars
of shadowed patterns,
where breezes tease the branches
to dance
in their lacy needle skirts
 
Here again the day
dissolves the untruths
of separation,
allows the seep and smear
of tone and hue
to bleed
 
I step into this
collage, offering the
bloodsap of my body
to the frameless creation
 
Here again, with each day,
I am glued to the
vivid presence of the artist
 
capturing light with water,
composing the graceful archs
with soil and stone
and flora,
the endless possibilities of clouds
on horizons
 
paint me in-
infuse me with the palette
of this day
 
                 -Wendi Lopatecki


Hand Split Cedar Roof Shakes

hand split cedar shakesBeing a splitter of cedar by trade, Colin naturally decided to split all his own shakes for the roof of his new workshop by hand.  Having many piles of cedar already collected and in need of being moved out of his old working location gave Colin a good start at the job of splitting approximately 600 square feet of coverage, or what he estimated to be 6 squares of shakes.  A square is made up of 4 bundles of shakes covering 100 square feet (each bundle covers approx. 25sq.ft. depending on length of shake and row coverage).  Using a froe and mallet, Colin split and shaped the shakes out of 18″ bolts of cedar, using the best of the shakes for the roof and saving the less than ideal (wavy, thin, less tapered, or  too narrow) for a future wall project.  froeshake splittingsplitting shakescedar shakesShakes are split by placing the froe across the grain on one end of the bolt, about 3/4″ from the edge, then hitting the froe with the mallet and peeling off the shake.  It should taper somewhat (shakes can be 24″ or 18″ long, usually the longer the better for coverage and tapering) and then you flip the bolt over and repeat the same action, flipping the bolt after splitting each shake.  stacks of shakesIt took a surprisingly long time to split the estimated amount needed, mostly because of the amount of less than perfect shakes that he was getting from the bolts he was using (of which much was old grapestakes, and other pieces of cedar that were not as usable in longer lengths anymore, as the cedar he salvages is not collected for shakes, but in longer bolts usable for furniture, gates and fencing).  Colin chose 18″ shakes partly because of the wood he had available and partly because of the curves and roundness of the roof on his shop.  layeringHe layered the shakes with an overlap of 7.5″ each row.  As the rows are applied it is important to offset the gaps between shakes from row to row.  What this means essentially is that the space between shakes never lines up directly with the gap in the row below, and better yet not for 3 rows.  The straight grains of cedar and the overlapping shakes encourages efficient water run-off, while the gaps allow for evaporation and quick drying time.  Cedar shake roofs have a life span of 50 years (though some have been known to last upwards of 80yrs).  flowing around the curvesCedar shingles differ from shakes in that they are taper sawn, thinner, and usually are rated only for 25yrs.  Cedar has excellent natural oils present in it’s wood that makes it rot resistant in it’s naturally wet climate.  Much of the northern pacific coastline, rimmed and abundant in fat old growth logs, offers ideal shake block opportunities with wide planks and tight grains.  Most shakes are collected from downed red cedars near logging clear cuts or trees not long enough to be worth milling into lumber.   roofHere we have salvaged what we can find on the beaches and then applied the best of our skills to producing by hand the beautiful and functional flow of cedar shakes.

At the very end of the project Colin ran out of suitable cedar to split for final part of the roof, and not wanting to waste anymore time as it was the middle of winter, we gave in and purchased the last few bundles of shakes needed to complete the roof.  Although a bit of a disappointment for Colin, this is the reality of building yourself, sometimes you just need to compromise and get it done!roof finishedfinished roof

Back to the Spinning Wheel

spinningWhen I first arrived on this small island nine years ago, I was instantly aware of the thriving community of fibre artists- avid spinners, keen knitters, committed weavers, and exultant felters.  Already being the knitter that I was, I yearned to explore the fabulous world of yarn creation amidst fields of abundant sheep.  With my two year old in tow, I joined the weekly gathering of spinning ladies in the Community Hall lounge as they spun a variety of yarns and poured afternoon tea.  All of them were excited to have me stop in and try out my hand at their wheels, and soon I was bringing along my own wheel on loan from one of the ladies.  Not long after that I found a used Ashford wheel for myself.  I was eager to try processing local wool, and found that many sheep keepers do nothing with the fibre from their sheep as they are focusing on raising lamb.  At first I was happy about finding a use for this waste, but soon learned about qualities of fibre.

Alpaca fibre from Salt Spring Island

Alpaca fibre from Salt Spring Island

Most sheep breeds here do not have spinning quality wool- it is short and rough and difficult to get lined up well enough to spin yarn that could be comfortable.  Since I had already amassed a few garbage bags worth of this wool, I decided to send it to the Gulf Islands’ Spinning Mill Co-op on Salt Spring Island and have it processed into batts of wool.  I spent $175, and in return, I had enough natural wool batts to make a king size duvet, a queen size duvet, and a few pillows.  But I digress.

Aurelia's Merino colour blends spun in long colour changes

Aurelia’s Merino colour blends spun in long colour changes

Back to the spinning wheel!  Fast forward and the spinning wheel had been put into storage at my mothers house while we moved into a small trailer to build our house.  Fast forward again, and four years later we are moved in and the wheel is finally being dusted off and my bin of roving cracked open.  Since my first encounter with the local sheep’s wool, I learned to decipher the qualities needed for different processes and applications and had managed to collect quite an array of colours and textures.  I was directed to a west coast Canadian company, aureliawool.com, specializing in importing beautiful New Zealand rovings of Merino and Corriedale with luscious colour combinations to play with.  I also learned that cleaning and carding vast quantities of wool can be rather tedious and quite impossible in a trailer, so I sent many bags of local wool with higher qualities of fibre for spinning with, to the Spinning Mill to be made into roving ready for me to spin.   (Really, the spinning part, as well as the knitting or weaving, is the best part anyways.)

the beginning of a sweater

the beginning of a sweater

I have decided that my first project on the wheel, (just to give me lots and lots of reconnecting time with the treadle and the bobbin), is to spin through a huge bag of local brown roving and hopefully have enough to then knit a sweater for my husband.  I am not sure how long this process might take, but I am feeling inspired to take on something long term and very hand made.  Spending time spinning is one of the most relaxing and meditative activities for me… as I watch the soft fibre slide through my fingers and become strong yarn, the rhythm of the treadle calms my busy brain and connects me to a timeless moment of creation.  Knitting and weaving have the same balancing effect.  There is always so much more to learn of these ancient arts, and I am excited to continue the exploration of colour, style, and warmth.

Celebrating A New Christmas

As we journey through the year, Christmas comes as another little blessing.  -Taeven

Colin's hand painted Christmas card

Colin’s hand painted Christmas card

Indeed, the arrival of this time of year provides opportunities for us to step out of the routine of daily life and reflect on the greater values that we hold for ourselves and for the world.  It has taken me many years of feeling caught in a dualistic drama surrounding Christmas to be finally moving into the direction of creating the kinds of traditions that support the values and emotions that I long for at this time of year. While I trudge through the rituals that our North American society, media, and religion have handed to us, and attempt to surround myself and family with ways that feel true for me, there is a motivation to find beauty and deep connection to the light of the spirits of the people around me.  This year I feel particularly strong about creating Christmas with a certain emotional field for myself and for my family.  It seems like a great window to let in beauty, connection, laughter, joy, love, gratitude,the timelessness of days, simplicity, and prayers of peace for the world.  I find myself yearning to create this certain atmosphere, and filling myself up with warmth and the importance of being together.  I struggle with fitting these energies into the physical manifestation of the traditional ways that are expected, and sometimes feel that my hesitations to replicate what everyone else is doing may cause disappointment or misunderstandings.  How do I translate this to those around me in an honest way through such acts as giving a physical gift… a gift of the thoughts of my heart?  For in my heart I wish to give so much to everyone, but without incurring financial strain, encouraging the clutter of stuff, and widening the divide that lies between those who have and those who have not.  So much mental debris is created when we feel obligated or expected- divides between rich and poor, imbalances of wasteful and scarce proportions.  I want to give beyond these limitations,  I want my gifts to reflect my genuine motivation to give honourably and without insult or suggestion, without waste or  support of the factorization of cheap, environmentally harmful stuff.  I hope that handmade tokens, second hand presents, and gifts of food is simply enough.

our tree made with branches

our tree made with branches

I would stuff the stockings with brain teasers and jokes, art activities and clues to scavenger hunts, or with games that involve piecing together something from each persons stocking.  Personal challenges can be created and tucked in for each person, and perhaps can lead to finding a hidden gift.  Things that would keep us all giggling and silly, that keep the laughter and festivities alive throughout the day instead of the short-term, rip-it-open-and-move-on-to-the-next-thing method.  I loved the stocking moment when I was young, but I can’t seem to bring myself now to buying tons of little plastic things to quite over stuff everyone’s stockings.  Activities and collaborative team efforts to create fun and beautiful moments are the best thing I can think of to replace a huge pile of presents that get torn through before breakfast.  I struggle with the waste of cut trees of Christmas, and have created an annual tradition of building a tree by gathering large branches that have blown down on our property and standing them upright in a bucket of water, supported within a bamboo frame.  We collect different kinds of fir and cedar, and I give a blessing of thanks and respect to the diversity and importance of the life-giving forests of our island and around the world.

homemade gingerbread made with Nana

homemade gingerbread made with Nana

And what of the foods of Christmas?  How do I shed a blanket of love over the cooking of Christmas dinner?  Slow food all day, long meals made with many hands, vegetables infused with the luscious flavors of patience and love.  Conversations shared over chopping boards and simmering sauces, laughter spilling like warm drinks and fresh fruit.  A variety of children’s head levels skirting and giggling in wild joy.  Hands passing glasses and plates as if these everyday objects are in themselves, gifts to be given and received.  Eating only what is needed, and savoring each bite with gratitude, sending prayers of abundance to each corner of the world.

a winter walk

a winter walk

It is important for me to venture out into the winter world no matter what the weather is.  To walk together in the fresh crisp air and remember that the hearth of my home is also the hearth of the earth and of the global interconnectedness of the living world.  Humanity, since our slow beginning, has shared the same air molecules as every animal, plant, tree, insect, bird and fish that has ever lived on the earth, renewing and recycling the very particles that bring life into our lungs and blood, just as it brings life to the leaf cells and sap of the towering, ancient trees and young shoots.  Warm hands in mine, I want to walk through gusts, rain, sun, snow, cloud and mist, breathing in the beauty of the air, the abundance of moisture, a giving and receiving in every breath.  Sharing the crisp and glistening air and feeling the world together, the sense of home expanding into the heavens and into the soil waiting quietly for spring.  The birds snapping up the clusters of seeds heads and worms that wiggle and sway- I want to hear their joyful songs and know that their melodious calls are gifts enough.

But what if I cannot do all these physical things?  What if I had no time to hand make gifts, no money to buy games and food, no home even to wake up on Christmas day?  What if my family was gone, or I had none, or those that I had did not feel the way I do or share the same motivations and values?  What if I was limited in any way from practicing these physical rituals that reflect my emotional values…could I still hold these energies of Christmas and feel fulfilled?  Could I still be warmth and love, connection and beauty, joy and gratitude and giving?  How would I show it, share it, offer it?  How do I create physically that which I feel energetically if my physical world is not such as it is- perfectly privileged?  We are spiritual beings first, having a physical experience, but it is through our worldly ways that we express our spiritual energies and needs.  I suppose this is the constant challenge- to meditate deeply in the midst of chaos, in noise and pollution and different opinions, judgement and poverty.  To emanate my center of peace and love, and offer it to any who may wish to take it.

It is a luxury that I can consider it an easy possibility to create my ideal vision of how I want to surround myself during the Christmas season, that I can freely try on and rearrange the comforts of life that fit exactly into my spiritual center.  I understand, though, the danger of being dependent on the perfect setting to achieve such peace. I am swimming, floating even, in gratitude that all I write about is completely possible for myself and my family.  It is my wish that I can be surrounded by friends and family who share in this longing for connecting with each other, to bring with them a desire to share love and generosity, to be willing to be openhearted and tender, and to rejoice in festivities.  I want to be bursting with life, and laughing with tears, and saying thank you, thank you, thank you, for being who you are, and to have eyes to look into who say thank you, thank you, thank you, back.  I send out prayers that there will be this same luxury and privilege for everyone- to create for themselves a season of celebration that is an authentic reflection of the beauty of our hearts and spirits, filled with love for one another, and feeling the true peace of the world.

I celebrate the spirit of giving with my hands and with my heart.  I celebrate the spirit of beauty in nature.  I celebrate the spirit of joy with laughter.  I celebrate the spirit of light with candles and with my own internal source of divinity.  I celebrate the spirit of abundance with gratitude.  I celebrate the spirit of love with eyes and hands and prayer.  This is my offering in any place I may be, with whomever I may be with.

Christmas Gifts of Connection

a green star of Christmas

a green star of Christmas

Just as the winter season of Christmas begins to draw nearer and nearer and my conflicted heart starts to get all knotted up about the dualities of this holiday and what it has become in our world today, our homeschool facilitator sent out her ideas about education and the role we can take in bringing our next generation into a different understanding of the impacts of the mass consumeristic element that threatens to dismantle the magic that Christmas ultimately desires to stand for.  Instead of bringing peace,  light and joy to everyone, the time of Christmas triggers so much sadness, anxiety, stress, loneliness, and anger in too many people… a trend that I seek to change for myself and for my family in the hopes that establishing new ways of celebrating the season of love and birth will help alter the emphasis of what this holiday means.

being clear with ourselves and respectful with our earth

being clear with ourselves and respectful with our earth

I do not intend to point fingers to the one issue sorrounding consumerism and the dualities of rich and poor, as I understand that there are so many other factors in the social soup of discord that becomes many peoples’ main flavour around this time of year. Also I do not intend to say that all gifts bought from a store and given at this time are contributing to the negative cycle, as long as those who are buying things do so with love in their hearts and without feelings of obligations that work against what is personally affordable, and consideration is given to the integrity of the gift chosen.  I think it is important that we pay attention to what we are doing, and make it clear for ourselves and for our children, (to whom Christmas media is hugely targeting), that we can create new choices for the ways in which we celebrate and give to each other that do not come with economic, environmental, and emotional stresses.  I would like to reprint Julie’s article about some ideas for education around the issue of consumerism, as inspiration for untangling the heart strings.

Greenheart Education- Julie Johnston

http://www.greenhearted.org/greening-the-holidays-at-school.html

Below are some ideas for teaching sustainability in transformative ways by “greening” the holidays along with your students (or children at home). And I’m not just talking about colouring the holidays green — I’m talking about dipping the holidays into a vat of natural dye until they are drenched in green!

Life Cycle Analysis of Christmas (and Other) Presents

Take time to discuss or reinforce the concept of needs versus wants. Many people forget the difference at “giving” times of the year. Help children see the connections between what they receive (and quickly discard) and the living conditions of their brothers and sisters — of all species — around the world.


How can we get our children to be satisfied with fewer and less expensive gifts when their friends are getting lots of (sometimes expensive) gifts?

You can’t expect kids to go cold turkey. I have found that kids are somewhat open to the understanding that this is somebody else’s birthday that we’re celebrating. If you can make the holiday joyful enough with enough points of real pleasure, parties, hikes, special activities, spending time together… if you can do enough of those things, then the focus won’t be so single-mindedly on how big the pile under the tree is.
— Bill McKibben, Hundred Dollar Holidays

This is also a great time of year to teach about life cycle analysis! As many children in different parts of the world ask for and receive lots of new “stuff” for Christmas (or other holidays), help them become aware of the environmental, social and economic impacts of their gifts.

Talk to children about where their gifts (those they give as well as those they receive) come from and go to. Extraction, production, distribution, consumption, and disposal (the “materials economy”) all have their costs and benefits. But this is a linear system in a finite world (“cradle to grave”), and hence unsustainable.

A learningful way to teach the concept of sustainable development during this time is to have each student bring a gift from home, perhaps the favourite one they received last Christmas or sometime during the previous year for a birthday or another holiday. (Let’s ignore, for now, Annie Leonard’s statistic about how many new purchases are thrown out within a few months!) If the gift is too big to bring to school or was a service gift, they can bring a photograph or illustration of it, or simply tell a story about it.

BestVennSmall

Have each child draw a triple Venn diagram with three large overlapping circles, on their own piece of paper or on the board. Label one circle Environment, one Social Equity, and one Economy.

Next, as students start trying to picture where their gift came from, and where it will end up, have them write the answers to questions that arise in the appropriate circles or intersections. For example,

  • What natural resources were used to produce this gift?
  • Are they renewable or recyclable?
  • How far did this gift travel? Was it locally made?
  • What is its “carbon footprint”?
  • Who made this gift? Who transported it? Who sold it?
  • Were they paid a fair living wage?
  • How much did this gift cost?
  • Was that a fair price for the buyer (or Santa)? What is its cost-per-use?
  • What will happen to this gift when it’s no longer needed/wanted?
  • Is there a price to pay for getting rid of it? If so, who will pay that price?
  • How much did this gift truly cost?

(Encourage students to watch Ed Burtynsky’s Manufactured Landscapes if they don’t know the answers to these last questions.)

Answers that require research could turn this into a longer-term project.

Discuss Gifting Alternatives

Take the time to discuss questions, feelings, needs and concerns that arise. For example, this might be the first time some students have discovered their “social conscience” — and it can be disconcerting, especially if these glimmers of the Golden Rule at the global level contrast with their families’ values and holiday traditions.

Discuss ideas the children have for making their celebrations and gift-giving kinder to the planet, and to others around the world and in the future.

  • Service coupons
  • Charitable donations in the recipient’s name
  • Homemade gifts
  • Fair trade gifts
  • Handmade reuseable wrapping “paper” or gift bags
  • Plants or homecooked foods

Share your students’ ideas in a school e-newsletter.

I wish you, your students and your family a simple holiday season filled with love, peace, fun and kindness — for all.

Final Lime Plaster

Back in May (2011) we decided to get going on the final lime plaster of the outside of the house before the business of summer cob building took over.  Lime prefers to have cooler temperatures in which to dry, and requires much more attention to the timing of the drying process for a result of eveness of colour and trowel lines.  Much like the process of applying the cayolin clay plaster on the inside, lime needs to be troweled on continually until a whole section can be completed, otherwise an apparent line will be visible where the plaster dried too fast, or where troweling stopped.  There are techniques to make these lines look less visible if whole big sections are difficult to complete in one go at it. We added a beveled line that undulates around the house, dividing the wall into smaller sections and providing a place for us to stop.  That way we were able to plaster only the top section, and then only the bottom, and have the line of plaster meet under the bevel and so be hidden.

moving along in a team of three

Working with three people who are competent with the job is important.  Fixing spots as you go, running out of plaster when you need it, and being too late for the sponging part of plastering is stressful.  So is having the sun come out unexpectedly and not being able to stop to find a way of shading the work space.  Likewise, having lunch, snacks, and drinks being made available while working is a huge bonus in making lime plastering a smooth and fun thing to do.

getting those mixing muscles flexing

The right tools are also necessary.  We used Japanese trowels, hawks (easy to make-plywood board with a handle on one side), just like with the interior plaster, and mixed the plaster in 5 gallon buckets and then in a large tub for uniform colour and consistency.  A powerful drill with a paint mixer attached, measuring spoons and cups (depending on colour pigment used), a spatula, and big scooper are helpful to have on hand.  Ladders or scaffolding should be close by for high parts.

The ingredients are simple- hydrated lime, stucco sand, water, and colour pigment.  We soaked the lime in a big barrel a few weeks in advance.  We also did many colour samples using a one litre mix, adding pigments in increments of tablespoons to get an array of shades and colour blends.  We have many beautiful arbutus trees framing the house, and we wanted to make a colour that brought out a reflection of the deep red/orange/brown that we see in the twisting branches.  We also thought that such a colour would bring out the vibrant yellow of the yellow cedar window frames.  Red pigment, however, has pink tendencies, and so we ended up using ten tablespoons of red in a one litre mix, plus five tablespoons of chestnut brown.  Multiplying that up to 4 gallons in a bucket, and we were deep into a large quantity of pigment.  We ordered what we thought would be enough for the whole house, based on calculations for the area covered per bucket on the inside, but discovered partway through the job that we had only enough for just over half the house.  We spent way more money on colour pigment than we ever expected, but we were committed to the colour.  Lesson #1: estimating for natural plasters is difficult, and calculating for colour pigments is even more complicated.  Lesson #2: find a good source of affordable, bulk colour pigments.  Because we were pushing to get this job done while the weather was still cool, we just walked in to a concrete supply store and bought mortar pigments that come in small bags.  When we discovered just how much we would need, we didn’t want to take the time to find a different source because different pigments have different colour shades.  We would have needed to do the colour sampling all over again.  By the time we ran out and needed more though, I was very much wishing that we had.  However, in the end we spent about $800 in the final outside layer (incl. lime and sand), and compared to other forms of siding or paint, we have a beautiful plaster that soaks in to the landscape, accentuates the curves of the bales and the coziness of the forest, for probably less money in the end.

The very first thing we had to do, before any of the plaster went on, was to add the sculptural elements to the rough coat.  Elemental it was, too – the aspect of the house is situated very close to the four directions, and we wanted to acknowledge the directions and the elements on each side of the house.

south sun

We sculpted a large sun on the south side for fire, and a water lily on the west side for water.  My mom got to work on sculpting a tree on the north side for earth, and I placed two dragonflies on the east wall under the light that shines beside the front door for air.  Our beveled relief line that undulates through the middle of the wall flows through each of the elemental sculptures and adds a subtle shadow line.  The sculptures were made using the same mix as was used for the brown coat of the walls- 1 part clay, 2 parts sand, and 1 part chopped straw.  Fine sand and clay sifted free of rocks makes the plaster easier to shape.  We also wet down the wall and spread clay slip over the area to help with adhesion.

mixing lime, sand, and pigment

Lime plaster: 1 part lime, 3 parts sand.  For us, this meant 5 litres lime and 15 litres sand.  That is what we could mix in one 5 gallon bucket.  Spin it together with the mixer, and add colour pigment, mixing it in with a small amount of water.  Then we turned three buckets into the big tub and mixed them all together.  We worked out of this tub until we got low, then had our extra person work on mixing up more.

Before we started on the walls, I went around and plastered the sculptural areas first, thinking that it would make plastering the walls faster to do rather than having to do the intricacies at the same time as keeping ahead of the drying plaster.  Two were done in white, and two were done as the same colour as the walls.  What I discovered was this was not as straight forwards when it came time to do the walls.  Red pigment, as well as splatter from the rough coat of clay as it was being sprayed with water, got all over the finished sculpture and needed cleaning and touching up afterwards.  Also, it was hard to sponge the plaster without touching the already plastered areas, which made the transitions between the two look smudgy.  From a distance, it is not a big deal at all, and since this is the outside, we usually look at it from a certain distance.  So I recommend doing it all at the same time- just consider simple sculpture lines and expect to be slowed down considerably when plastering these areas.  Small tools are essential, as well as the all useful yogurt lid with the rim cut off.

sponging- making the finish texture smooth and uniform

The sponging part of the process comes when the plaster is tacky enough to leave finger prints but dry enough that no plaster comes off onto the fingers.  It can be a very precise moment, depending on the weather and how fast the plaster may be drying.  A damp sponge is simply moved around in circles to remove the troweling marks and give a smooth, uniform look to the whole wall.  Sponging too soon will pull at the plaster too much, and sponging too late means that the sponge needs to be wetter and a stronger motion is needed to smooth out the trowel marks.  A well troweled wall, however, won’t have very many marks to be eliminated.  We noticed that sponging on a too dry wall caused a variation in the colour pigment, making it a lighter shade, just like when we sponged near an already plastered spot and brushed up against it.

final plaster layer is about 1/4 inch thick

Our process went pretty smoothly.  Colin and I mixed what we needed for the day and did the troweling with a friend who pre-sprayed the wall sections ahead of us with water, sponged along behind us when the plaster was ready, and helped remix some of the plaster from the bottoms of the buckets when it began to dry out too much.  Getting familiar with the perfect consistency is learned simply through using the plaster, and noticing when it is too dry and difficult to spread or too wet and sliding off the trowel.

the art of troweling is challenged when ladders and awkward spaces need to be reached

The motion of getting it from hawk to trowel to wall is also a practiced motion that comes with repetition.  Generally, I would make lots of little overlapping rainbow swipes over a one foot square area, and then smooth the whole area down in larger swipes right away, and move on.  No putzing allowed!  Get it on, flatten it out, and move on.  Plastering a whole house gives lots of opportunity for repetitive motion learning…  start with the most hidden space and do the area around the front door last.

dragonflies at the front entrance

There are many details and considerations with lime plaster, and it is helpful if you have experience with some other form of earthen plastering, or if someone who does can give a hands-on lesson.  Again, we had the direction of Tracy Calvert, who has been building naturally since the 1980’s and has specialized in earthen plasters.  She has led many workshops and believes that skills of natural building are to be available for anyone willing to learn, like the traditional practices passed down from cultures around the world that enable the reality of shelter for everyone in a community and not only for the wealthy.

north tree

west water lily

Pear Extravaganza

pear ginger jam, quartered pears, and pear/apple sauce

My favorite time of year…pears, pears, pears and a few more pears.  While the battle between tent caterpillars and apple trees raged on this summer, the pear trees stood by and quietly unfurled their blossoms and strengthened their leaves.  Orchard stewards who took care to hold back the migrating caterpillar population as they crawled towards anything green and leafy were later filling buckets and bags with luscious fruit.

My family and I, along with a few other neighborhood families, were offered the apples and pears from an orchard in our neighborhood.  The owners leave the island for the winter, but didn’t want to see the fruit of their trees go to waste.  We brought home boxes of ripening pears and huge apples, some of which we made into juice with another neighbors small hand press.  We brought in our home made dehydrator and began coring and slicing apples and pears to fill up the trays.  My father built the dehydrator when I was a teenager, and I am very thankful that we still have it to use.

home made dehydrator

Pears and apples are the the very basics of what is possible with a dehydrator- we have made crackers, fruit leather, and dried herbs, and the possibilities are endless for vegetables, too.  Now that we have some kitchen space I hope that we can expand on our uses. It is a very simple design- a plywood box with 6 trays made with window screen stapled to a 2×2 frame that slide in to place in the box, and a hinged door on one side.  It sits above a low-heat boat/RV space heater, the kind that is meant to keep damp spaces dry.  By moving the trays down as the lower fruit dries, I can load the top trays and rotate the trays continually.

My mom and I also got the canner out and made 12 jars of pear ginger jam, a winter favorite that we alternate with the many jars of blackberry jam we made earlier in the season.  We canned pear/apple sauce for baking and eating, and we also filled a few large jars of quartered pears to preserve the luscious juiciness of the pears over the winter.

Cedar’s favorite snack

Books and references that are integral for recipes and how-to tips on canning, freezing and drying…..

Keeping The Harvest, by Nancy Chioff and Gretchen Mead (1991) covers just about every method of preserving anything.  Includes plans for a home made dehydrator, although it is more complicated than the one my dad built.  Plans for that one are in Dry It, You’ll Like It! by Gen MacManiman (1973, a classic…might be hard to find).  We also have a new book called Independence Days, A Guide To Sustainable Food Storage and Preservation, by Sharon Astyk (2009).

using the apple press to make fresh juice

Independence Days lays out the how-to’s of food preservation, as well as connecting a host of broader issues tied to the creation of local diets.

It includes information on buying in bulk, techniques of canning and drying, and what tools are and are not needed.  The author also focuses on how to live on a pantry diet year-round, how to preserve food on a community scale, and how to reduce reliance on industrial agriculture by creating vibrant local economies.

The Roof of the Cob Workshop

As we move into the first week of October, it remains the driest summer on record here on our west coast island, parching the gardens, drying up wells, and raising the fire danger all around us.  The one thing that the clear sunny skies have been perfect for is drying out the cob walls of Colin’s workshop and giving us lots of time to get the roof on and the walls protected for when the rains finally do pour down.  In the meantime, Colin is splitting all the cedar shakes that he needs for finishing the roof, and I am getting ready to start troweling on the scratch coat of earthen plaster on the walls.

The construction of the roof began with the laying of the rafters onto the top of the cob walls, radiating outwards from the central post and beam structure that stands in the center of the workshop to support the large skylight.  We embedded “deadmen” (inverted wood T’s) into the top foot of the cob walls every two feet, and attached the rafters to these for extra tie down support.  Then we had a small amount of cobbing left to do- filling in around the rafters up to a finished height that closed in a small vent on the outside edge.

Colin had in mind an undulating roof line as well as a curving roof line, so the top height of the walls swept up and down as they went around in the circle, making the rafters swoop above doorways and dip into corners.  Placing plywood over the rafters required half inch as well as quarter inch plywood, doubling up the quarter inch in the places where it needed to bend around corners and into the dips, giving the roof a plywood patchwork look.  We then rolled out lengths of roofing felt and started on the skylight.  Traditionally, cedar shake roofs don’t need any plywood or roofing felt.  The shakes were just nailed right to strapping over the rafters.  Because we are building a permitted building with unconventional materials with approval from an engineer in a seismically sensitive zone, well, we had to do it.  Our engineer told us that the plywood helps to distribute the load of the roof on the load bearing walls, uniting the roof and reducing the amount of pressure directly on the walls.

The skylight required a little more finessing in terms of design.  Basically, a system of nine ribs curve over a center beam, with double walled polycarbonate sheets bent over the ribs, and cedar strips screwed down on the top.  Lots of details in between, of course, but that is the basic construction of the 8×12 skylight.  There is plywood filling in the ends of the skylight, and roof venting along the sides that moves the air through from the vents at the other ends of the rafters.  We will be filling the inside of the ceiling with rock wool insulation, leaving a two inch gap at the top of the rafters for this passage of air.

The light inside is a beautiful diffused brightness, and the gentle curves and waves of the roof line is complemented by the surrounding slope and roll of the bedrock, the arch of the lifted skylight echoes the balanced curve of the strawbale house above it.  The moments of standing and looking at the very real outcome of what was an imagining is almost surreal, as if we were imagining what was already there and had just failed to notice it before.  We still have an extensive list of big and small jobs to do before the workshop is usable, or finished, but having the foundation up to the roof constructed and becoming a part of our landscape is an amazing accomplishment.  Thanks to many helping hands, encouraging words, and loads of summer fruit dropped off by generous neighbors!

Glass Circle Star

Stained glass window by Tracy Calvert

Glass Circle Star

Circle star

you hold me intact

through the blazing of colours-

of heart and throat,

of cooling blue and the

pangs of crimson

a sweeping tone of

shadowed orange

presses against my temples

and pulls me into the

outward dance,

blueness like sky

blends into expression,

dissolves the time chaser out

from under my feet

shades and hues

shifting, blurring

over lapping into the ripple

and warp-

this is the passing through of colours.

White circle star,

bringing me back in,

horizon clear,

valley shaped, and still being so,

by the sliding-by of the lake

into the river

sky orbited by the pure lure

of magnetism and evolution-

I am swept into your landscape

and then I am swept away

at these imaginings,

of the brilliance

of where these roads might take me if I let them,

this vast, jewelled path

gleams, glimmers,

glistens,

as long as I am listening.

I fall into this submission

of colour,

sink myself in-

and from the other side,

the light

lights my way through.

Tracy and I created this collaborative combination of poetry and art for a Verse and Vision art show that was organized by my mother Margaret here on Pender Island this summer.  She was inspired by listening to the readings by Pender writers at Speak Easy, an open mic night held once a month, and she began encouraging pairs of artists and writers to collaborate and create a show celebrating the word and the image.  Tracy and I have been working together through natural building for the past few years, and it was wonderful to expand into our other passions and connect on a deeper level that explored the process of our creativity and how that place of creating becomes a timeless meditation within a world of shape, colour, patterns, and unplanned, intuitive journeys that teach us about stepping aside and allowing ourselves to be moved without structure or judgement.  Tracy and her partner Jude have a beautiful little cottage that can be rented on South Pender.  Information for the cottage as well as natural building and stained glass creations can be found here…  www.woodandglass.ca

Cob Walls Going Up!

It has been a little difficult to keep up on a blog posting about the building of the walls, because so much is happening in such a short time that photos of progress quickly become out dated.  Most of my own time has been spent working alongside the cobbers, helping my mom to prepare and make meals, or collapsing in bed at the end of the day.  The walls are now very close to their final height, and we will soon be able to install the rafters before we continue with the cobbing up and around them.   I thought it would be a good time to review what has been done, and then follow up with the roofing later on.

We had three people from off-island join us for four days, and a continuous stream of friends and neighbors each day to learn and help out.  Colin’s mom from Florida was visiting, as well as our friends from Vancouver who sold us the property and are building the little cabin on the property.

clay slip on the foundation

We started with learning the art of foot mixing on tarps, but then moved on to using the huge pile of bobcat mixed cob.  Tracy Calvert, our cob building expert from Cobworks, showed us how to apply clay slip to the stones of the foundation to help adhere the cob to the stone, and then we started laying down the first handfuls of cob.  We focused on building up one of the wall sections that would have windows in it, so that within the four days, our cobbers would have the opportunity to set the glass in place and cob the sills and edges.  Tracy spent time each day after lunch discussing different areas of the building process, including foundations, techniques for windows and doors, plumbing and electrical, and roof structures.  On the last day, we had a small ceremony to celebrate our work together by placing objects in a jar that have a personal connection and burying it into the wall of the workshop.  We did that again with the second group of cobbers on the next weekend, and Colin and I were very touched at the honesty and words of appreciation and inspiration that everyone had regarding their experience building and learning together.  Everyone had a different reason for being here learning about cob- some of which were specific to cob and some were seeking personal empowerment.  We come together as strangers and leave each other with new friendships and new gems of knowledge to integrate into our lives.  I was reminded of the time when Colin and I traveled a lot and met different people from all sorts of paths, knowing them sometimes for a short time or a long time before parting ways, but always taking something of the experience of knowing them with me.

It is also wonderful to have friends and fellow islanders stop in for a day or more to help out.  Having the support of our community means a lot to us.  We have come to see the building of this workshop as another example of building stronger community ties with experiences of working together and deepening relationships and memories between us.

Colin and I had drawn out a general sketch for a sculptural design on the outside of two flowing lines coming out from the sides of the main door and sweeping up into a raven on the left, and diving down into the roots of a tree on the right side of the door.  We wanted to have bottles placed in the wall along the pathways of the two lines, so as we went we taped two bottles together to span the width of the wall and cobbed them in place.  We also have some circular thick glass port windows, about 8 inches across, that we wanted to have in the walls, so we put buckets that were slightly smaller than the glass in the place where we wanted the windows and them cobbed all around them.  By turning the buckets each day we ensured that they will pull out easily when we want to set the glass in.

placing corbels for the arches

We also made corbels with long lengths of straw covered in clay and layered together to build a strong protruding window sill and arches over the tops of the tall windows that we cobbed in place.  Celine, our neighbor, brought us a beautiful tall blue glass bottle that we placed in between the windows, adding more dimensions to the width of the wall.  We added a framed opening window on the east side, hammering old nails into the wooden frame for the cob around it to grab onto.  We did the same with the door bucks, creating a network of wire and nails that the cob will harden around.  There is no plumbing in the workshop, but there are a few light switches that Colin mounted near the door bucks, running an electrical conduit up to the rafters where all the wiring will run.  Other electrical outputs will be built into an interior wall that will frame in a utility room and backing for Colin’s work bench.

Trimming is a big part of cobbing.  Every day, before more cob is loaded on to the walls, the splooges that occur while building up with wet cob is trimmed off with a saw and remixed to be put back on the wall.  It is important to make sure that the walls remain plumb, so that the strength of the weight of the cob is kept directly above the foundation.  It is easy for the wall edges to wander in all directions.  It is also easier to trim excess splooging than it is to add to dips that may occur, so it is important to keep the edges as plumb as possible and allow the splooging to happen.

We had the bobcat return in the days between the first weekend of cobbing and the second, to mix more cob and to remix the leftovers as it was getting dried out.  We had two cobbers from off island join us for the second workshop, and again a continuous flow of islanders coming by and spending time working with us.

niches built into the sides of the window and bottles framing the door

By this time, we were also getting two or three groups of people stopping by every day just to see what was going on, asking questions and watching the process.  We are fairly visible to the road, so walkers would stop, cars would slow down, and our neighbor across the street sent anybody who came to see her and her road side stand over to check out our building.  After the weekend, Shawn (one of the workshop participants)  decided to stay an extra three days and keep cobbing before flying back to South Korea, and we had two more people arriving after that who were not able to make the workshop dates but wanted to learn while we were still getting it finished up.  That is where we are now- working up in the top few feet, making deadmen for the rafters to sit on, feeding Marco and Nick alongside our family, and enjoying the continued company of our community.  Cobbing so far has proved to be a lot of physical work, work that is energizing and fun with a group of people working together and learning from each other.  New creative methods of building are developed, and artistic touches are discovered.  It would be too lengthy for me to explain details of the cobbing techniques, so I will recommend a book that Tracy recommends for anyone interested in learning more.  Check out The Hand Sculpted House, by Ianto Evans, Michael Smith and Linda Smiley and Cob Cottage Company in Oregon.  I also recommend a hands on experience for a better understanding of the process, and as a way of feeling out whether cob would be the ideal method if you have a project in mind.

Cob Workshop Stone Foundation

In anticipation of our upcoming cob workshops to build Colin’s woodworking shop, we have been busy setting up the foundation and floor of the building.  The spot where we are building is tucked up against the bedrock slope that slants down and somewhat divides our land into upper and lower sections, the upper section being where we have just completed the first half of our strawbale house which will eventually be extended down the rock slope.  The workshop is situated off to the side of this slope and as close to the side line of the property as we can go.

In early July we had an excavator come and dig out 2 foot wide trenches that would hold 18 inch deep concrete footing walls with drain rock along the outside.  Colin built forms down the middle of the trench, using the clay walls as the forms on the inside of the trench and leaving the outer side empty for filling with drain rock.  We dug a connecting trench and placed a drain pipe that went down hill towards the garden.  Colin added a small grid of rebar in the bottom of the trench and then called in the cement truck to pour the footings.  He added stakes of rebar throughout the wall to tie together later after the stonework was done, as was requested by our engineer for seismic strengthening of the stone and concrete.  He also dug footings for the skylight posts and placed saddles after the concrete pour.  The concrete footing wall came up to the height of the clay grade, and provided a strong ledge onto which the excavator would place many of the massive stones that exist on our property.

So by mid July, we had the excavator back and picking huge stones from our pile that Colin directed into the spaces between the rebar stakes, trying to place them in such a way so that he could fill in between them manually with smaller stones.  He mixed and shoveled concrete as each stone was set, and adjusted the placement so that the outside edge was either flat or sloping downwards for water run off.  In the pile, he found two huge flat stones that were placed at the front double door entrance to the shop.  Then he spent the next few days picking smaller rocks and cementing them in the spaces, creating a two foot wide, irregularly stacked stone ledge two feet high onto which the cob wall will be stacked, keying in to the varying height of the stones for extra solidity between the cob and the stone wall.

A large pile of clay left from the digging of the trenches will be used as part of the clay we need for mixing the cob, and a large pile of local pit run sand is being delivered in the next few days.  Bales of straw will be picked up from the Saanich Peninsula, and a huge tarp has been strung up to protect the space from the heat of the sun as well as the unseasonal threats of rain we have been getting.  The food menu for the workshop participants is being finalized, and we have even had a friend come by to film the construction of the foundation with the idea of making a small movie of the cobbing workshops and the process of building this small natural building.

We are off in a few days to our annual family music camp, so getting as much done and in place now will help us feel more prepared when we arrive home and have cobbers showing up four days later!  We are very excited about hosting this learning opportunity, and creating a beautiful space for Colin to work in.  We are still accepting people to join us- see the previous post Cob Workshop Approved for details of the cobbing workshops in August.

Cob Workshop Approved!

Come and build a cob workshop with us! This summer we are offering an opportunity for learning about building with cob while constructing a woodworking shop on Pender Island.  Details about registering are at the end of this post.

During the last month, Colin has been working on drawing the plans for his woodworking shop that we are building this summer.  He has been using a small area in his dads workshop for a long time, and the limitations of that space are more and more apparent. Since his business ( www.thujawoodart.com) is what pays for all our land and home building projects, it was obvious to us that the next thing on the list would be a permanent space for him to expand into, with proper space for wood sorting and storage.  Since we are building within the Capital Regional District (CRD), everything we do needs to be permitted and inspected for compliance with the building codes.  Colin’s dream of building a load bearing cob workshop was thus dependent on the engineer that we have been working with throughout the construction of our strawbale house.  For the past three years, Colin has been giving him a heads-up about this plan, and sending along information and history about the processes and strengths of cob.

From Home Work, an inspiring sky lit workshop

The design that Colin has imagined was inspired by a photo in Lloyd Kahn’s book, Home Work, showing a workshop with a huge central skylight.  Colin’s design entails a large skylight, (8×12), supported by a timber frame in the center of the roof, with the posts coming down into the center of the room, and the roof rafters fanning out from the skylight to rest on the cob wall.  In this way, the walls are supporting a slightly less load than if the roof had no posts at all, and our engineer was happy to approve the designs without any other additions besides some re-bar within the stone foundation and a concrete stem wall beneath the stones for reinforcement of the foundation for seismic standards.  We sent him a video that was filmed at UBC showing a cob building built on to a seismic shaker platform, and given the equivalent shake of a 7 earthquake.  (Ask An Expert-Cob Construction).  A city engineer was witness to the demonstration, and after the building showed minimal cracking, it was subjected to a 9, at which point a wall section crumbled but the roof remained entirely intact.  Seismic qualifications are important considerations in this area, and our engineer was quite satisfied to approve our project with the information we were able to pass on to him.   We are pretty excited about this approval- there are not many engineer approved load bearing cob buildings out there yet.

a cob wall on a stone foundation

We hope that the more exposure alternative building has in the world of construction, the more it will be seen as a viable option in certain circumstances with a understandable set of guidelines and standards in place to keep the buildings safe, healthy, and affordable.  I don’t imagine that cob houses will become a “normal” way of building, but we would love to see the doors opening so that those who wish to build with cob can do so without unnecessary expense and obstacles for something that is really so easy and widely applicable.

So now,  we are organizing some cob workshops for building the cob workshop!  Here is what we are offering this summer:

camping will be in the meadow beside the swimming pond

Join Colin and Wendi, with Tracy Calvert of Cobworks, www.cobworks.com to learn and build load-bearing cob walls onto a stone foundation.  Besides covering the basics of cobbing, we will include the finer details of working around door and window frames, constructing arches and niches, using wood lintels and exploring creative bottle and glass placement designs. Discussions will provide opportunities for questions and further site specification points, as well as other aspects of natural building.  Camping sites are available in the meadow beside the swimming pond, with an outdoor shower and composting toilet. Vegetarian meals will be provided, please inform us of any special food needs ahead of time. Two positions are available for intensives covering both workshops and extra time between and/or after, as self-directed opportunities to learn more. Also, cabin facilities are possible for any needs of circumstance. It is our hope that cob and natural building construction can be widely available methods of building for a diverse, creative, and compassionate community.

the site of the future workshop will be where the pile of logs is, against the rock slope

August 10-13 (Friday to Mon. encouraged to arrive thursday night)

August 17-20 (Friday to Mon. encouraged to arrive thursday night)

Intensive including both courses and 3 days in between with extra instruction at $950 (with possibility to volunteer and stay later afterwards.)

Early bird pricing at $380 until July 27/ Aug 3, then full price of $420 after that.

Comment on this post to register, and we will be sure to email our reply.

Previous Older Entries Next Newer Entries